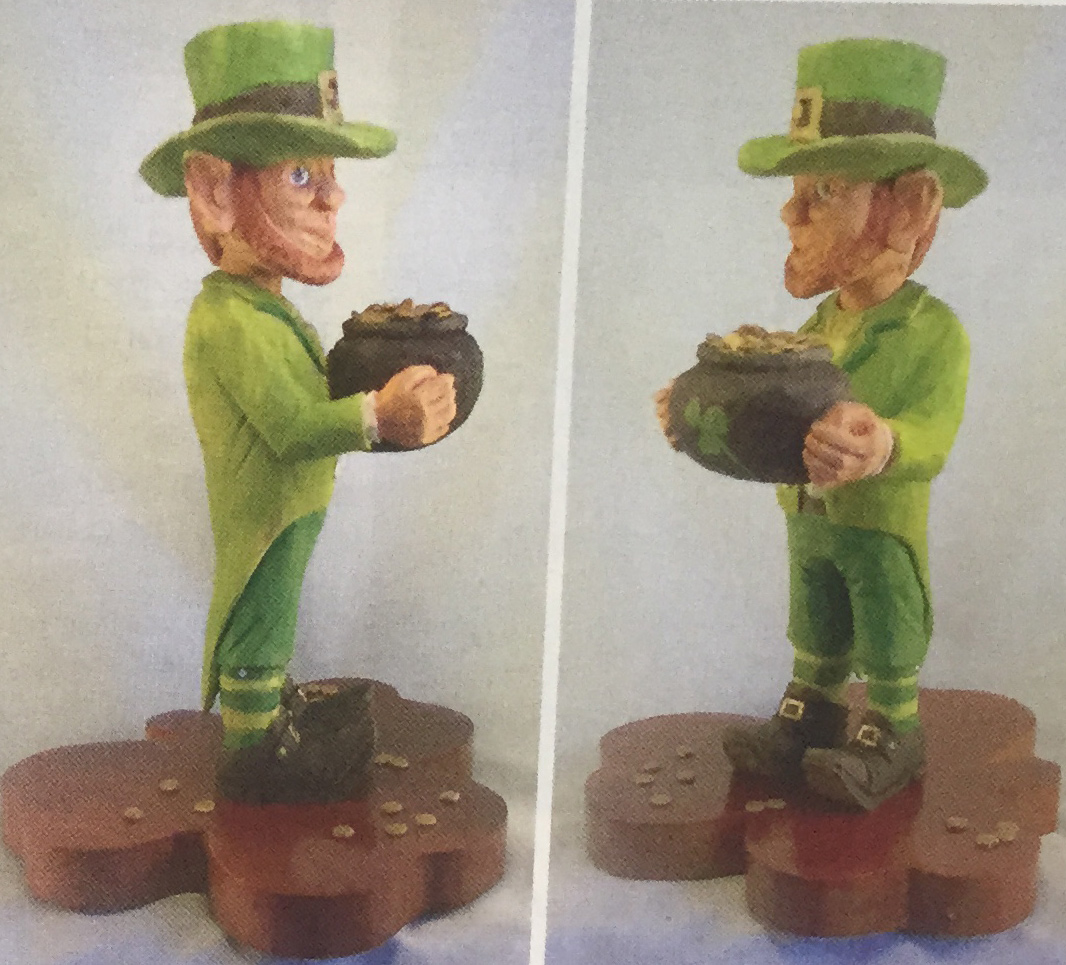
If you are lucky enough to find gold at the end of a rainbow, you can bet that there just may be a leprechaun hiding close by guarding it. For those of you who aren't prone to chasing Rainbows, you can carve this fun project from William Gray and have a leprachaun and pot of gold of your very own.
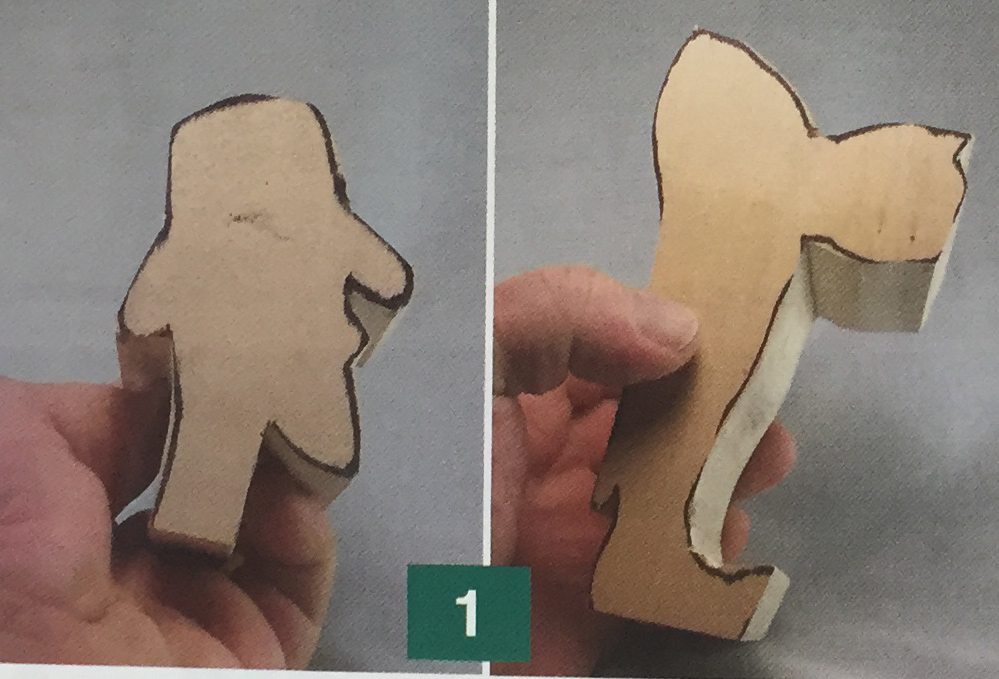
1. The patterns are cut from basswood blocks. The body block is 3" x 4" x 6" and the head is 2 1/2" x 2 1/2” x 3". The patterns are outlined and then cut out on a bandsaw.
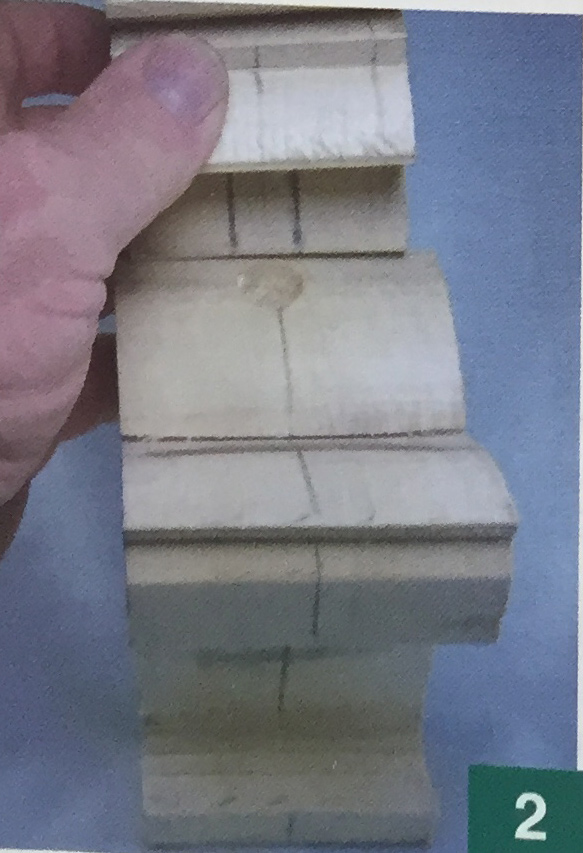
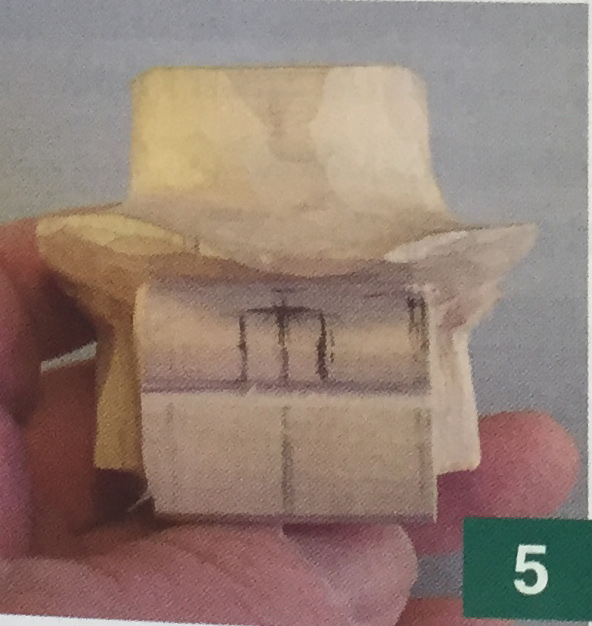
2. Draw a centerline down the head and body. With a 5/8” Forstner or spade bit, bore a hole approximately 1” deep in the body for the neck. Center the head over the body and mark the outer edges of the neck hole on the head block.
Note: In this project I use power tools for roughing and hand tools for details. Feel free to use whatever tools you have on hand.
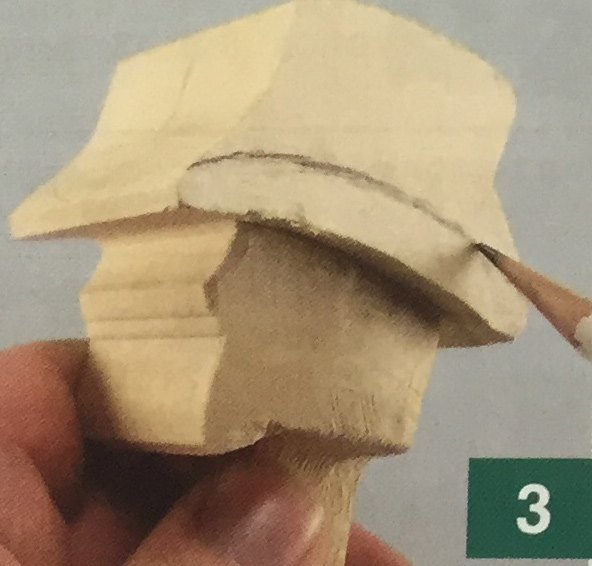
3. Using a Kutzall carbide burr or knife, remove about 1/4" from each side of the head under the hat brim and the neck. Draw in the sides of the hat, 1 /4” up to develop the brim. Shape and round the corners of the hat, being careful to watch the grain direction of the wood.
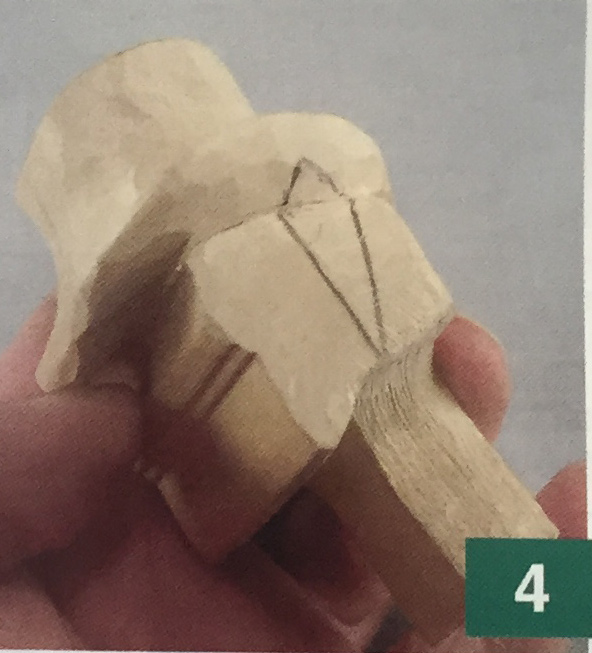
4. Round over the brim of the hat. Find the center on the sides of the face, and draw a line from under the hat to the neck. Draw in the ear shape (with 1 pointed ears) as shown i in the photo.
5. Make a stop cut at the front and back of each ear, and remove the wood around the ear, narrowing the face.
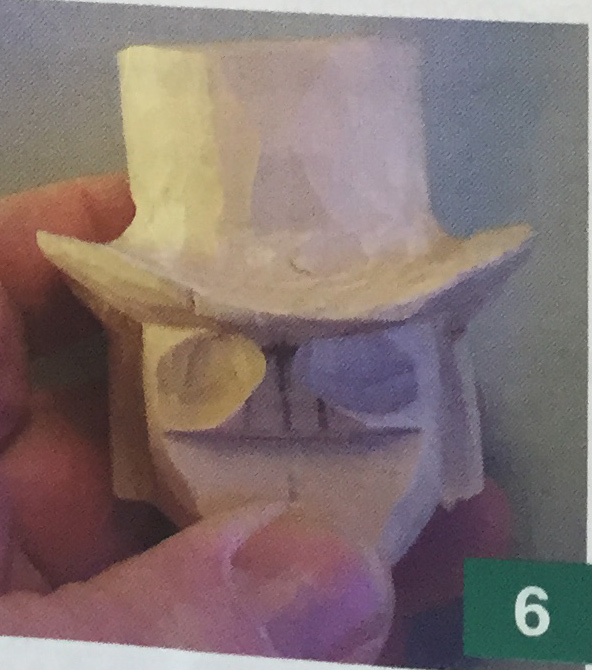
6. Begin shaping the jaw and chin. Use a #6-1/4" gouge to create the eye sockets.
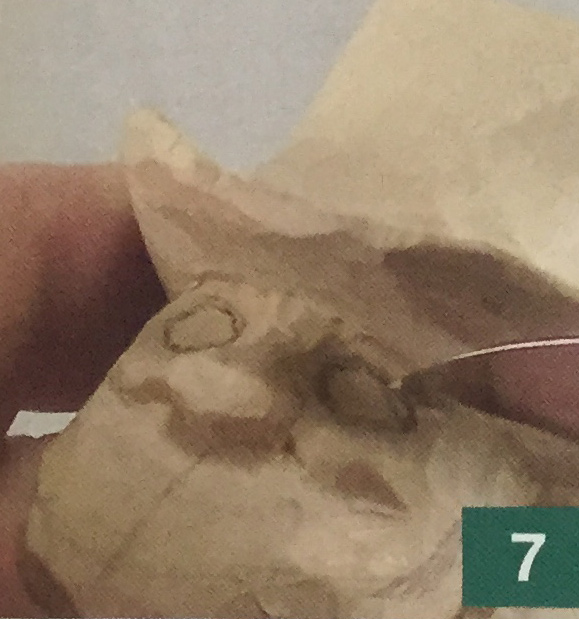
7. Carve in the nose, shape the cheeks, and draw in the eyes. Use a detail knife to create a stop cut around the eyes, making deeper triangle cuts in the corners. Take a small sliver of wood out of the top and bottom to form the eyeball.
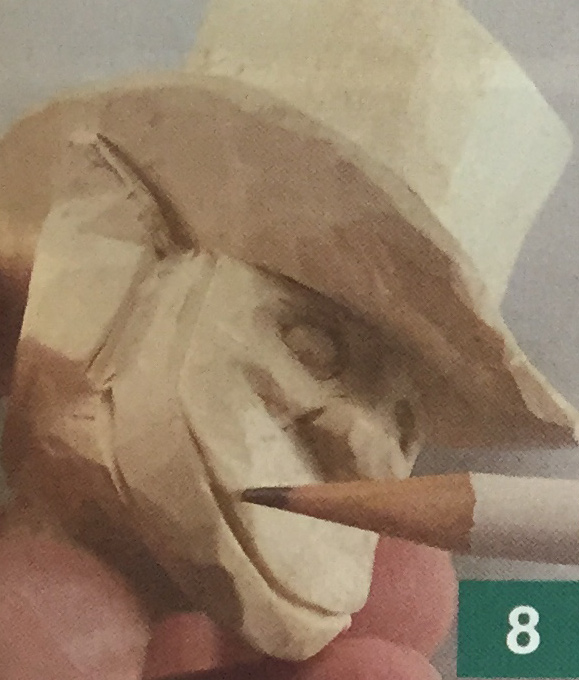
8. With a V-tool, outline the beard and the hair at the back of the head. Relieve around the front and back of the beard and the back of the head to “raise” the beard and hair.
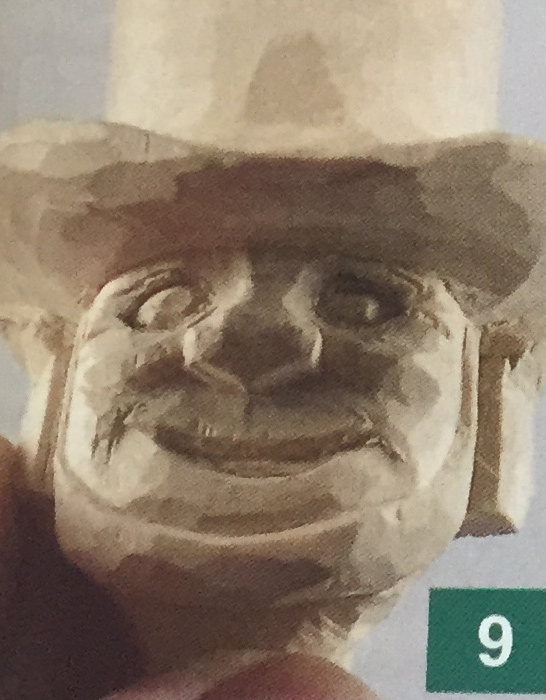
9. Draw the mouth and shape with a V-tool, and continue shaping with the detail knife. Using a #11-1/8” gouge, cut in the channel under the bottom lip.
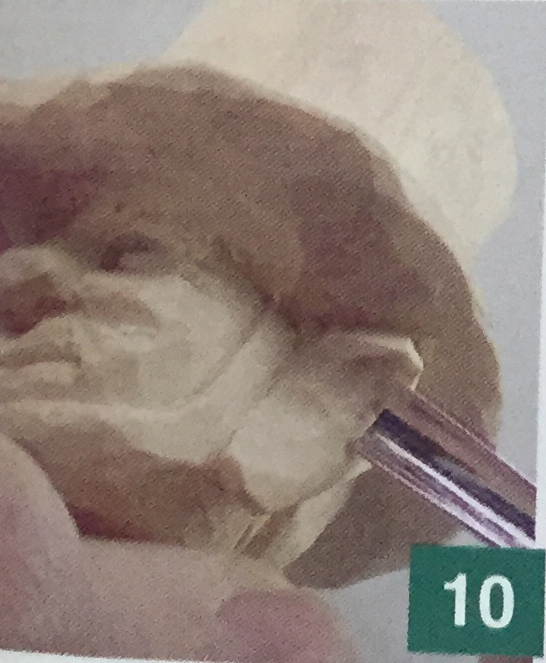
10. Using a #6-1/4” gouge, begin shaping the ears, bringing the front edges below the sideburns.
11. Form the tragus with a #6-1/4" gouge. Push in and back slightly to prevent chip-out. Remove the wood from the back of the tragus using the same gouge.
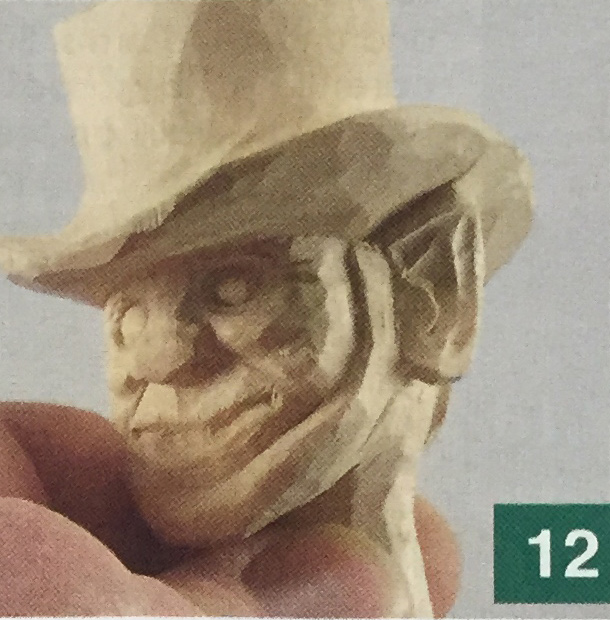
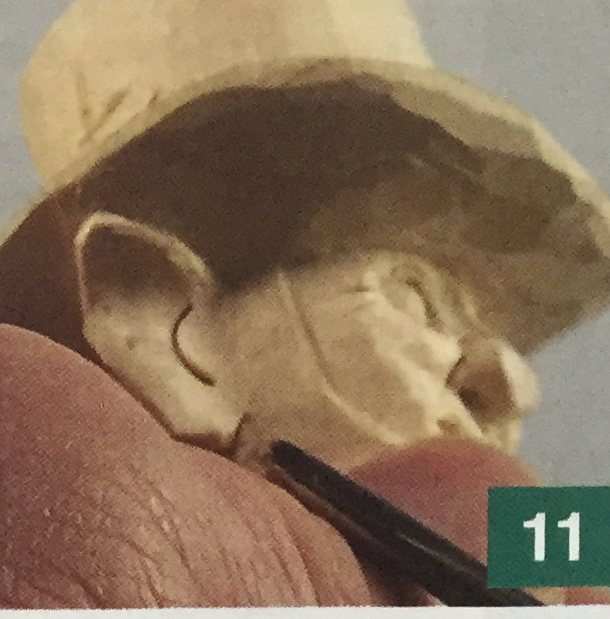
12. Using a #11-1/8” gouge, from the outer edge of the ear.
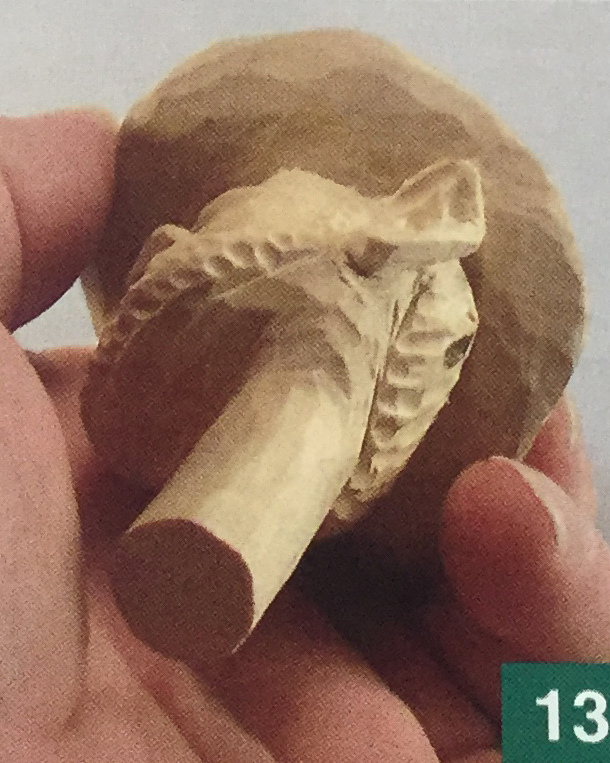
13. Cutting from the face out with a #11-l/8"gouge, establish the hair texture in the beard and on the back of the head by making small shallow cuts.
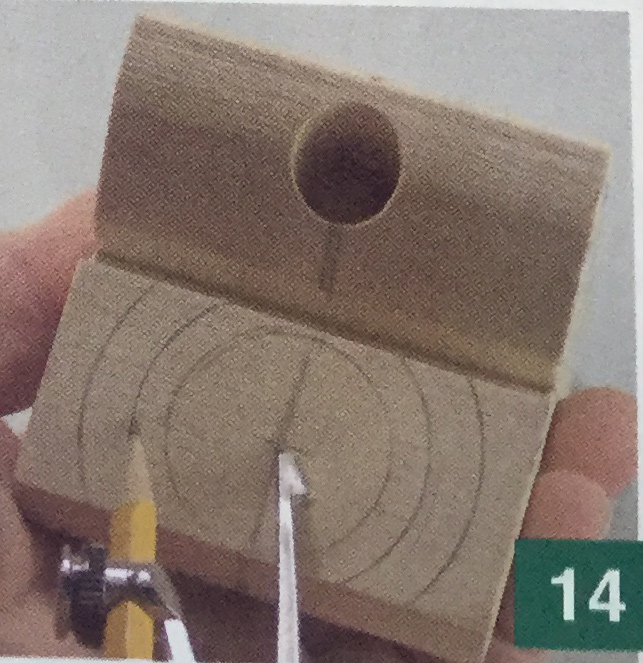
14. Using a compass, draw three circles on the top of the pot of gold. The inner circle indicates the top lip of the pot, the center circle indicates the sides of the pot, and the outer circle indicates the leprechaun’s hands.
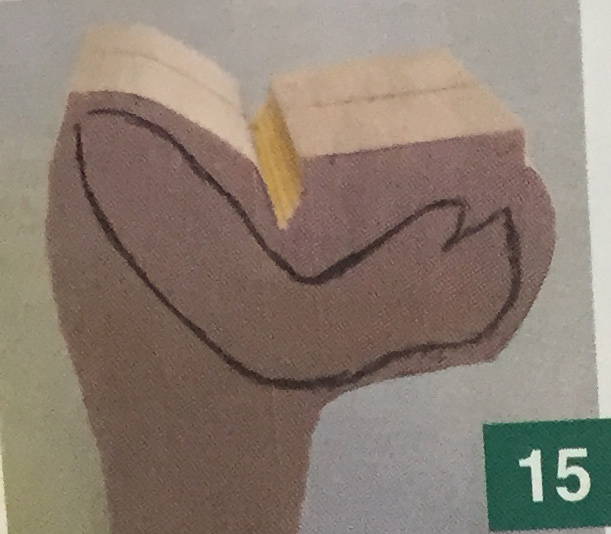
15. Trace a pattern for the arm position and draw onto the body.
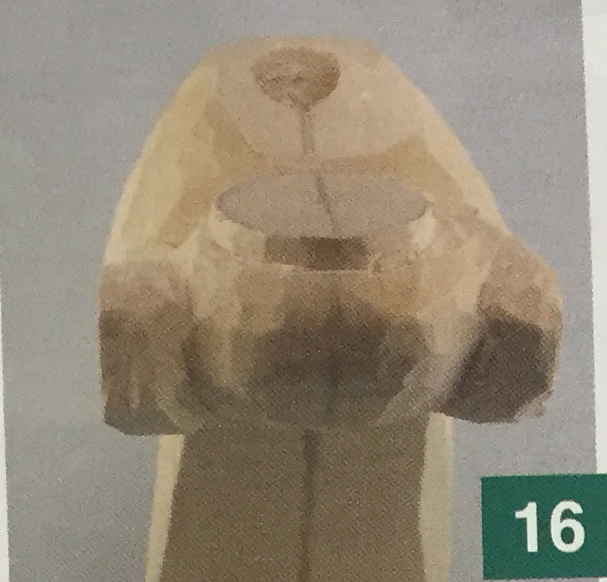
16. Round the shoulders and under the arms. Be careful not to go past the outer circle on the pot of gold. Referring to the front- and side-view patterns, begin shaping pot.
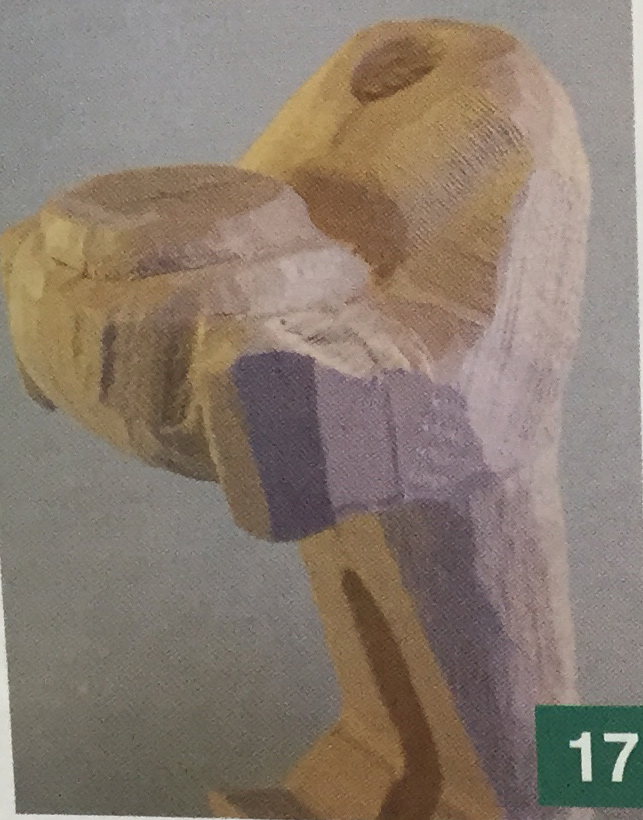

17 & 18. Begin thinning down the legs and arms. Do not go all the way through at the knee area... remember, he will be wearing a coat with "tails."
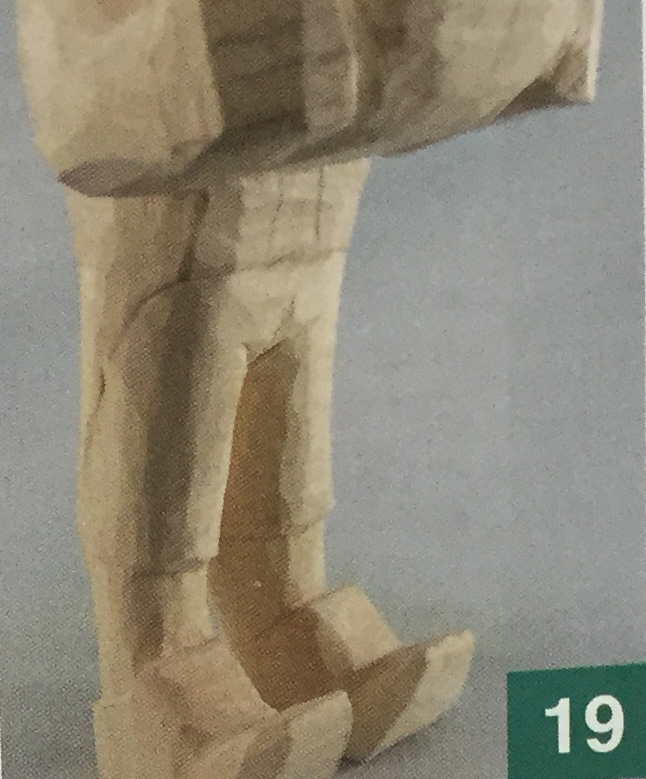
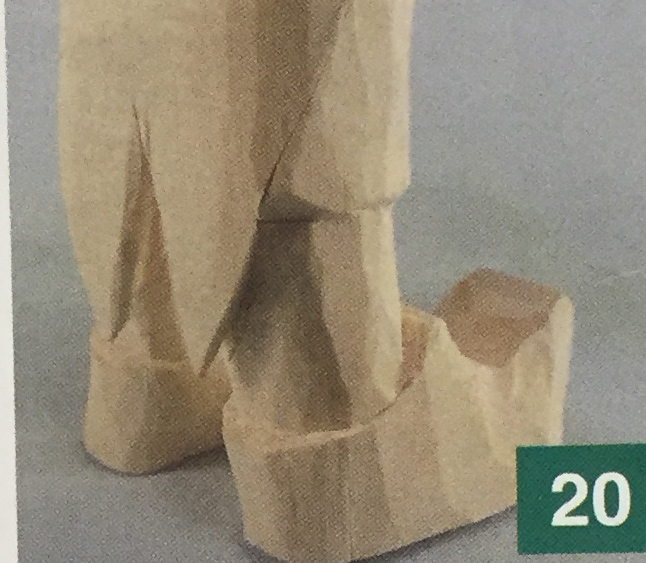
19 & 20. Start outlining the arms, coat, pants, and shoes. Begin shaping the shoes and legs. Make a stop cut at the knees and the top of the shoes, then cut back to the stop cuts. This is a slow process— just take your time and plan your cuts.
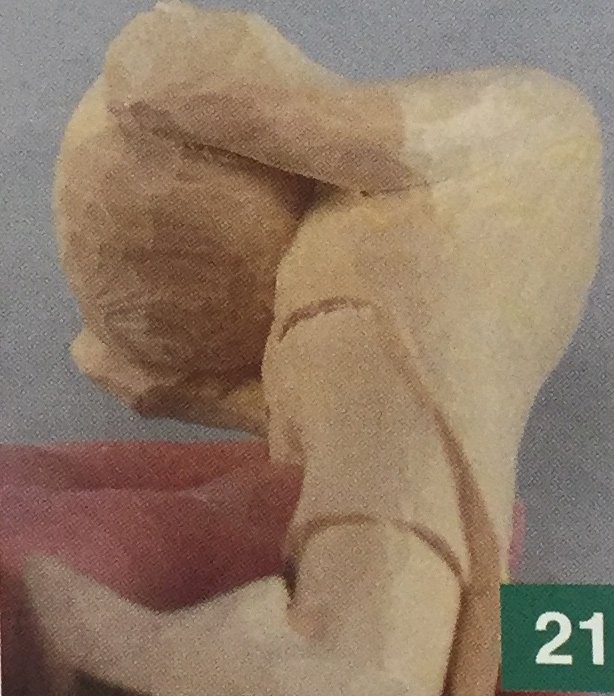
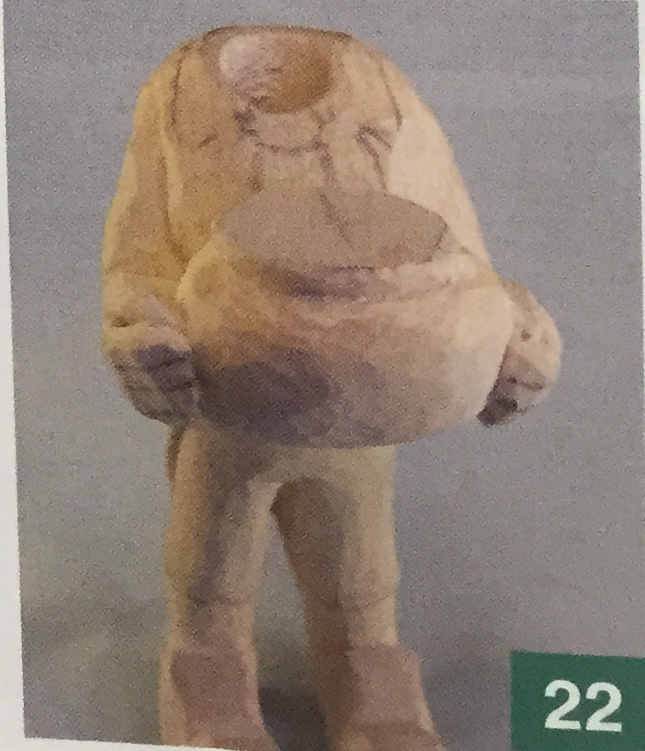
21 & 22. Continue shaping the legs and shoes; also make a stop cut around the front and sides of the coat, and begin carving the front and sides of the body.
With your knife or a 1 /8” carbide burr, begin removing wood from the sides and fronts of the arms. Cut the hands downward to fit the contour of the pot-Begin separating the arms from the pot and front of the body.
Slim down the arms and hands, and draw in the position of the fingers-Draw in the bottom of the pants.
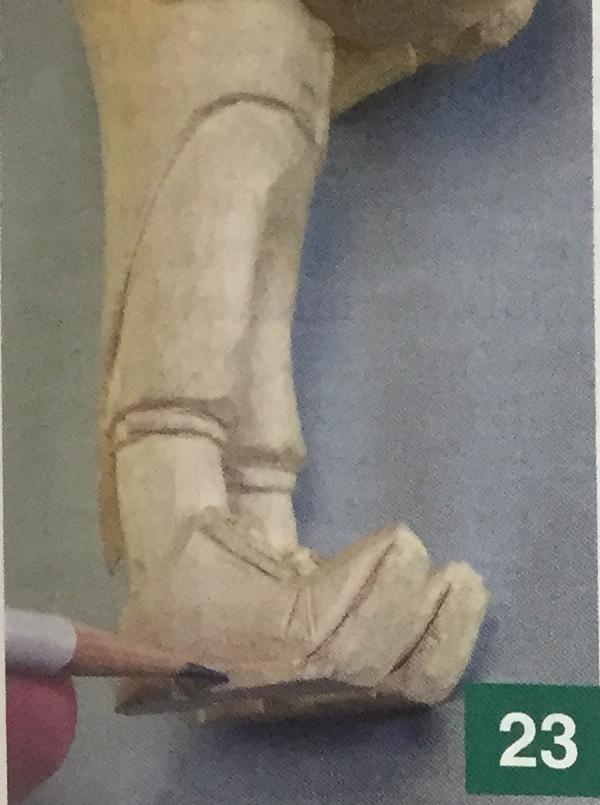
23. Let's do something with the shoes by drawing in the buckles on the front, and by cutting in the heels and soles with the V-tool.

24. Draw in the hands and separate the fingers with the knife or V-tool (1 used a 4mm V-tool). Also with the knife, make a stop cut and cut back from the hands to form the coat sleeves, and make a stop cut 1/16” back on the coat sleeve to form the shirt cuffs.
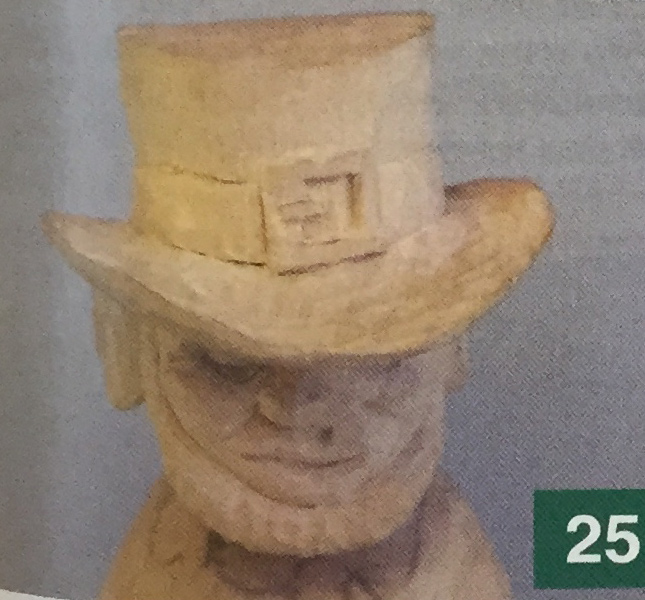
25. On the hat, draw and carve in the buckle and the hatband.
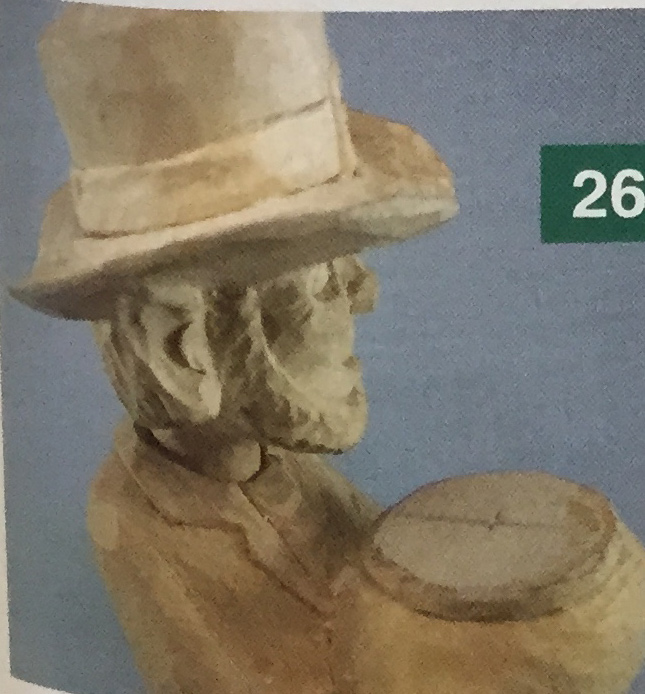
26. Draw and carve the ascot, lapels, and collar, making a stop cut and relieving back into them. Do the ascot first, being careful not to cut into the neck cavity.
Finish. Scoop out the middle of the pot—not too deep because we still have to fill the pot with gold coins. I made the coins by using a piece of cardboard and a paper punch, and then two-part epoxy to keep the coins stacked randomly in the pot. After the epoxy has dried, go over the coins with the metallic gold paint.
I cut out a shamrock for the base, and then I applied small drops of epoxy (or Super Glue) and scattered a few gold coins around the leprechaun's feet. (I used a pair of tweezers to pick up the coins).
This was a fun project, and I do hope you enjoy carving it as much as I did.
Paints Used
- Kelly Green (hat and pants)
- Leaf Green (coat)
- Lemon Yellow (ascot)
- Pure Black (shoes, hatband, and belt)
- Metallic Gold (buckles and coins)
- White (eyeballs and shirt)
- Burnt Sienna (hair and beard) Carolina Blue (iris)
About the Author
William Earl Gray of Medon, Tennessee, has been creating his distinctive caricatures for over 20 years. He displays and sells his unique creations at various shows throughout the United States.
Read our latest articles at Carving Magazine homepage.
