Welcome. Let's talk carving! This column is devoted to beginner and intermediate carvers. But, I’ll welcome experienced carvers as well, so they can smile and say, “I knew that!"
I've been carving for three years, and realize that some of you have forgotten more than I’ll ever learn. To you I say, “Thank you for sharing.” I’ve found experienced carvers to be bigheaded and kind. Because of them, I want to write this column for those who come after me. I’m new enough to remember what I didn't know and how excited I was when I found the answers.
Carving Magazine is a gold mine of information. My plan for this column is twofold: (1) dig through the gold of past Carving Magazine issues to discover the diamonds, and bring those outstanding tips to our new carvers; and (2) share, not only what works for me, but any carving problems I’ve encountered and how I’ve dealt with them (TIPS) So, my beginner carver friends, when your pose (not your own personal nose) of the face you've sweated over for three hours goes skidding across the floor, remember what someone told me: “Where there is wood there is hope.” Although, admittedly, a face without a nose is pretty much hopeless.
Carving Tip 1
After roughing out your piece, carve the face first. I don't think instructors agree with me, but that’s okay—this is my column. If the face doesn't turn out well, you haven’t wasted days on the body and won't be as hysterical if you hack off a nose, ear, or lip. On the plus side, if the face turns out well, you can admire it while carving the rest of the body (this is a very good feeling; enjoy it while you can). And if the body doesn't turn out well, cut it off and you'll still have a face to be proud of. Yes, I've been there.
As we are on the subject of carving issues, otherwise known as “WHAT DO I DO NOW???" I am reminded that one of mine is still fresh on my workbench. Let's talk—because I wouldn’t want you to suffer the same consequences.
I’ve often been told to wash carvings with dishwashing detergent and a stiff brush to remove pencil lines, as well as oils left from my hands. The first time I heard this, I thought my piece would turn soft and mushy and disintegrate. After all, it was raw wood. None of this happened. However, I discovered that there were other lurking dangers. These dangers, my beginner friends, were not mentioned to me by anyone, because “they" thought we should automatically “know” certain things. Well, we don't.
Let me digress.
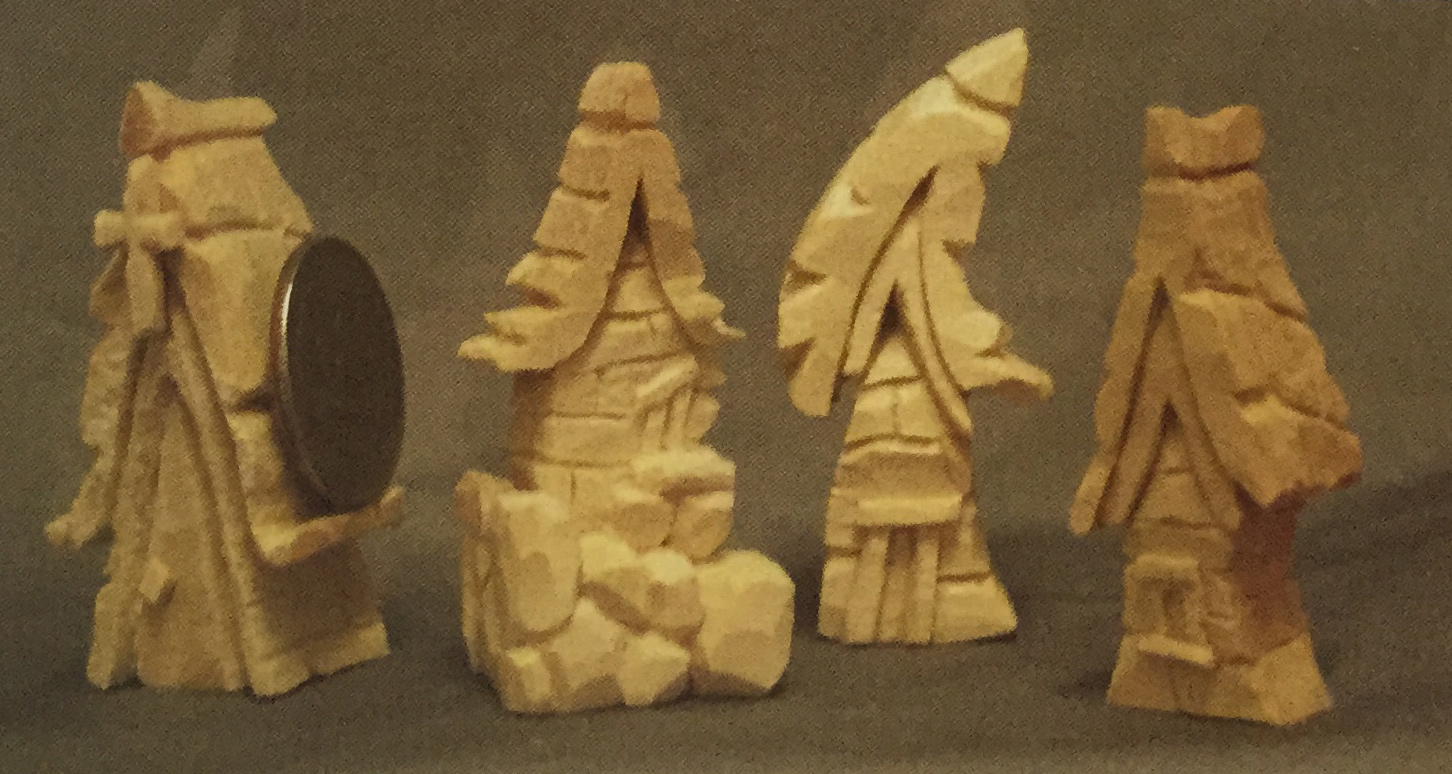
In October 2009, at the GOW (Gathering of Woodcarvers), I took a terrific class from Camper John Clopton on carving the sweetest little cottage. Camper John's cottages were like faces—you could make any part larger, smaller, higher, or bigger, and they’d just look more interesting. The next week, I carved four cottages half the size of his original, and each one was different.
If you look at the photos, you’ll notice that these carvings haven’t been stained, cleaned up, or made pretty—there is still more work for me to do. They look like movie stars without makeup and with frizzy hair similar to how you look when you get out of bed in the morning—lovable, but not looking your best.
Carving Tip 2
You want to use a sharp pencil when drawing on your wood. The problem is that pencils don't stay sharp, and I don’t think it’s good to sharpen them with your detail knife (it just sounds so wrong). I never have a pencil sharpener when I need it (who does?), so I use a mechanical pencil. You can pick up a pack of them for under $5.00. Be sure to buy the ones with thin lead—you'll see the size noted on the package. Buy extra lead and a good fat white eraser.
When I cut the blanks for Camper John’s cottages, I planned that the end grain would be on the sides with the roof shingles, not on the ends with the little windows and doors.
Carving Tip 3
Plan your carving piece around the grain. To find the end grain, slice a sliver of wood from each of two adjacent sides of your wood. The slice that’s more difficult to carve is the end grain. Try VERY HARD not to put any detail on the two end-grain sides of your carving. At this point in your carving life, it will only cause you misery and heartache.
My mistake, when cutting the cottage blanks on my bandsaw, came with that pesky end grain.
I cut three cottage blanks with the end grain on the sides with the roof shingles (good), and one with the end grain on the front/back (not so good). BUMMER! That meant that I to have to carve the little window and door in the end grain. I decided to carve one really big door on one end and not put in a back window.
Carving Tip 4
Take a CLEAN spray bottle and fill it with half water and half rubbing alcohol. Spray the end grain with the mixture before carving. It will be easier to carve. Mrs. Dunkle gave me that tip while I was buying two knives from Mr. Dunkle. Didn’t I tell you carvers were kind people? She told me BEFORE I bought the knives.
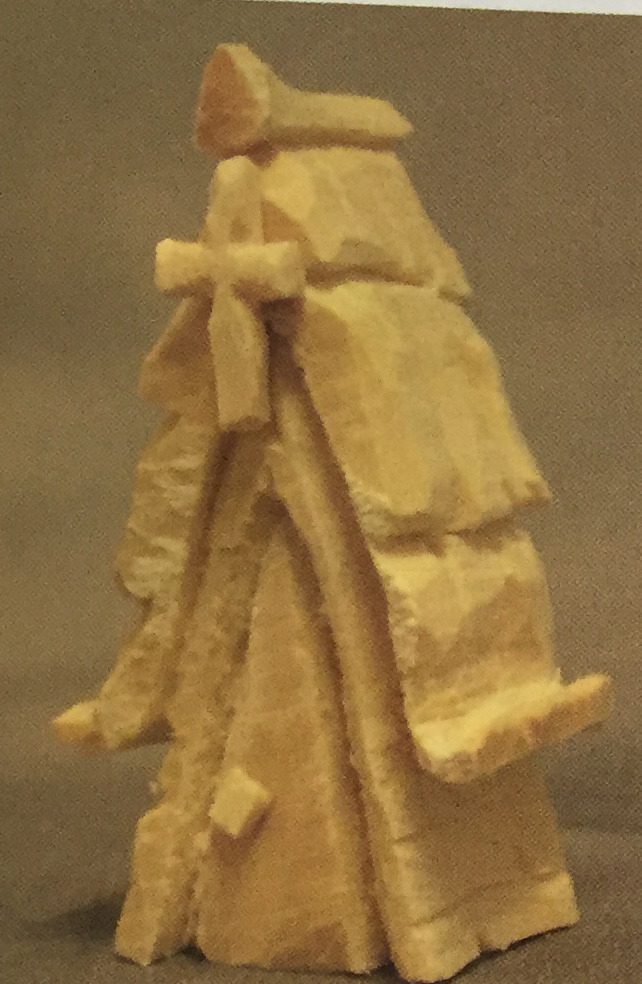
When I was done carving the large door, it was obvious that the cottage looked way too odd, so I carved a small 3/4” cross, planning to glue it to the front of the cottage—I mean the church.
Carving Tip 5
About that 3/4” cross...I carved it five times because it kept flipping out of my hand and blending in with all the wood chips on my bench (yes, there were a lot of chips). When carving small items, first clean off your bench and then tape down a white sheet of paper. Now, carve. This made the fifth cross easier to find.
If you aren't gluing the piece right away, seal it up in a baggie and write on the bag, in magic marker, what the bag contains. There is less chance of you tossing it out that way.
My cross was carved and bagged, and I was in the basement at the sink, ready to scrub the pieces with dishwashing detergent and a firm toothbrush. For some unknown reason (husband), the white Ivory liquid dishwashing detergent was no longer at the sink. It had been replaced with green Dawn liquid dishwashing detergent.
Here is my Achilles’ heel—my enthusiasm trumps my intelligence every time. What difference, I thought, could it possibly make to use green Dawn in lieu of white Ivory— both were liquid dishwashing detergent. I ignored the part of my brain that was yelling, IT MAKES A DIFFERENCE!
For each of the three cottages, I wet the cottage under the faucet, put a little Dawn on the toothbrush, worked up a lather in the palm of my hand, and brushed the cottages. I gently dried each with paper towels, and then turned to my church. Without a thought, I picked up the church, dumped the Dawn directly onto it, and reached for the toothbrush.
Carving Tip 6
Have you heard the tip about washing, then rinsing a dog? It applies here. Rinse all the soap from a carving until you are absolutely certain there is none left, then rinse it one more time. You can let it dry overnight, or if you’re anxious to move on with it, dry it with a hair dryer. Don’t put the dryer too close to the wood.
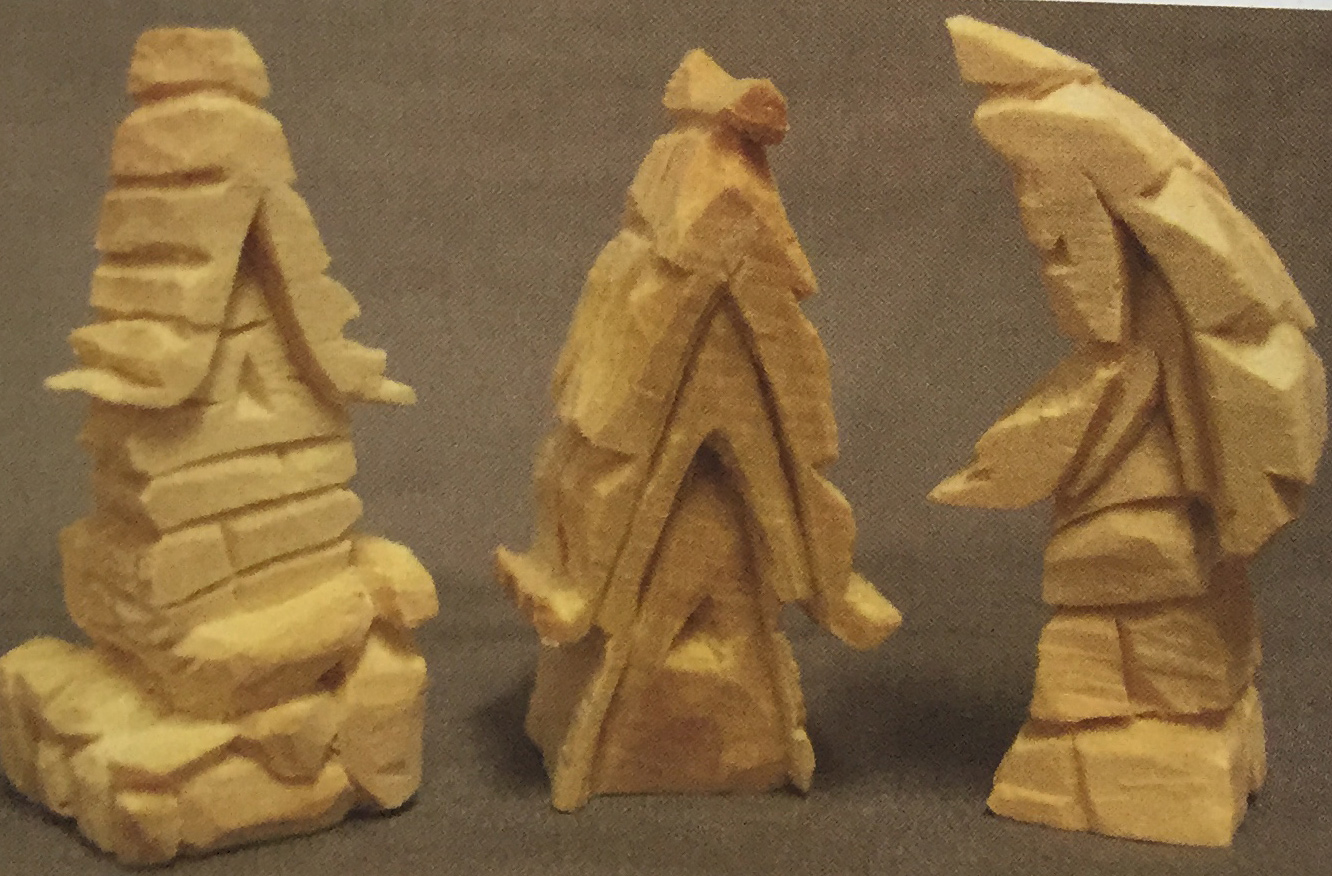
Strangely, when the church dried, one end was a greenish color. The end grain had sucked up Dawn's green pigment. It would not come out, wash out, or brush out, and there was no way I was going to carve it out of that end grain. For all I knew, it could have soaked in all the way through to the altar. In the photo below (it's the one in the middle), you can see the Dawn-infused end grain compared to the other two cottages. Now, I am content to say I have a church with a greenish back side.
Carving Tip 7
Go with the flow. Obviously, someone up there wanted a partially green church, and who am I to disagree?
Although we can wash away pencil lines and hand oils, and it doesn’t seem to affect a carving, I have found this is not good for all carvings. I was teaching myself chip carving and had a beautiful practice piece. It looked so good, my husband wondered if we couldn't “do” something with it. I said, "Let me wash it, first.” (I can hear some groaning out there from you old-timers.)
Carving Tip 8
Washing a piece will remove hand oils and pencil lines, and it will also slightly swell the wood, so if you made a mistake in your stop cuts, they won’t be as visible after it gets its bath. However, those crisp, clean | carved cuts that we all strive for in chip carving react the same way— they swell slightly—removing the beauty of fhe sharp cuts and, in some places, making them look like unscheduled dents. In lieu of washing, use an eraser to remove pencil lines from your chip carving piece.
Now let’s talk about found diamonds I in past issues of Carving Magazine.
Carving Tip 9
Ol Don Burgdorf has a tip I’m going to try when I paint my 3 cottages and the church. While I know to thin acrylic paints with water so the cuts and grain show through, didn’t know I could paint over wet wood. Ol Don advises that colors blend easier on wet wood. He also notes that when painting items that call for a more opaque paint (such as eyes), we should be certain that the wood is dry so no blending occurs. This also goes for painting the lips. Thanks, Ol Don.
Carving Tip 10
A great idea from Marcia Berkall. Right now. I’m carving a relief where one part of it is of a person’s vacation home. I can do that. I’m having a problem with the easy sides that should just be landscape. I don’t want the shrubbery to look dumb or stagnant, yet once it’s carved, that’s it. What I’ve been doing is carving sample pieces to see if I like fhe layout of the trees, bushes, etc. Marcia’s idea of doing a clay model is one I've heard before, but haven’t tried because I didn’t know anything about clay (except Play-Doh). She suggests using Roma Plastilina. Thanks, Marcia—being able to bend a tree, add a branch, or a bush is going to be a time-saver.
Carving Tip 11
Joe Dillett has good suggestions on how and when to sign your carvings. He encourages us to sign our pieces and be proud of our work. He uses a Dremel Engraver, Model #290, or an Ace Hardware professional engraver for under $10. Before signing, Joe sharpens the tip of the Dremel to needlepoint using his grinder. Depending upon the carving, he usually signs on the front right, before applying the sealer coat. Good ideas, Joe.
See you next time in "Let's Talk Carving,” when I'll show you my three finished cottages, and one church.
Peace—Susan
"There is a lot of cleanup to do on this church's end grain. Usually you won't see this type of photo in a magazine, but I want beginners to know that this is part of the carving process."
About the Author
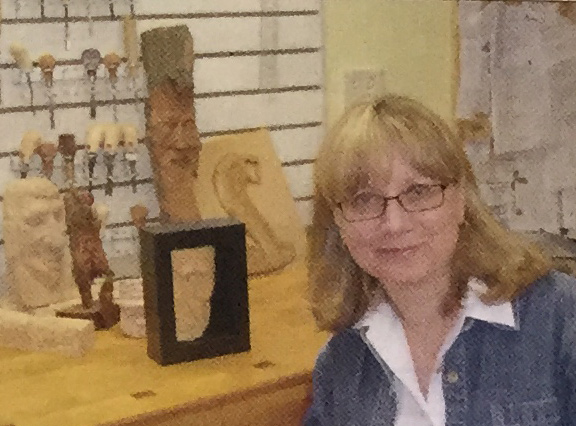
Susan Alexander lives in Orland Park, Illinois, with her husband, Robert. Susan began carving three years ago. Last year, when her husband presented her with a bandsaw for their wedding anniversary and she claimed it was the best gift of their 37 years, he promptly topped it by having a studio built for her.
Susan is a member of Mensa, a member of the NWU (National Writers Union), has had 3 novels and numerous newspaper and magazine articles published, holds a full-time job, a black belt in judo, has caught and released 14 muskies (she pulled one into the boat by hand), and is a freelance writer. In every minute of her free time, she carves.
In this article, Susan has combined her two great loves—the written word and woodcarving. “Both," she says, “make beautiful sounds."
