The advantages of carving on a tilted workbench are that there is less strain on your back and the lighting angle can be similar to that of the carving hanging on the wall. This article shows how a ready-to-assemble workbench was modified to become a versatile tilting workbench.
Modify your workbench to create a carver’s tilting bench
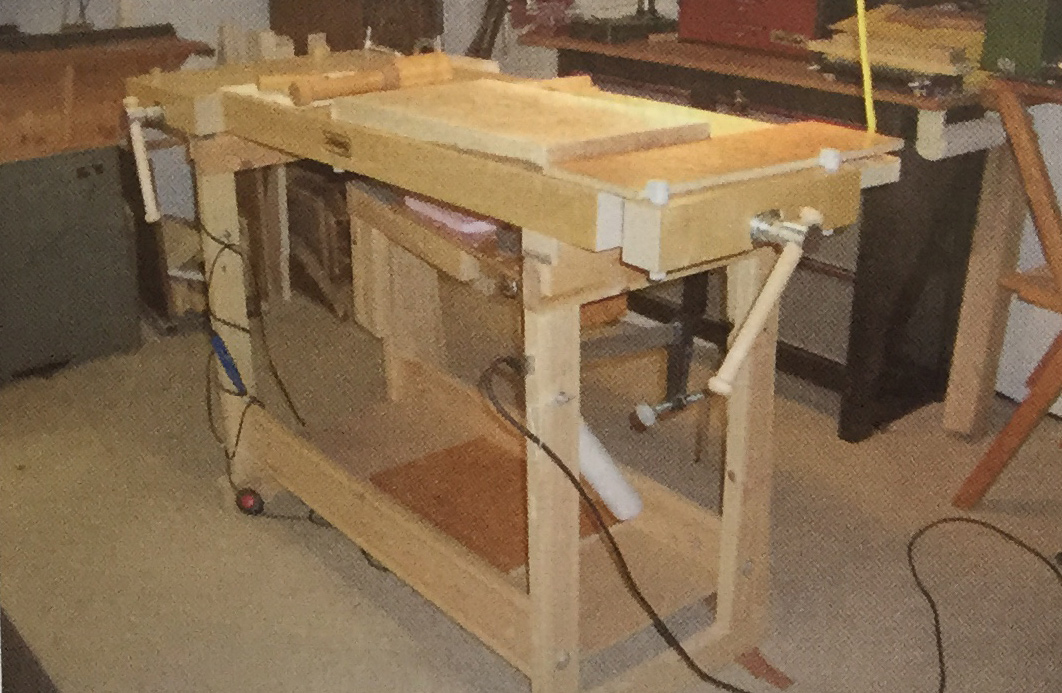
1. This is the workbench in the horizontal position. This is a good starting position. Tools stay on the top and it is easy to clamp a board into position. However, working in this position is hard on the back and neck, and the chips do not fall off your carving.
This bench top workspace is 19 3/4" deep by 53 1/2" long. The height, as modified, is 35 1/2".
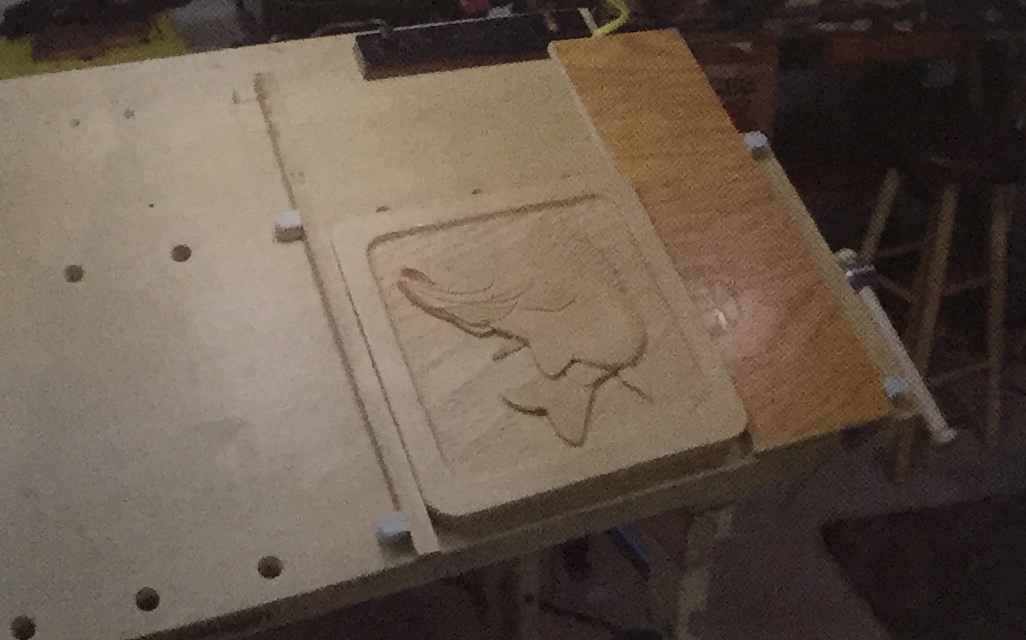
2. On smaller relief carvings, an oak cleat is used to span the space between dogs and a half-inch-thick spacer is used over the end vise to clamp the carving over the bench. A block glued to the bottom of each, or a nail underneath, keeps the cleat and spacer from sliding off the tilted top when the vise is loosened.
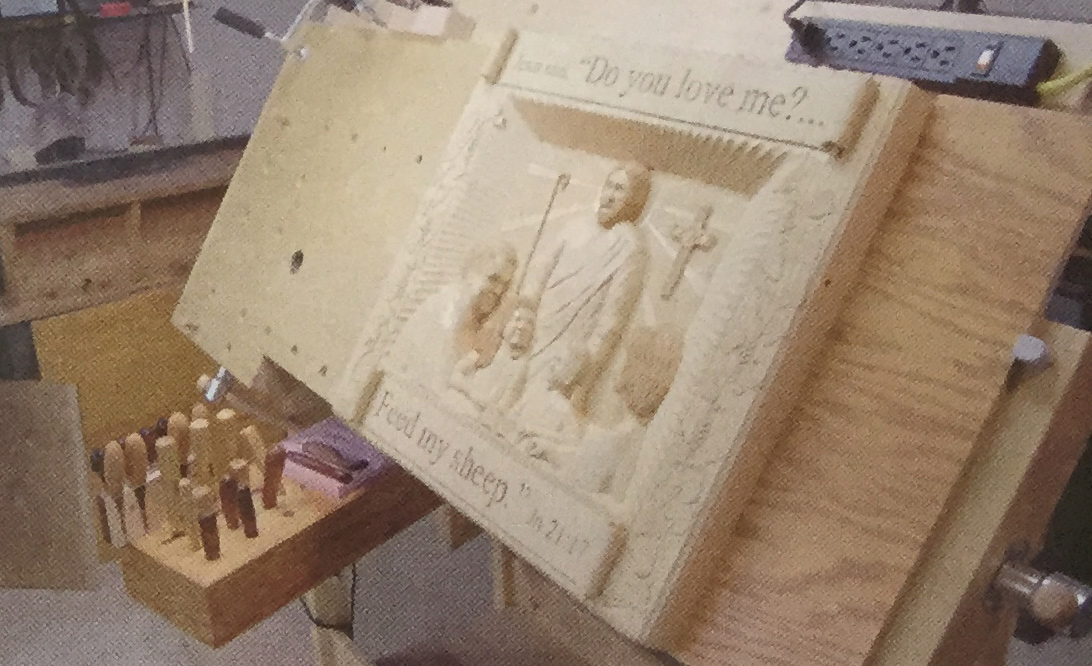
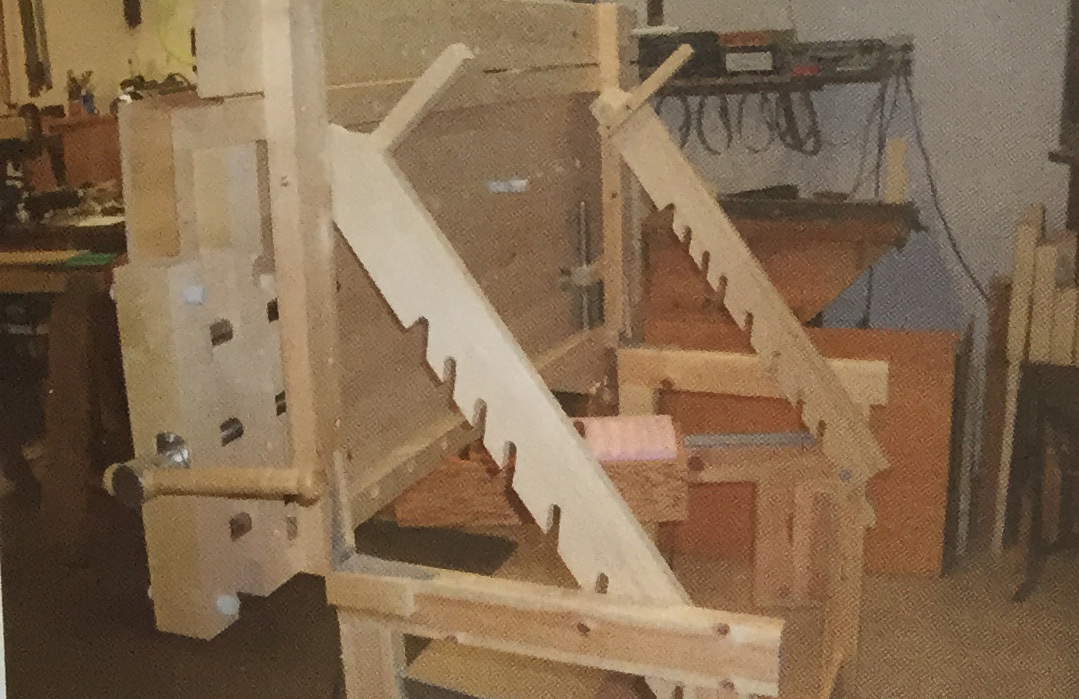
3. On larger carvings the bench top is tilted more to make reaching the top of the carving (back of the bench top) easier. The lighting at this angle makes it look more as it will when hung on the wall. When the top is tilted, the tools will no longer stay on the top, so a swing-out tool tray is used to hold the carving tools.
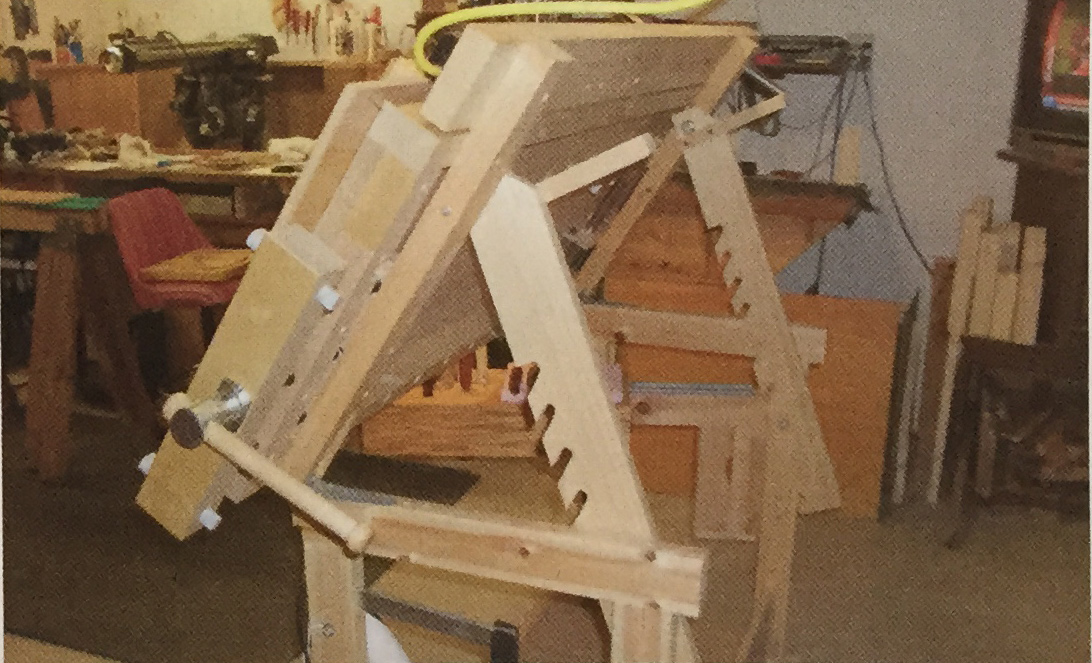
4. This shows the guts of the tilting top. Two 2” x 3” boards were added under the original top and hinged to the front legs. A notched 1" x 4” pivots on a lag screwed near the rear of the 2" x 3” boards in-line with the rear leg. The first notch is at the horizontal position. The next three notches are two inches apart. After that, the next notches are about 3" apart until the top becomes vertical. The notches catch onto another lag screw about 7” down the rear leg.
5. This shows the top in the vertical position. The notched boards and hinged 2” x 3" boards are duplicated on both end frames.
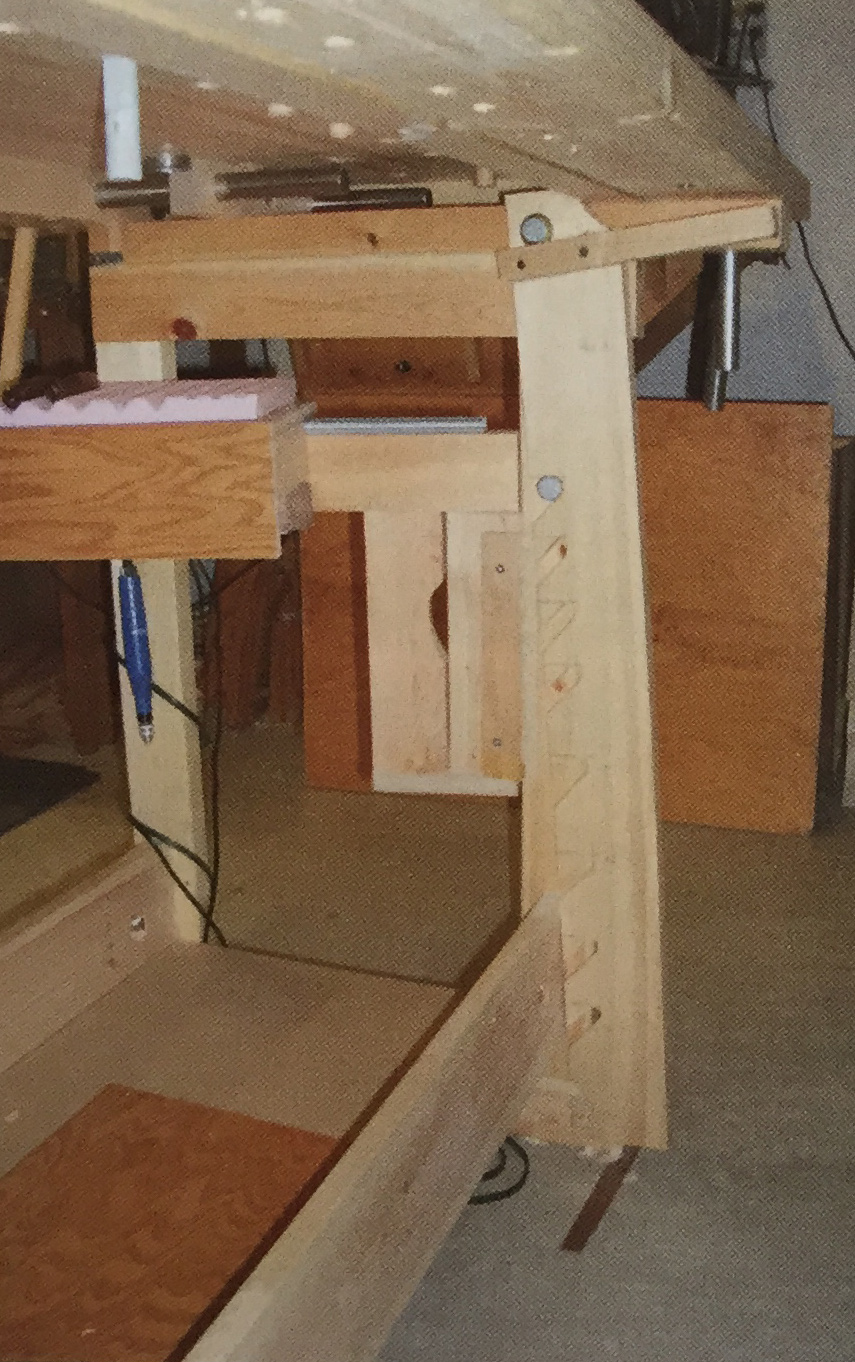
6. The notched board shown when the top is horizontal. Above the notched board and atop the 2" x 3" boards, a 2" x 4" was added to the rear of the worktop and is used to mount a power strip and a task light, and to store accessories.
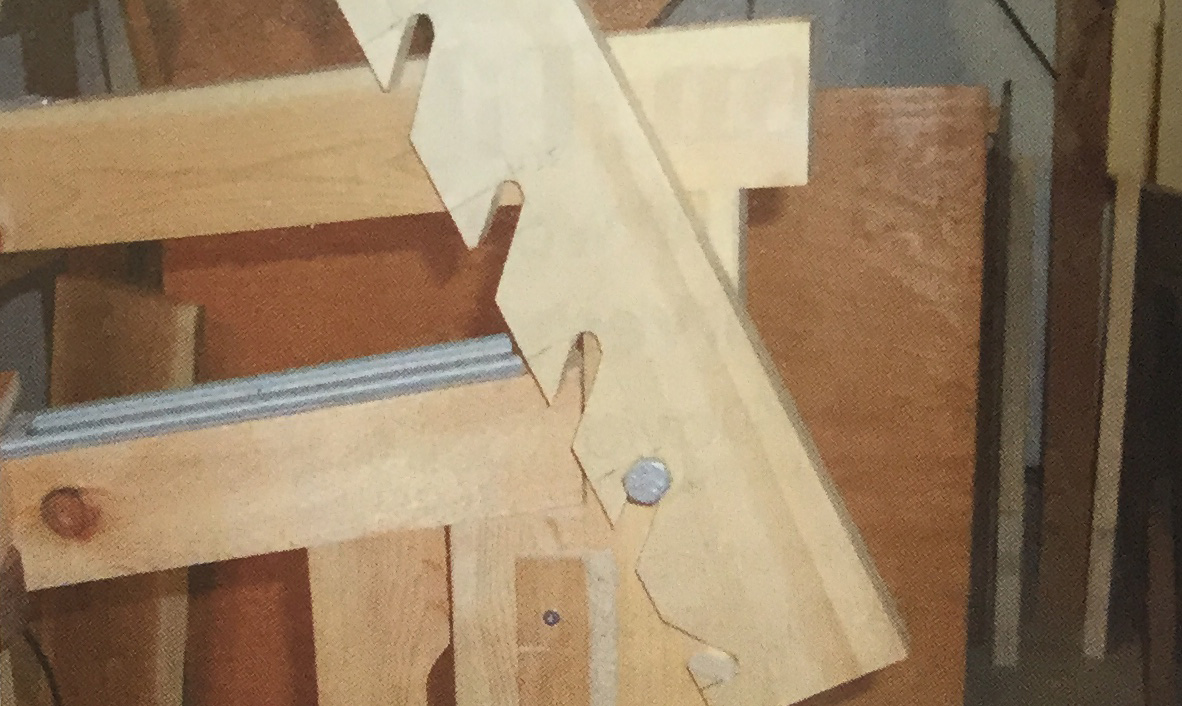
7. A close-up of the most vertical notches. The notch for the most vertical position is reversed because the bench top is past center and wants to fall forward. Larger carving projects may shift the center of gravity, so that when near the vertical, other positions may need to be clamped to keep the top from falling forward.
8. A short 1” x 1" is attached to the top of the notched boards, and aids in releasing and lowering the top.
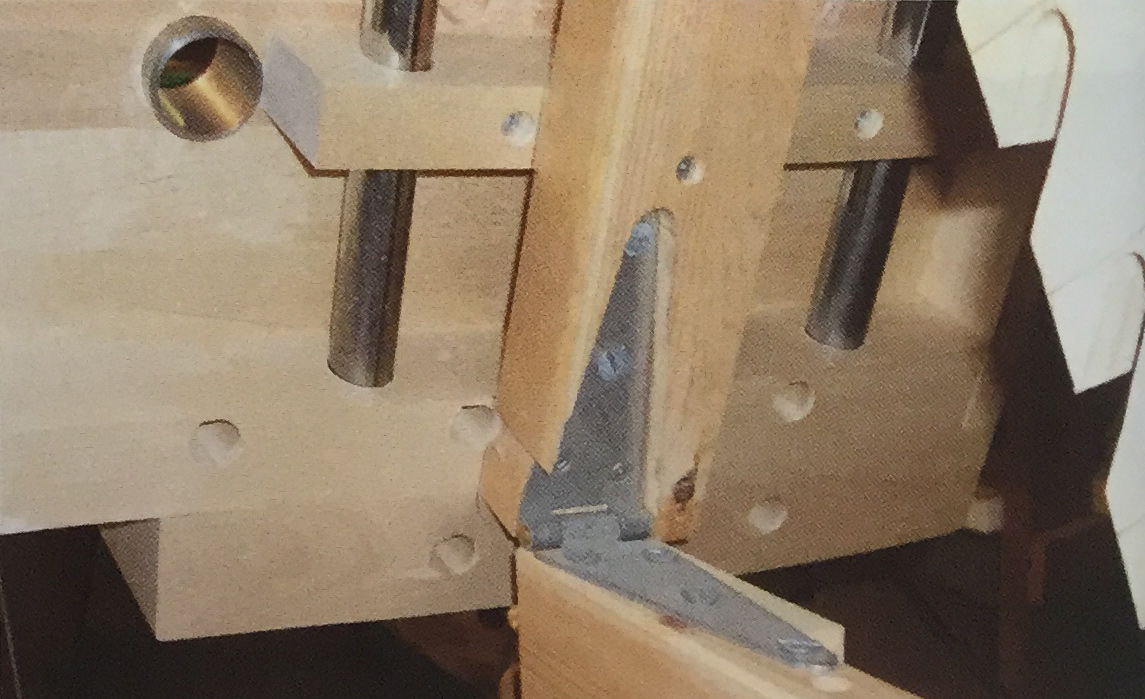
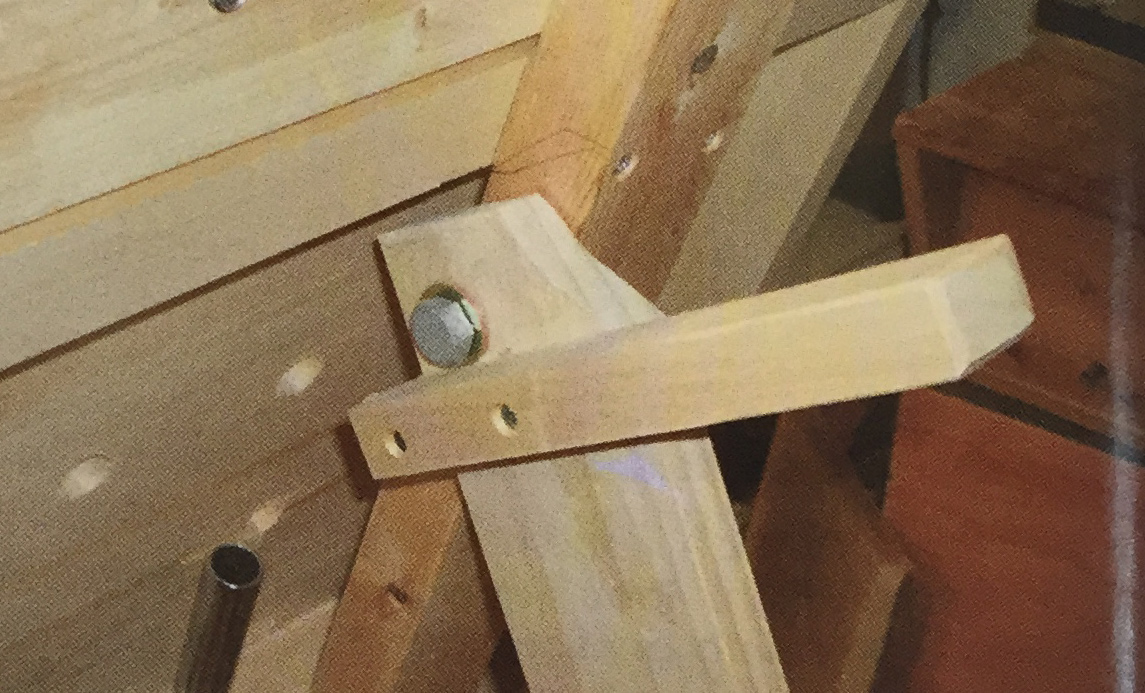
9. This shows how the hinges are recessed into the front end of the 2" x 3”, allowing the 2" x 3" to make good contact with the end frames. Avoid blocking the holes ^ the top so bench top dogs can still be used.
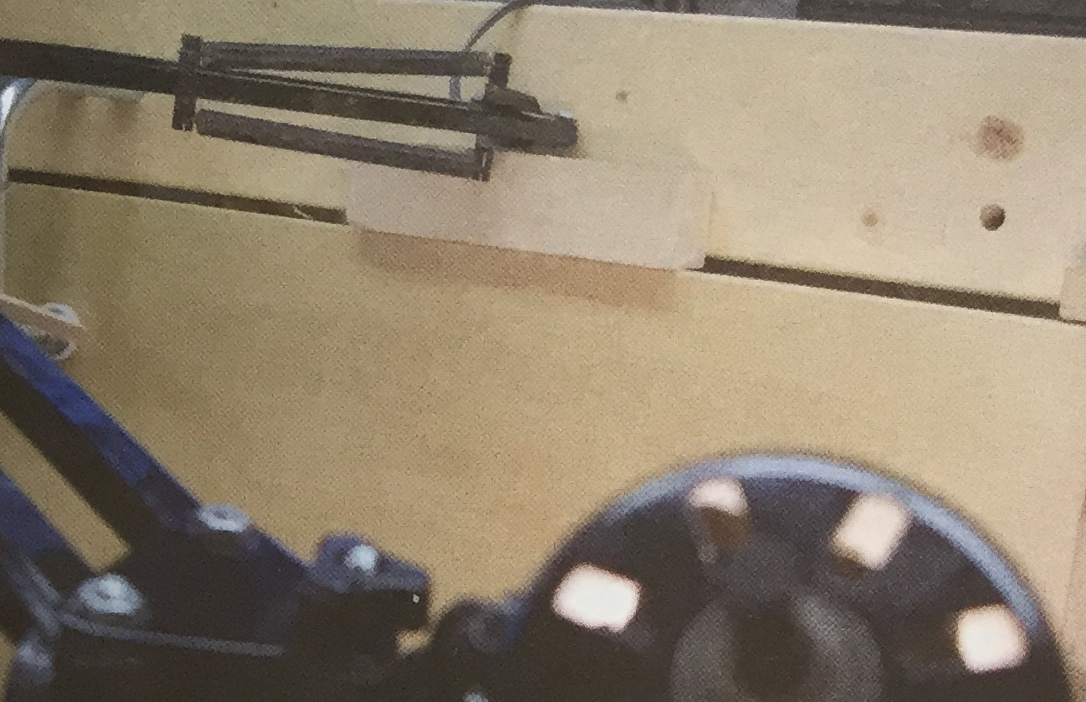
10. As viewed from above, the task light is mounted and pivots in a hole in the added 2" x 4” at the top of the bench. When the bench is tilted, the light will have unwanted rotation, so a block or wedge is used to keep it in position.
Getting comfortable when carving makes it a lot more enjoyable, and your quality of work will improve. It will not look like a "that’s good enough" carving. Your body will stay healthy and happy, and you can carve longer. Keep carving.
About the Author
David Rausch’s former life was as an agricultural engineer. He retired from Iowa State University Extension in 1998. The step to retirement was relatively easy, since David's hobby of woodworking had expanded into woodcarving in 1995 when he attended a local carving workshop and got together with friends to carve on a regular basis. Each year he has attended one or two weekend workshops to explore different types of woodcarving.
Read our latest articles at Carving Magazine homepage.
