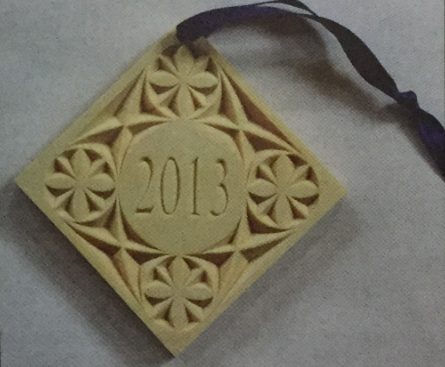
Chip carving a unique ornament is a long-standing tradition for me. Friends and family have their trees decorated with the ornaments that I've carved for them over the years. They expect a new design every year and I’m not about to disappoint them in 2013. I've provided you with two patterns to choose from. The skill level varies between the two patterns, so choose one that appeals to you and your chip carving skills.
For this ornament, I am carving on a 3/8" thick piece of basswood. Always prepare your wood surface before you begin carving your project. You can use a cabinet scraper or sandpaper to create a smooth surface. I am preparing my surface with 220-grit sandpaper.
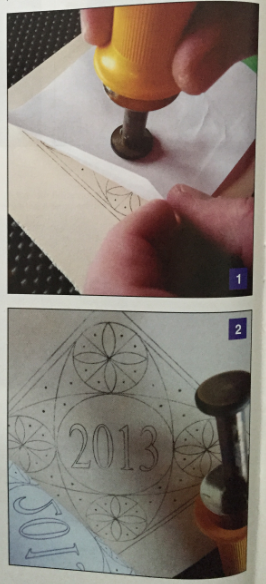
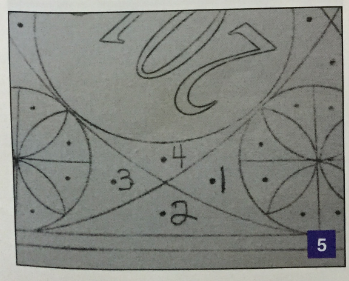
1 & 2. Apply the pattern to the wood using either graphite transfer paper or a Pattern Transfer Tool (which I am using here). I'll carve 40 ornaments this year, so the Pattern Transfer Tool is a huge time-saver because it allows me to quickly and accurately apply the patterns. Eight ornament patterns fit on one 3/8" x 6" x 12” piece of basswood.
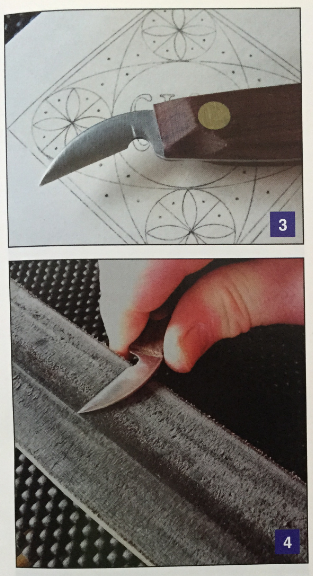
3 & 4. Before you make your first cut, be sure that your knife is razor sharp. I'll show you how to sharpen your knife in an upcoming article. For this entire carving, I'll be using My Chip Carving Modified Knife. The narrow, thin blade will work well for reaching the bottom of a curved chip. Touch up the edge on a strop that is charged with compound, and you're ready to carve.
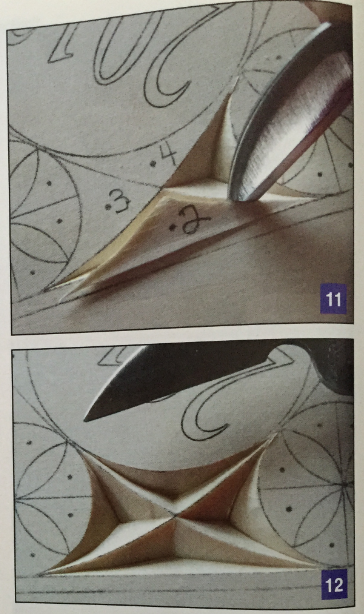
5 8. 6. Before you decide which chip to remove first, always think about which chip you want to remove last. If 1 remove this group of four chips in that order. I’ll remove
the smallest chip fast. Hold yaw knife as explained In my article (“Chip Carving Techniques") in the last issue of Carving Magazine.
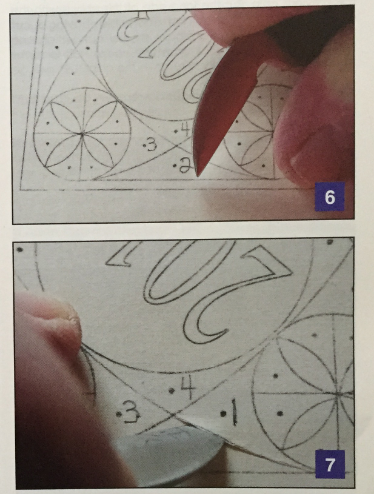
7. My first cut will be here, visualizing the point of the knife reaching the dot. Start shallow with your cut and cut to full depth; then draw the knife out.
8. For your second cut, plunge straight down and draw the knife out to the end to complete the cut.
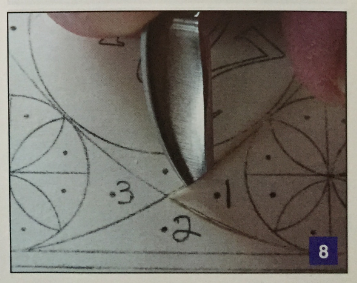
9. Remove the chip with the third curved slicing cut. This cut will be shallow to deep to shallow.
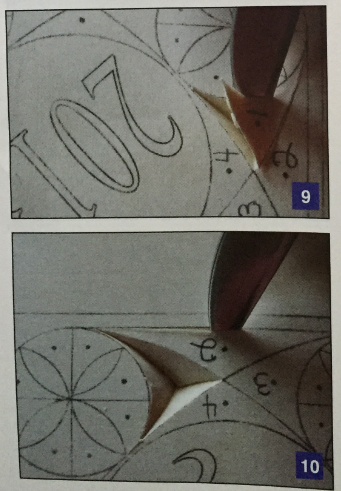
If you have any cleanup to do, do it now. Enter the chip with the same grip and angle on your knife. Carefully make delicate cuts to remove any remaining wood that needs to come out. Do not pick at it and scrape it out. Clean, delicate cuts are the key.
10 L 11. The first cut on the next chip should be away from the previous chip. But the long side of this chip is with the grain, so I'll make that cut first. This avoids having a cut that is running with the grain as my last cut, which can lead to some tearout. Pick up where you left off to make the second and third cuts to remove the chip.
12. Follow this same technique to remove the third and fourth chips.
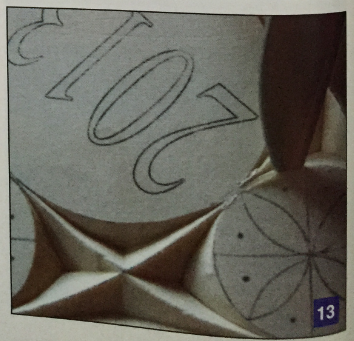
Work your way around to the other groups of four and remember to enjoy your time carving. Learn from one chip to the next whether you need to cut deeper or not as deep.
13. With all four groups of four chips removed, you are now ready to carve the rosettes. The chips that you will carve are in groups of two. I’ll start with this cut, which is away from the chip that I just removed.
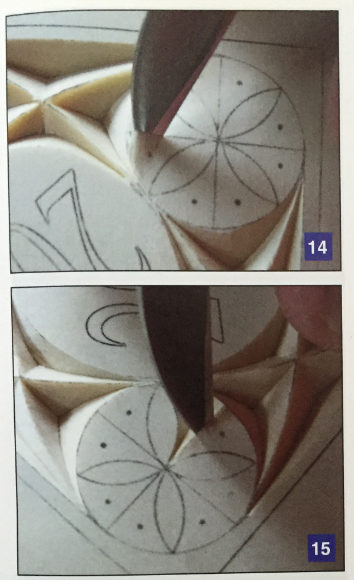
14. Continue with a second and a third cut, picking up where you left off on the previous cut.
15. Work your way around the rosette in a clockwise direction if you are right-handed or a counterclockwise direction if you are left-handed.
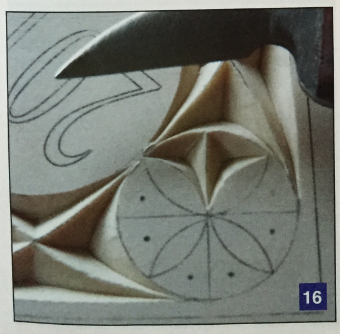
16 & 17. The other groups of two are removed in the same manner.
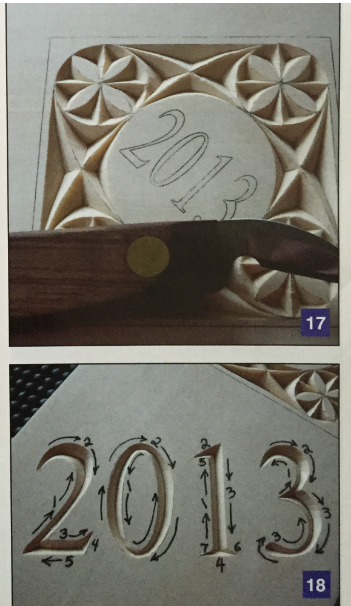
Now, we're ready to carve the numbers on the project. Including a date truly personalizes any project. In an upcoming issue, I'll write a separate article on how to carve letters and numbers. For now, follow these steps to chip carving “2013.”
18. This photo shows the order in which you need to make the cuts for each number.
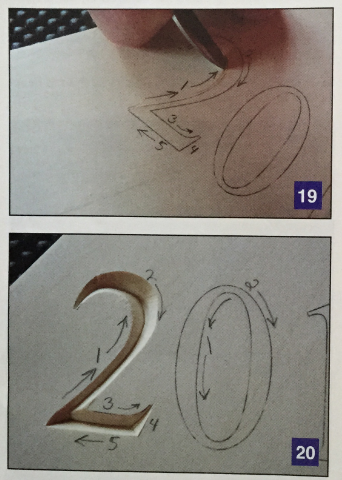
19. The first cut will be on the inside curve of the "2." cutting from shallow to deep as the chip widens and then drawing the knife out of the wood.
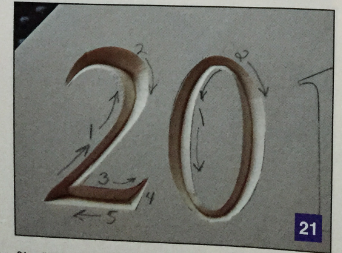
20. Complete the “2” by making three cuts on the bottom.
21. When carving the "0," flowing for smooth curves.
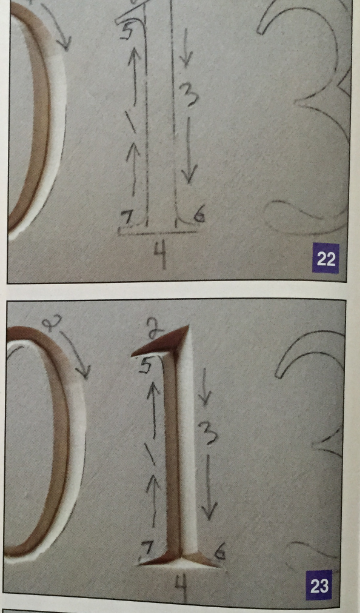
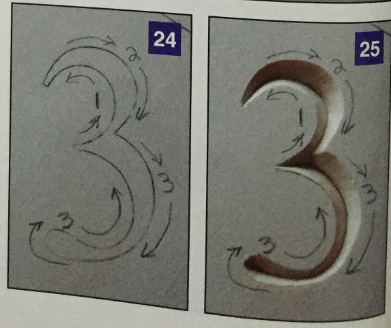
22-25. Carve the “1” and “3" as shown.

26. Your carving is complete. Now it is time to prepare your ornament for a finish. First, remove any pattern lines that were not carved away. I recommend using a Tombow Sand Eraser for this task. It removes graphite paper and Pattern Transfer Tool lines better than any eraser that I've tried. Drill a small hole in the top of the ornament for the ribbon.
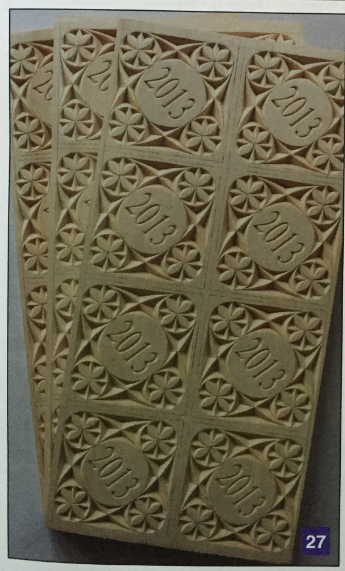
27. Next, sand the surface with 220-grit sandpaper. Sand very lightly to avoid flattening the sharp ridges that you carved. Remove the dust with a vacuum cleaner.
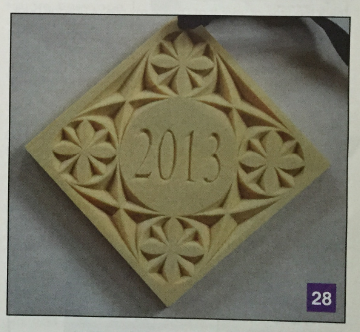
28. Now it is time to apply the finish. First, brush on a coat of Sanding Sealer. You brush this on because it will soak into the wood. When dry, lightly sand with 220-grit sandpaper and vacuum off the dust.
Then spray on a light coat of satin lacquer. When dry, lightly sand with 220-grit sandpaper and vacuum off the dust. Repeat this process two or three times. Attach a festive ribbon to the top of your carving and you're finished. Congratulations!