Welcome to the world of gouge chip carving. Russ shares this beautiful snowflake design that you can use for most decorative applications.
Gouge chip carving is creating a design using only two cuts (a vertical cut and the removal of a chip). The technique works best in hardwoods (e.g., cherry, maple, walnut).
This project integrates four basic gouge chip carving forms: the diamond, the snowflake, vines, and flowers. The purpose is to give you confidence in integrating gouge chip carving forms, and practice in vertical cuts and the removal of chips.
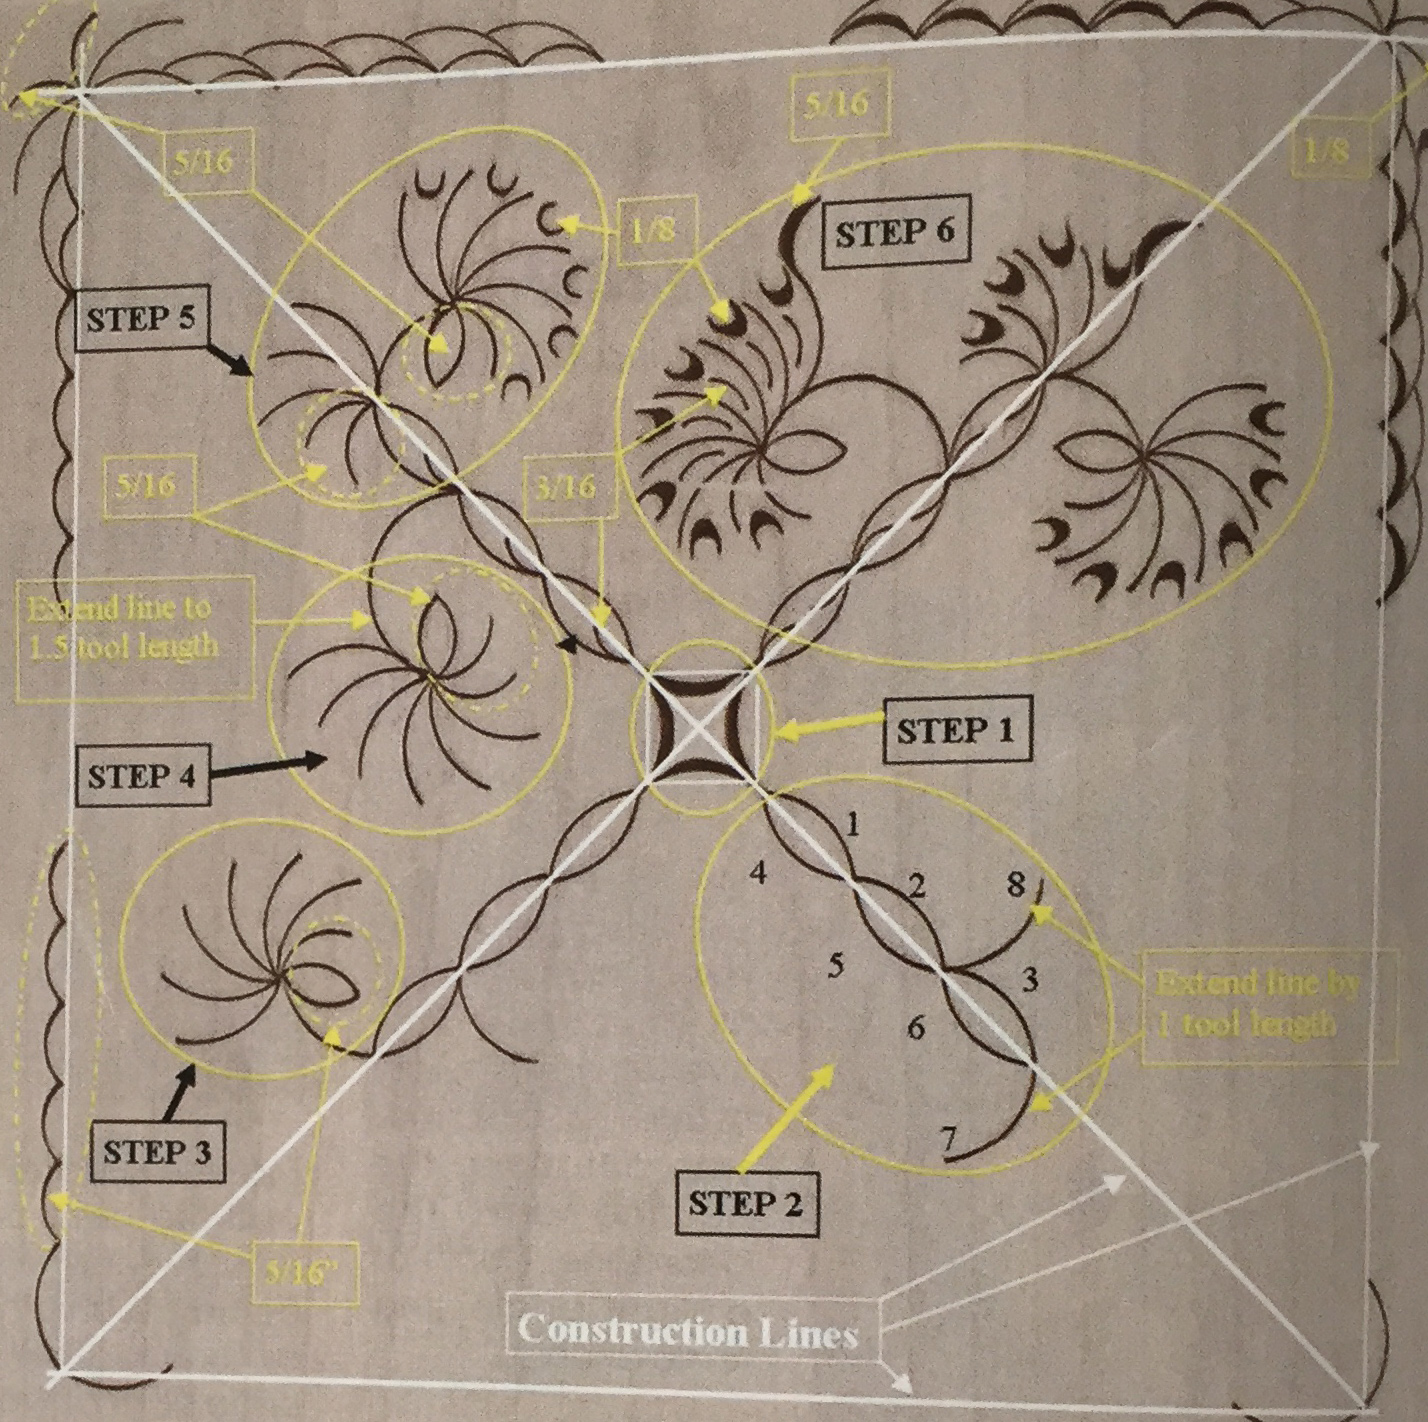
The white lines are construction lines, the yellow are comments, and the black lines represent step order.
Supplies
- 6” x 6” Hardwood square
- Leaf Green (coat)
- Gouges (1/8", 3/16", 5/16”, 1/2”)
- 1 lb. Round mallet
- Soft lead pencil
- Straightedge
Wood Prep
- Sandpaper (220, 400, or 600 grit)
- Shellac wash coat (11/2 lb.)
- Denatured alcohol
- Cocoa powder
- Baby oil
- Mineral Spirits
The first action is to select and prepare the wood. Prior to carving, sand the wood with at least 400-grit sandpaper. Next, apply shellac wash coat, and then let dry for 10 minutes. You can check your sanding by applying and removing accent* material. Redo if necessary. Once the wood is sanded, a wash coat of shellac is applied and checked with cocoa accent, and then a second wash coat of shellac is applied.
Preparing Shellac Wash Coat
Liquid shellac is normally a 3 lb. cut. Use clear unless you desire the amber hue. Mix equal portions of the liquid shellac and denatured alcohol (11/2 lb. cut). Apply with a cloth pad.
Special Notes for Accenting Walnut After sanding and applying the first shellac wash coat, apply a coat of cocoa accenting and then wipe off with a flat piece of wood. Next apply a coat of shellac wash coat. Then test by applying the spackle to ensure that all blotching has been eliminated.
Accenting Materials
General Note: I do not advise using any accenting material which includes red pigment. I find that the red pigment is difficult to control, and results in poor definition of the vertical cut and removed chip.
*Cocoa as Accenting Material: Use dry, edible cocoa powder. Mix cocoa with mineral oil (baby oil). Mineral oil is the vehicle to allow spreading of the cocoa powder over the carving.
*Spackle as Accenting Material: Spackle is a commercially available material for filling nail holes. The base white can be colored with acrylic paints.
Procedure
Accent material can be cocoa for light woods and spackle (white or colored) for dark woods.
Apply accent material to carved area, and use a razor blade and dry cloth to remove excess. Do a final cleaning with a cloth dampened with mineral oil and mineral spirits.
Notes
- Water and alcohol expand wood. This reduces the effect of accenting.
- A yellow shade works well (walnut and cherry) and white (walnut).
- Always test accenting (especially color) on a scrap piece of wood before accenting your carving. Make necessary modifications to get the effect and color you desire.
Wood preparation is necessary for successful accenting.
Accenting
After carving, lightly sand the surface with a 400-600 grit. Apply a shellac wash coat and let dry 15 minutes. Then accent the carving.
After accenting, apply a final shellac wash coat. This will seal the cocoa I accent and allow you to apply a final finish of your choice (e.g., lacquer, varnish, acrylic).
The Project
- All cuts are made with the 1/2" gouge unless otherwise indicated.
- Complete each step for all quad- rants before going to the next step.
- Preliminary Actions: Draw construction lines and diamond in the center.
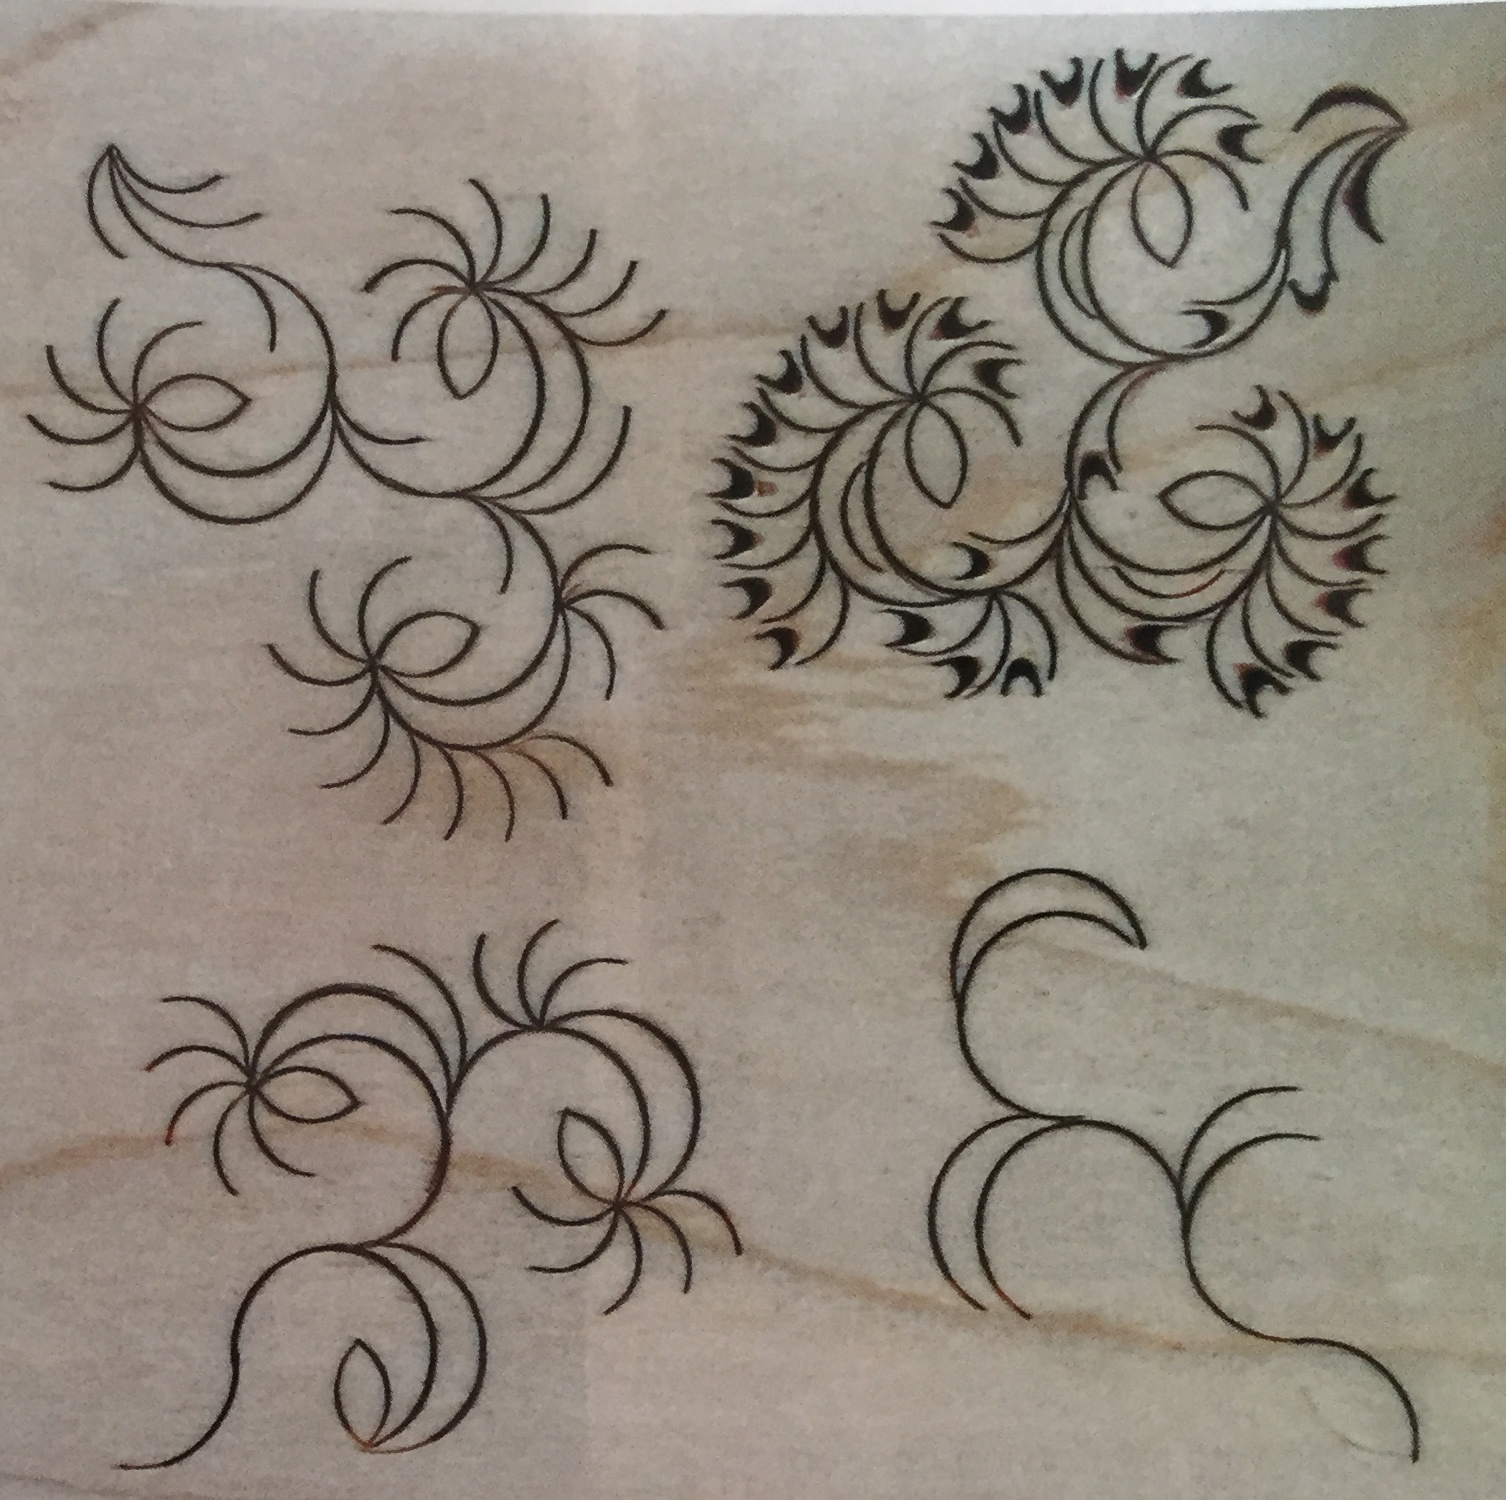
The Snowflake
Close-up view of the step-by-step procedure for carving the snowflake.
1. Perform diamond vertical cuts.
2. Vertical cuts as indicated. Extend two lines by 1 tool length each.
3. Start with button and follow with vertical cuts counterclockwise. Note first petal cut is 5/16" and remainder 1/2".
4. Extend vine line 1/2 tool length (total of 1 1/2 tool lengths). Start with button, followed by two 5/16" cuts, and then 1/2” cuts.
5. Start with two 5/16” cuts, followed by three 1/2" cuts. Then, start with button cut, one 5/16" cut, and six 1/2" cuts. Use 1 /8” tool to close the petals. Use 3/16” tool to start accenting the large buttons.
6. Close all petals with 1/8" tool and remove a chip from each with the 1/8" tool. Complete the accenting of the large buttons with the 3/16" tool and do not remove a chip. Add an accenting 5/16" cut to the end of two petals and remove a chip.
The Border
Lower Right: Use 1/2” tool and make two vertical cuts as shown in the photo
Lower Left: Use 5/16” tool and extend one side with five cuts.
Upper Left: Extend the other side. Use 112" tool to make the cuts above the 5/16" cuts. Make corner cuts with the 1/2” and 5/16" tools.
Upper Right: Close four petals with 1/8” tool and remove four chips. Complete vertical cuts as shown.
About the Author
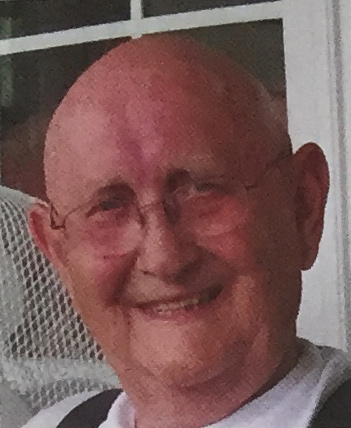
Russ Hewitt's interest in working in wood came to the front line after he retired from the army in 1977. "My family and I moved to Missouri and built a home in the middle of 80 acres. I began to make furniture from the wood harvested from our land. Walnut, cherry, and oak became my wood of choice.
Soon, my wife suggested enhancing the furniture I made with carvings of some type. Using gouges and a one-pound mallet, gouge chip carving was born.
My first success was pinwheels, next came flowers, and then vines. When my granddaughter saw a new design I was working on, she called the design a snowflake. This opened up an infinite number of design possibilities. I went public with my carving concept in 2002. The thing that I am most proud of is the concept of just two cuts: the vertical and the horizontal.
Using a gouge and mallet to make a design can be accomplished by most people. Age should not be a factor; my youngest student was 8 and my oldest students were in their 80s. Gouge chip carving can be taught in 6 hours. I have published two design pamphlets and a tutorial video to go with the tutorial pamphlet.
Currently, I teach a class in Springfield, MO, once a week. I conduct workshops within a three-hour drive from Springfield.
Be sure to check out our annual Gouge Chip Expo, which is held in Springfield, MO.
Read our latest articles at Carving Magazine homepage.
