Simple designs are easy to carve and fun to paint By John Relchling I carve a variety of decorative fish-spearing decoys and end up with a lot of small cutoffs that are just too good to throw away. To save them from the burn pile, 1 came up with this simple, fun, and useful project for carvers of any skill level.
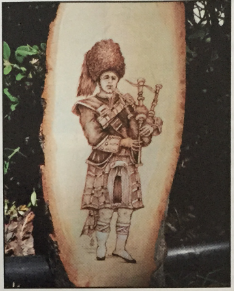
The weather is cooling off and fall is upon us as we head into the final stretch of our heirloom collection. This issue's projects have been the most challenging for me because of the complexity of the costumes. I have tried to keep these images simple while maintaining the details that identify them. The burnings themselves are quite simple— just outlining and shading are used to complete the designs.
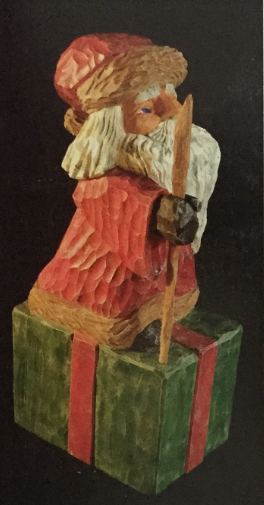
Like many of you, I have always loved Santa and the spirit of good cheer that he represents. That, perhaps, is why I love to carve Santas so much. I share this Santa with you in the hope that this project rekindles the spirit of Christmas and holiday goodwill in each of you. The Santa in this project is a posed Santa. He is about to deliver the large present on which he is standing. I wonder who caught him on camera. I wonder what is in the present.
For this project, I used a 4" x 5-1/2" x 12" block of basswood .
For the most part, I carved this project using large two-handed tools for the roughing work and palm tools for the details. You can use tools that you have available, but most of the time I will indicate the tools that I used for the given step. I held this Santa in a vise, which allowed me to use both hands to control the tools.
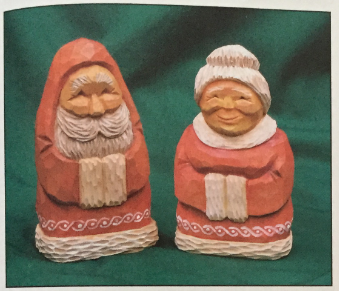
I have found that a successful woodcarver is usually one-half of a team. There's usually someone backing up the woodcarver, watching the "noncarving” details and keeping him or her honest. This “other half" is not always the distaff side of the pair by the way, but in Santa's case it is—so Mrs. Claus is the subject of our carving project this time.
Before we get started, Donna Menke, another writer for Carving Magazine, gets credit (and blame?) for starting this. A while back, she e-mailed me for tips for carving a Mrs. Claus version of my Smiling Eyes Santa from Issue #32 of Carving Magazine and then proceeded to give me a couple of subtle “pushes” toward writing this sequel. Anonymous sources have told me that she's quite good at giving “pushes," and I thank her for them.
So, one of the benefits of this project is that Mrs. Claus takes the same size blank as the Santa in that previous article. The bandsaw cuts are identical as well (as shownin the pattern). For my "left brain" readers out there, those measurements would be 5-1/4" tall x 3" wide x 2" thick. I recommend scaling those measurements down to what feels comfortable in your hands, or don’t be a slave to them at all and use chunks of wood that you have on hand.
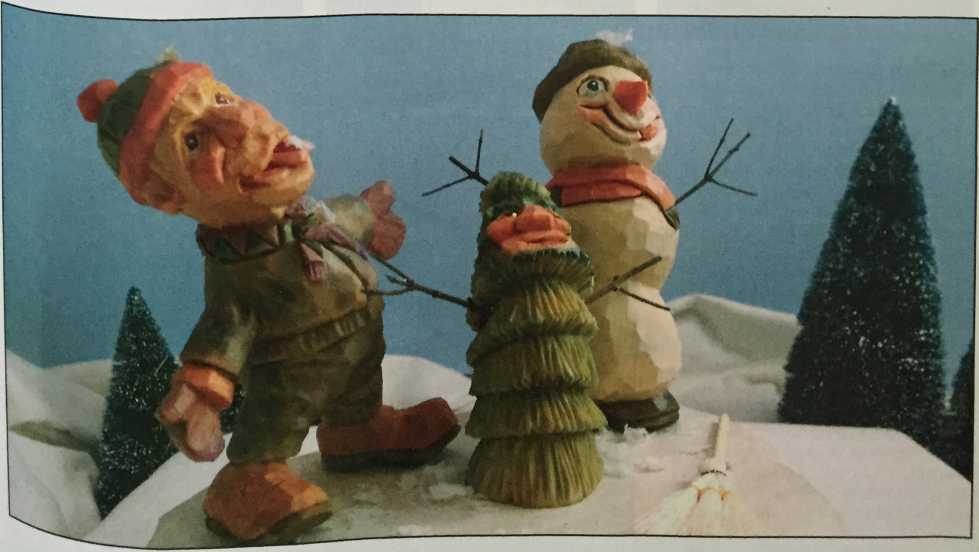
The anticipation of those first snowflakes of winter is a magical sight that only kids can truly understand. Kids see those first glorious flakes and everything winter becomes a reality. Sledding, skating, snowballs, igloos, SNOW DAYS from school, and the granddaddy of everything that is winter—Christmas!
What better way to usher in the season than with three good friends out catching snowflakes on their tongues and frolicking on a fluffy carpet of white.
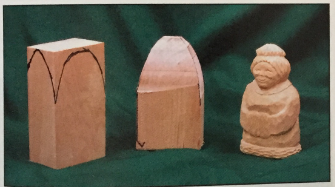
In this article, we will go through a step-by-step procedure to make the little boy. You will need a 2" thick x 6" long x 5” wide piece of basswood.