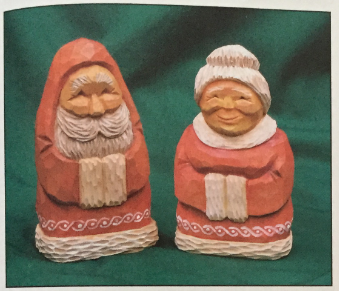
I have found that a successful woodcarver is usually one-half of a team. There's usually someone backing up the woodcarver, watching the "noncarving” details and keeping him or her honest. This “other half" is not always the distaff side of the pair by the way, but in Santa's case it is—so Mrs. Claus is the subject of our carving project this time.
Before we get started, Donna Menke, another writer for Carving Magazine, gets credit (and blame?) for starting this. A while back, she e-mailed me for tips for carving a Mrs. Claus version of my Smiling Eyes Santa from Issue #32 of Carving Magazine and then proceeded to give me a couple of subtle “pushes” toward writing this sequel. Anonymous sources have told me that she's quite good at giving “pushes," and I thank her for them.
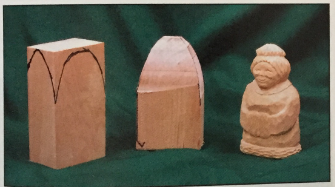
So, one of the benefits of this project is that Mrs. Claus takes the same size blank as the Santa in that previous article. The bandsaw cuts are identical as well (as shownin the pattern). For my "left brain" readers out there, those measurements would be 5-1/4" tall x 3" wide x 2" thick. I recommend scaling those measurements down to what feels comfortable in your hands, or don’t be a slave to them at all and use chunks of wood that you have on hand.
I will be giving reference points as fractions, so there's very little chance of you doing anything “wrong." If you're carving a Mrs. Claus to match a Santa that is already carved, simply start out with the same dimensions—trust me!
The other benefit of this project is learning how to carve a female face. My chief goal with the Santa in Issue #32 was making the process of carving Santa's face as painless as possible. Hopefully, we're going to step it up a level and accomplish the same thing here so that this doesn't just look like a shaved Santa wearing a dress.
If, at any time, my steps are unclear, take the time to skip ahead to later photographs. Often, the photographs in the later stages of the article will give you a clearer view of the shaping that I'm trying to describe.
Okay, let's get started.
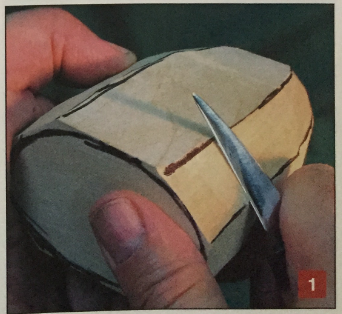
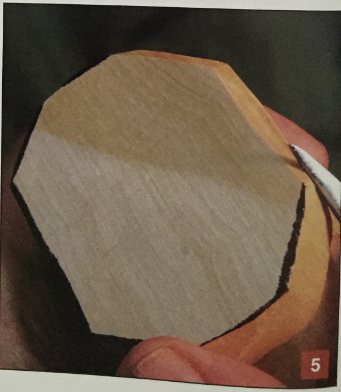
1. Knock off the corners! This project is carved in a Scandinavian flat-plane style (just like Smiling Eyes Santa), so you can stop with an octagonal (eight-sided) cross section; but there should be no right angles after this step.
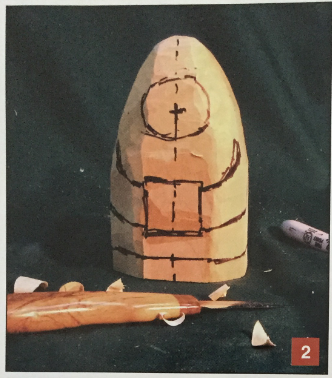
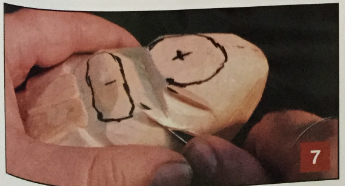
2. Using the photo as a guide, draw a centerline down the front of Mrs. Claus. Use a permanent marker, as it will t>e carved away, and it won’t smudge, smear, and require cleanup before a finish is applied. Draw a border all around the base to establish the fur trim of the dress.
Next, visualize a point halfway between the top and bottom of your blank and draw a centered horizontal line. Drop two vertical lines from each end and finish this into a box. This creates a cuff on each of Mrs. Claus s sleeves. Slightly down from each top corner, draw a curve for the inside of her sleeve. Starting just up from the bottom two corners, draw a curve parallel to the first two, ending at her side slightly to the back. Draw a circle for the face as shown.
3. Using a knife or a V-tool, make stop cuts to the waste side of all these lines (flat-plane purists ignore the V-tool suggestion). Those areas are above and in front of the sleeves. Before removing wood above the sleeves, be sure to leave wood for the bosom area. I'm trying hard not to sound sexist here, but this area is a Female Visual Queue (FVQ) and needs to be retained for later shaping.
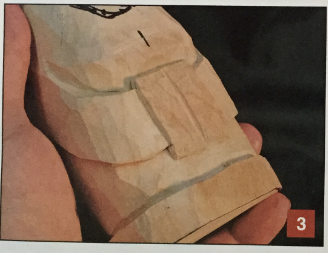
4. Continue removing waste wood until the sleeves and fur trim stand out. Then run a V-cut between the two cuffs and a stop cut to the outside of each—removing wood from the outside of each cuff down the sleeve should make the sleeve stand out. At this point, the cuffs are two hard rectangles. Soften them by nibbling these eight corners off with small chip cuts.
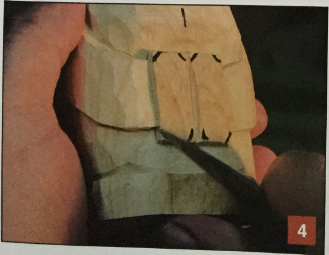
5. Soften any other hard edges by running a long 45-degree cut along them with the tip of the knife. Prime candidates for this softening cut are the top and the bottom of each sleeve and cuff, and the top and the bottom edge of the fur trim at the bottom of her dress.
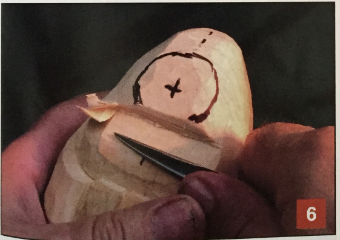
6. Make a horizontal stop cut at the bottom of the face circle, and then starting at just above the FVQ that we drew earlier, slant a cut up to it. This should leave a slanted surface sloping back from the FVQ and ending under her chin. Just to the left of center, make a 45-degree stop cut that's just outside the face circle.
This will establish her jawline. Run a slant cut up to this, extending the surface that you estabiished earlier under the chin. Repeat a mirror image of this cutt on the other side. Without losing that "flat-plane" flavor, take out any hard corners on the the jaw and chin with small cuts. You want to bring the chin to a softer point and tone down any hard shadows on the jaw-line... another FVQ.
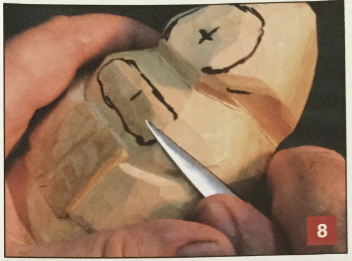
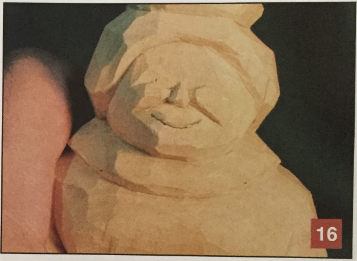
7 and 8. At a level slightly higher than her chin, make horizontal stop cuts in from each side to establish Mrs. Claus's shoulders. Remove wood from below with cuts that slant inward to give her slightly rounded shoulders. Continue to niake horizontal cuts straight across her back.
At this point, the head looks a bit “A" shaped (that would be "eh" shaped for my Canadian readers). It reminds me of a Cylon helmet or the lady engineer in Dilbert (an American comic strip). Knock off the bottom corners of that "A” profile and narrow the head with a few well-placed vertical cuts. Establish a couple of planes that are slightly to the left and right of the center of the face and at 45 degrees to the front (see photos).
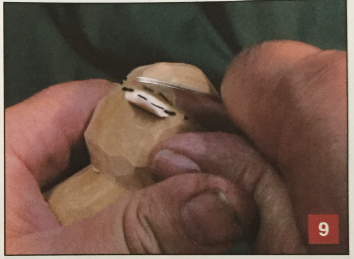
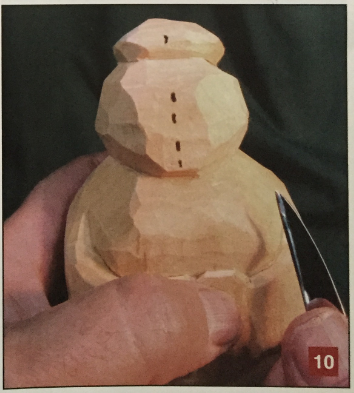
9 and 10. If you've carved away the centerline or the face circle or both, redraw them. Starting just above the face circle, draw a halo that dips down slightly in the back. Make chop cuts to this line to establish Mrs. Claus's hair bun.
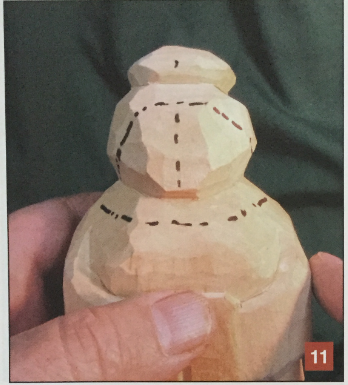
11. Beginning in the middle of the face circle, draw a line to the right that starts out horizontal and curves nicely downward and ends at the top center of her shoulder. Then draw a mirror image of this line on the opposite side. Next, draw a line down away from the neck and continue it an the way around the figure. Stop-cut these lines and remove wood from below them. This establishes the hairline and the fur collar of the dress, but be careful removing wood from below the front part of the collar and don’t undo our first FVQ. This would be a good time to take a break, put a fresh edge on your knife or knives, and step away from the carving for a bit.
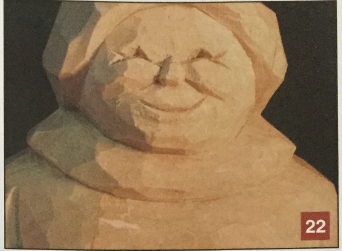
12. Approximately half the distance between Mrs. Claus's chin and the top of her bun (not the top of her head), draw a horizontal line. This is the brow line. A third of the way between this and her chin, draw a second horizontal line. This will be the bottom of her nose. Make a stop cut here that slants slightly downward. Starting halfway down from that cut to the chin, make a cut that slants inward and meets the stop cut at the same depth. (You can refer to later photos/steps to see what these cuts should look like if needed.) Make a stop cut straight in on the brow line. From the tip of the nose (previous step), make a cut that angles inward and meets the stop cut at the same depth.

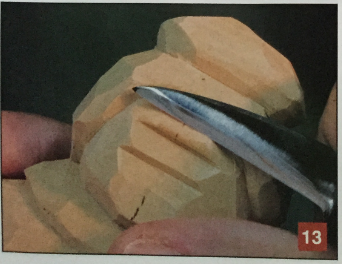
13. That brow cut is creating too much shadow, so carefully remove wood from the brow cut upward. You basically want a nice vertical surface above the bridge of the nose. This makes Mrs. Claus's eyes seem less recessed...another FVQ.
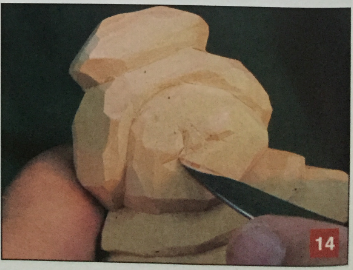
14. You may want to redraw your centerline here. I didn't, but I'm forgetful like that. From the brow cut to the nose cut and centered on the face, draw a square-top “A.” Chip-cut out one side of this “A" with a slant cut from either side of the line. The cut should be no deeper than the brow cut at the top or the surface under the nose. After making the cuts that define each side of the nose, there should be small corners left at the bottom.
Nibble these off with chip cuts similar to those that you made to eliminate the hard corners of the fur cuffs. The photo shows the final part of a chip cut that eliminates two of these triangles at the same time. The finished cut is on the left side (your right). The missing inside corner softens that part of her nose, and the missing outside corner softens the cheek. The top corner of this cut is where the “smile line" will start.
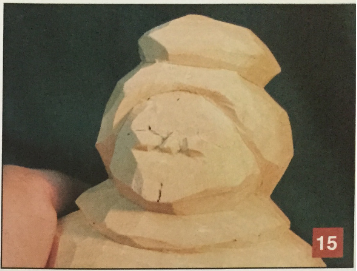
15. On the brow line, halfway out from the centerline, draw a dot. Make one that mirrors it on the opposite side. These are the centers of the eyes and the tops of what we called "cheek peaks" in my Santa article. If they don’t look right, shave them out and try again. Draw a slanted line from one dot to the near side of the nose. Draw a second line that also angles downward from the dot to the outside of the face. These are shown for the left side only in the photo. Stop-cut these lines and then remove wood from above, going no deeper than the vertical area above the brow that was established in Step 13.
16. From the bottom corners of the nose, draw lines that go out to the side of the face at an angle about 35 degrees down from horizontal. Draw a mirror image of this line on the opposite side. Look at them for a moment. These are the “smile lines," and they need to be symmetrical and to make Mrs. Claus smile.
Don’t be afraid to draw each line slightly into the bottom inside part of the cheek. When you’re happy with them, make stop cuts along these lines and remove wood from below. At this point, they should look like they're too straight and extend too far out. Do not worry. We will come back and correct this.
17. This next step can (and should) be practiced on a flat piece of scrap wood. About halfway between the bottom of the chin and the bottom of the nose, draw a line for her smile. Along this line, draw a stop cut with the knife (which should be vertical to the surface of the face). Begin at each corner of the mouth and draw your knife toward the center, making the cut deeper as you go.
Starting at each corner again, take the tip of the knife and shave off the bottom of this cut at a 45-degree angle. Gradually take off more wood as you move toward the center of the mouth. Repeat this cut on the top side of the initial stop cut, again taking more off as you move toward the center. Since this will be the upper lip, don’t take off as much as you did on the lower cut. If the lips turn out the same, just remove a bit more from the bottom. Larger lips are another FVQ, but we don’t want it to look like a bad Botox job here.

18. Now imagine Mrs. Clous s chin as a ball and draw a circle here. Just above this and just below the bottom lip, make a shallow, horizontal chop cut that s centered on the face. This should leave a shadow below the bottom lip and a highlight on the top side of the chin. Extend this cut (tilted up slightly) a short distance out both sides. You can remove some wood below the cheeks along the sides of the face. Make these cuts so that they angle slightly in toward the neck and actually erase a small end of each smile line. This way, we correct that problem we left in Step 16.

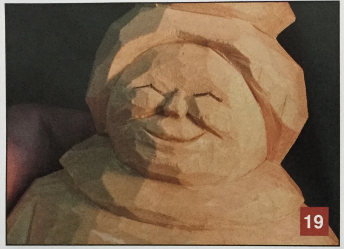
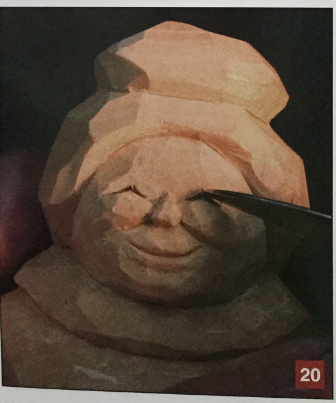
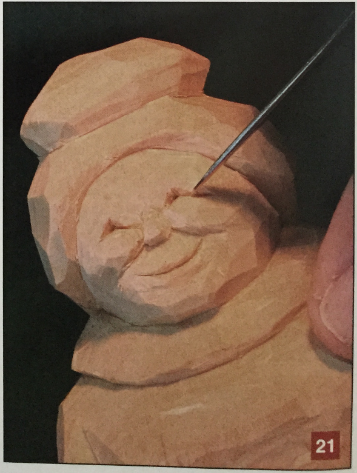
19-21. Back to the tops of the cheek peaks! Draw short lines down both sides of the cheek peaks, beginning at the center eye dot. Bury the tip of your knife perpendicular into the eye dot at an angle that lets you lean the knife backward until the blade reaches the end of each line. When it has, wiggle the thick edge of the blade that's still at the eye dot. This should widen each eye cut at the top of the cheek peak. This cut is done four times (twice for each eye). If the eyes look right to you here, skip to Step 22.
If they look too squinty, stay with me. Starting with the tip of the knife slightly above the eye dot, chop down so that your knife ends up at the bottom of one of the previous cuts. Swing the back of the knife around and repeat that cut, meeting one of those cuts on the other side of the same eye. These two cuts should free a small sliver of wood and widen the eye. Repeat for the other eye. This entire step is another good candidate for practice on a flat piece of scrap wood.
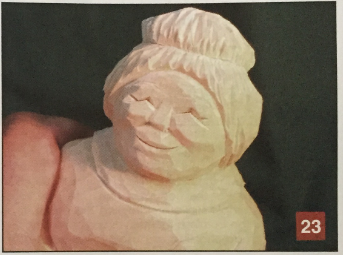
22. With the tip of your knife at the outside corner, make a small knick that extends down the cheek to the outside of the face. Without moving the knife tip, pull the heel of the tpe facet and swing to the side about 45 degrees. Make knife oU knick. Technically, these are crow’s-feet...I call them twinkle. If you repeat these cuts on a larger scale with the knife tip on the inside of Mrs. Claus’s elbow, you'll have the convincing sleeve wrinkles—flat-plane style.
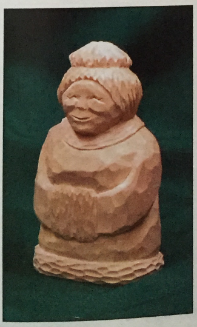
23. This photo shows the final texturing. I used a small gauge to make the overlapping scoop cuts for the fur trim and a small V-tool to create the staggered, curved cuts for the hair. Finally, I used a V-tool and very shallow cuts to make the eyebrows - notice that, overall, the ey,.ebrows are nicely arched and thin. This is your llast FVQ for this project.
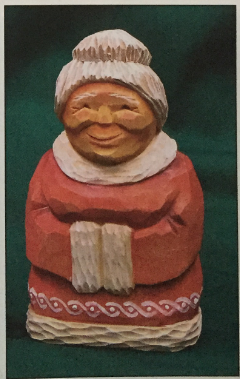
It you like the paint finish on my completed carving, it is done with transparent stains mixed from M/nwax Natural Stain (or you can use boiled linseed oil) and artists’ oil colors. Gleaned from several sources, I demonstrated this technique back in Issue #34 of Carving Magazine. A similar effect can be attained using watercolors or acrylics, but I would not mix the acrylics with water to get a colored stained; instead, I would use an “extender," which slows the drying process of acrylics. (Extender is sold at most art supply stores.) Acrylic colors tend to become flat and to lighten after they dry. A final coat of satin clear varnish will counteract this process.
Hey, I hope you enjoyed carving Mrs. Claus. Keep those edges keen and the chips piled high, and I hope to see you again on some future project.
