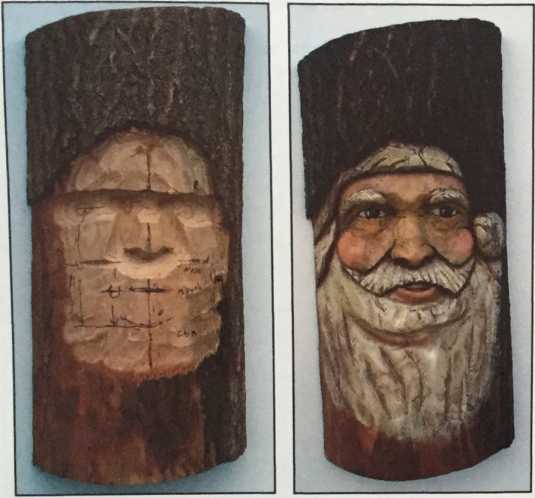
First, you need to pick out a log that will work for a wall hanging. This is a good project for using a hollow log that you may have hand, but it doesn't have to be hollow to work. Smaller logs can work just as well. I am using catalpa, but any wood that can endure the weather outside will do.
I prefer to have a project in an upright position while I am working on it so that I am seeing it as it will be seen by the viewer. Since these are large pieces and can be quite heavy, we will need to make a hanging bracket that will support the weight of each log and keep the log from moving too much as we carve it.
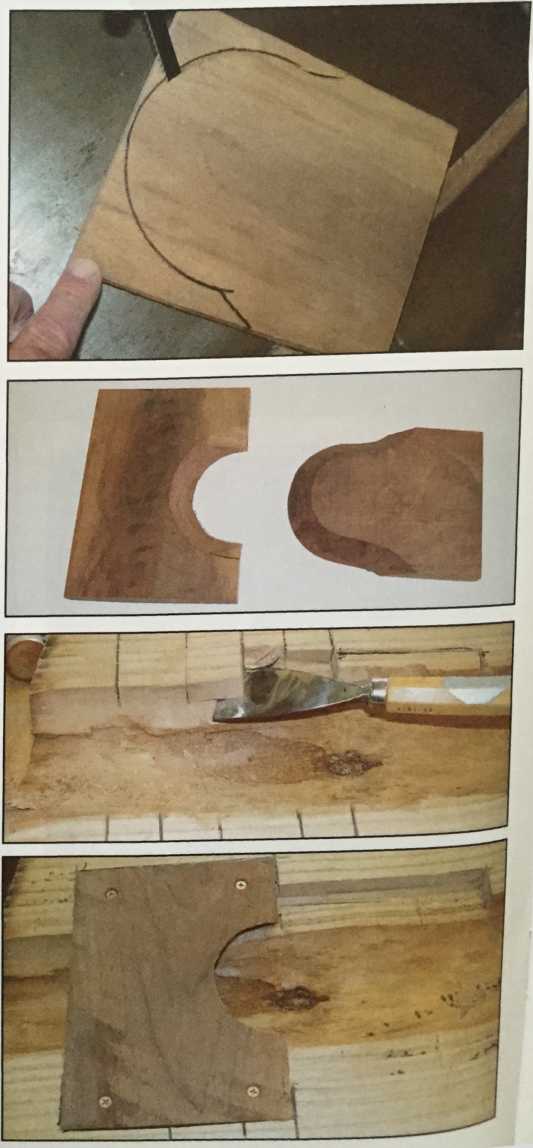
I designed a simple dovetail bracket that is recessed into the back of the log, which will work great for all our needs. For the bracket, use a hardwood that is strong and will not rot out if it is exposed to harsh weather conditions. Simply cut a semicircle at a 45-degree angle on the bandsaw and then saw a matching bracket. Create a recess in the back of the log for the bracket. Remember to hollow out a space that is tall enough to allow the hanger to slide in and out of the dovetail. Now that we can hang our log, we can start laying out the face.
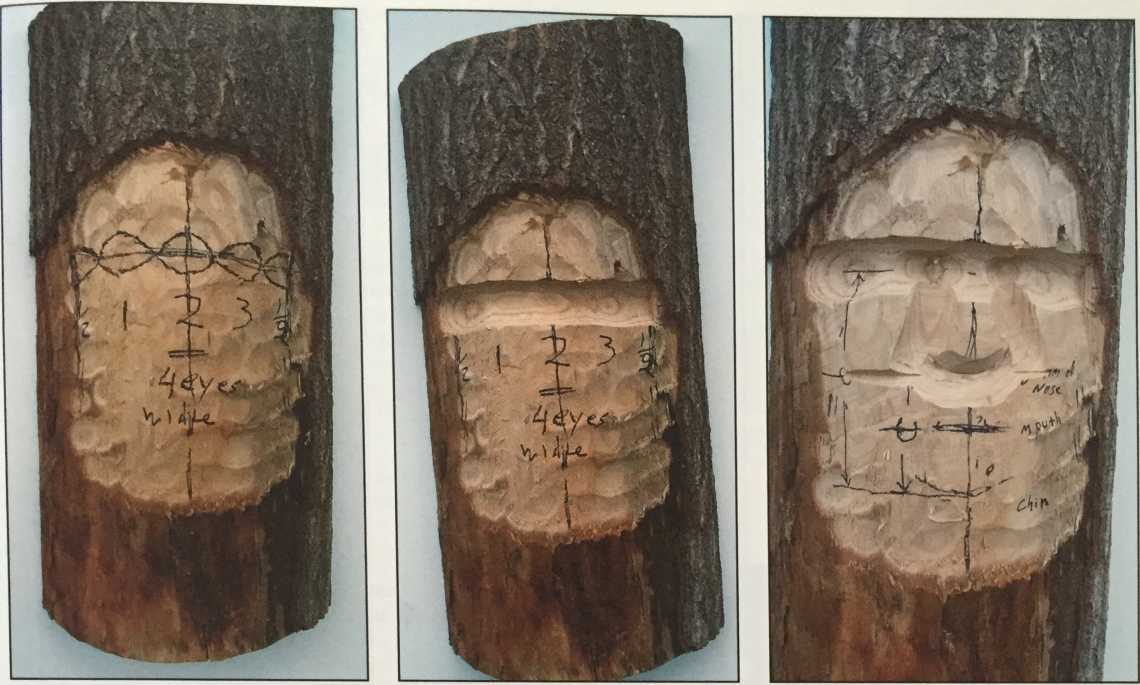
Start by drawing a line up and down the log. It doesn’t have to be in the center of the log; you can carve the face so that it is turned left or right if you wish. I create the face using a 4 eye-width pattern with a 1 eye-width in the center between the eyes and a 1/2 eye-width on the outside of each eye.
The two smaller logs that I'm carving for this article are 13" in diameter; therefore, I have room for a face that is around 10" wide. Dividing the face width by 4 gives a 2-1/2" eye-width; so, from the centerline, go over 1-1/4" each way to find the inside corner of each eye. You can then mark in the 2-1/2" width for the eye and that should leave you another 1-1/4" to the edge of the face. The bigger log has room for a 3" eye.
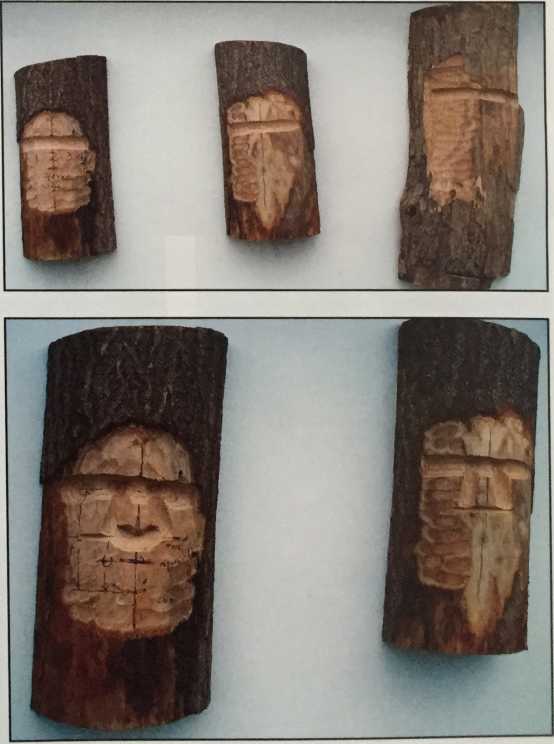
To determine the height of the face, multiply the width of the face by 1-1/2. Using this formula, the height for the 10" face-width is 15". The eyes will sit just above midway on the face.
Use a deep gouge to cut across the eye line to create a rough shape for the eye socket.
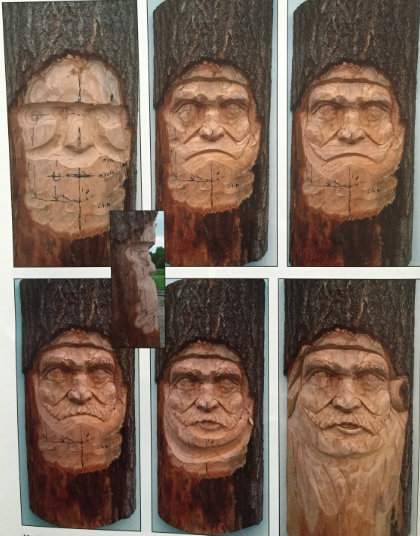
Mark the bottom of the nose with a V-tool about halfway between the eyes and the chin.
With a deep gouge, carve from the bottom of the nose up into the eye socket to create the basic shape of the nose.
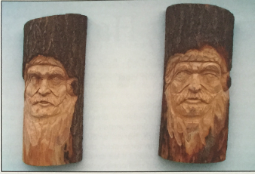
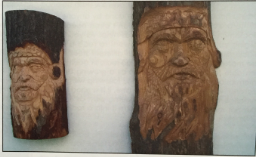
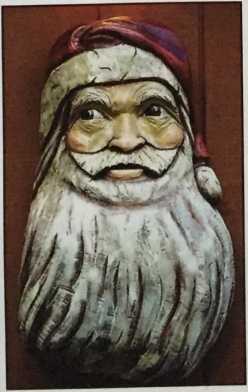
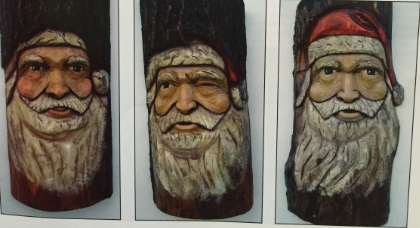
With the main features of the face roughed in, you can now go ahead and refine them to whichever way you like. Remember to keep the eyes rounded in every direction. The cheeks and the nose should slope back to form about a 90-degree angle. The mouth or bottom of the mustache is halfway between the bottom of the nose and the bottom of the chin. To show the chin under the beard, use a large gouge to cut under the chin line and round up the sides of the face. For the top of the head, you can carve a full hat or let it fade into the log.
I hope you find this helpful; if you have any questions, feel free to e-mail me through my website; jamesbarrwoodcarving.com.
