Practice basic carving techniques with this attractive project
Sunflowers are cheerful additions to any home.
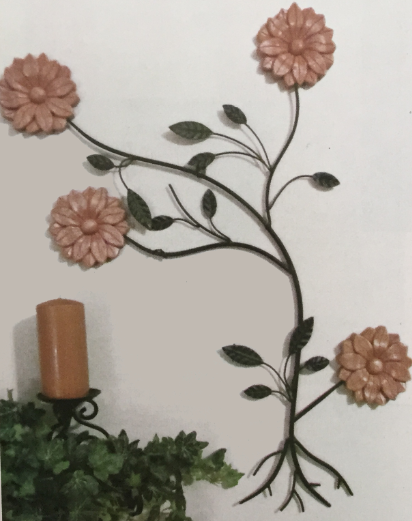
This simple flower can be displayed alone, used to accent a doorway or fireplace, or carved as part of a welcome sign. I carved four sunflowers from mahogany and added wrought-iron leaves and a shelf with greenery and a candle to create a beautiful wall design for my home. Whether you carve one sunflower or several, you’ll practice basic techniques and create a lovely project at the same time.
SUNFLOWER: CARVING THE CENTER
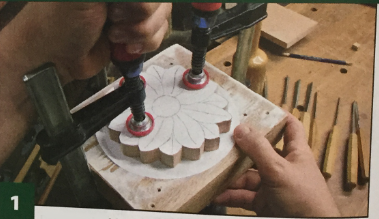
1. Prepare the blank. Attach a copy of the pattern to the blank using spray adhesive. Use a scroll saw with a #5 blade to cut along the outer line of the petals. Spread yellow wood glue on the back of the blank and on the front of a clamping block. Slip a piece of white copy paper between the blank and the block, and clamp it until the glue is dry. The paper will allow you to pry the pieces apart after carving.
2. Make a stop cut around the center circle. Clamp the block in a vise or attach It to a carving stand. Use a 1/2" (or 12mm) #6 gouge and a mallet to stab in along the center circle perpendicular to the blank. Overlap the cuts and make them about 1/8" (3mm) deep.

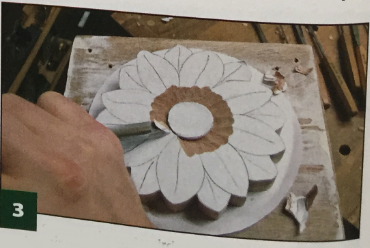
3. Separate the center circle from the petals. Move out about 3/4" (19mm) from the center circle and use the same gouge to relieve up to the stop cut around the circle. Repeat the stop cuts and relief cuts until the groove is about 1/2" (13mm) deep.
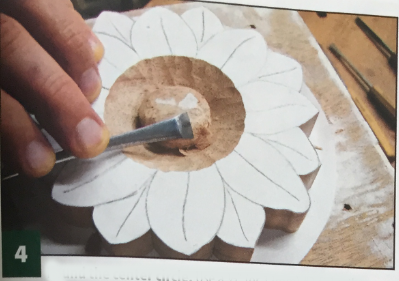
4. Round the center circle. Use a 1/2" (or 12mm) #3 fishtail gouge I to round the upper section of the center circle. Use a 1/2" (or 12mm) #5 fishtail gouge to round the sides of the circle. Shave off thin pieces of wood to make the center of the circle a nice round dome.
SUNFLOWER: SHAPING THE PETALS
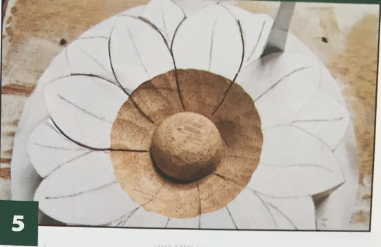
5. Make stop cuts around the petals. Redraw the petal lines in the carved area around the center circle. Match the profile of the gouge with the curve of the petals; I use 1/2" (or 12mm) #2, #3, and #5 gouges. Tap the gouge with a mallet to make stop cuts about 1/8' (3mm) deep around each petal.
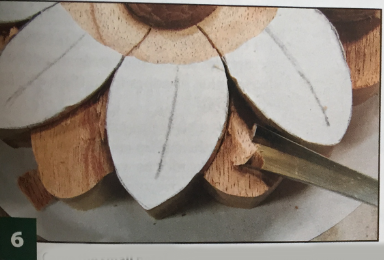
6. Carve the small petals. Use the 1/2" (or 12mm) #3 fishtail gouge to relieve up to the stop cuts on all of the eight small outer petals. Repeat the process until the smaller petals are 1/2" (13mm) deep at the inner point and 3/8" (10mm) at the edge of the petal. Use a 1/8" (3mm) #3 gouge to carve the inner point.
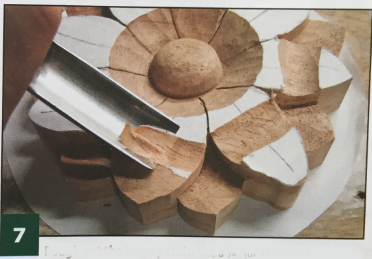
7. Rough out the large petals. Use a 3/4" (or 18 mm) #8 gougeto carve a groove across the top face of each large petal. Carve from one side to the other, making several passes to reach the desired depth. Carve the groove deeper, more shallow, or in a different position on each petal for a different look.
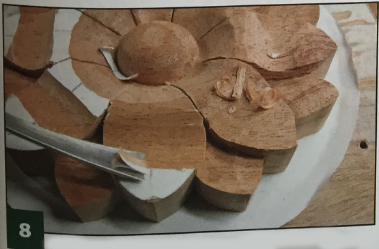
8. Refine the petals. Use the 1/2" (or 12mm) #5 fishtail gouge to remove the sharp edges from the groove and blend the petal from the center to the outer tip. Shave off small amounts of wood and work your way around the flower to smooth all eight petals.
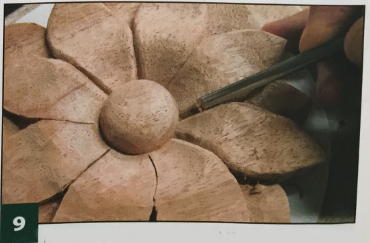
9. Round the petals. Use a 3/16" (5mm) #3 gouge to separate each petal. Use the gouge upside down to round the edges of the large and small petals. Be careful not to cut into the center of the sunflower.
SUNFLOWER: FINISHING THE PROJECT
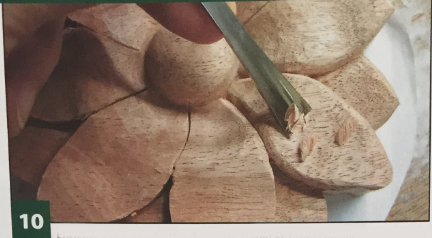
10. Finishing the petals. Use the 1/2' (or 12mm) #5 fishtail gouge to smooth and flatten from the center to the tips of the petals. Remove any gouge marks. Use a 1/2' (or 12mm) #5 gouge to carve a slightly concave profile into the petals.
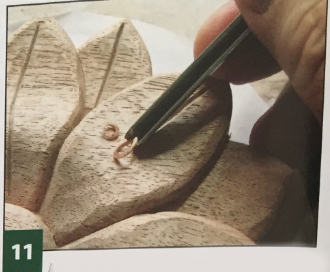
11. Add the veins. Use a 1/8 (3 mm) 45° V-tool to carve the veins. Start at the tip of each petal and follow the curving shape toward the center.
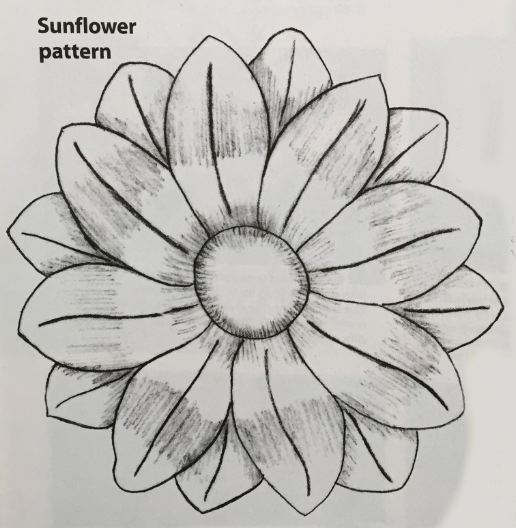
Sunflower pattern
Finishing the Sunflower
Use a flat screwdriver, spatula, or scraper to carefully pry the sunflower off the clamping block. Use a cabinet scraper or sandpaper to remove the excess glue or paper from the back of the flower.
I use a clear pre-catalyzed lacquer to finish the sunflower, but an oil finish looks nice as well. Allow the finish to dry overnight, and then attach a hanger to the back. I use Velcro because it is easy to position.
MATERIALS
- Hardwood, such as mahogany, 3/4" (19mm) thick: 5 1/4" x 5 1/4" (133mm x 133mm)
- Scrap wood for clamping block
- Finish, such as pre-cata-iyzed lacquer
- Velcro or hanger of choice
- Sandpaper
- Yellow wood glue
- Copy paper
- Spray adhesive
- Pencil
TOOLS
- Scroll saw with blades: #5 skip-tooth
- #2 gouge: 1/2 (or 12mm)
- #3 gouges: 1/8" (3mm),
- 3/16" (5mm), 1/2' (or 12mm), 1/2' (or 12mm) fishtail
- #5 gouges: 1/2" (or 12mm), 1/2" (or 12mm) fishtail
- #6 gouge: 1/2' (or 12mm)
- #8 gouge: 3/4" (or 18mm)
- 45° V-tool: 1/8 (3mm)
- Cabinet scraper
- Mallet
- Flat screwdriver or spatula
- Glue brush
The author used these products for the project. Substitute your choice of brands» tools, and materials os desired.
By Dennis Zongker
Dennis Zongker is co-owner ofZongkers Custom Furniture in Omaha, Neb. His first book, Wooden Boxes: Skill Building Techniques for Seven Unique Projects, will be published by Taunton Press in August 2013.
