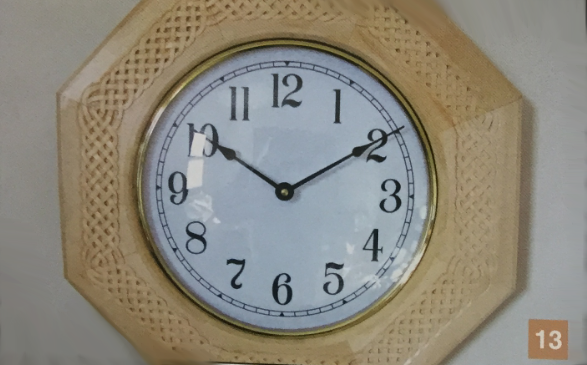
I have made a few very simple Celtic knots before and used them as ornamentation on woodwork. I usually placed them in the center of a panel or on a clock face. A commission for a wedding gift to an Irish couple gave me an excuse to take on a larger and more involved Celtic knot pattern. It is used as a border on the frame of a clock.

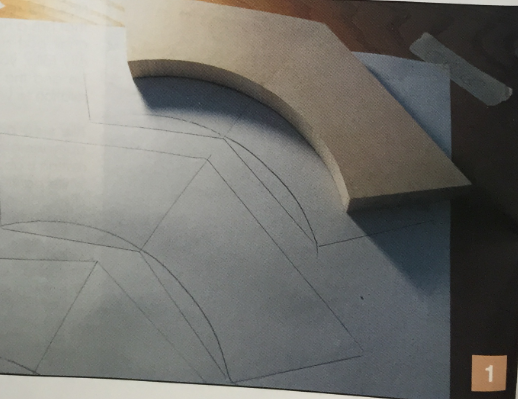
First, draw the knot. I trace a section of my clock frame onto a sheet of paper. I trace several sections, just in case I need to start over with a fresh outline.
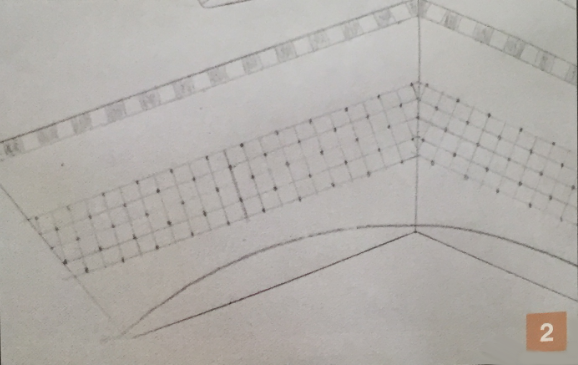
Construct a grid pattern, which will be used to "build" the knot. (The Checkerboard pattern at the edge was he pattern for a dentil edge, which I entually decided against because I thought that if made the overa11 design look too busy.) I lay out the grid parallel o the outside edges instead of doing a round band. This adds visual interest by introducing some variance at each of the eight joints, but still keeps the symbolism of an unbroken band. Notice that the important parts of this grid are the intersections—the alternating ones marked with dots. These dots will be used to designate cells (each cell is represented by a box with four dots).
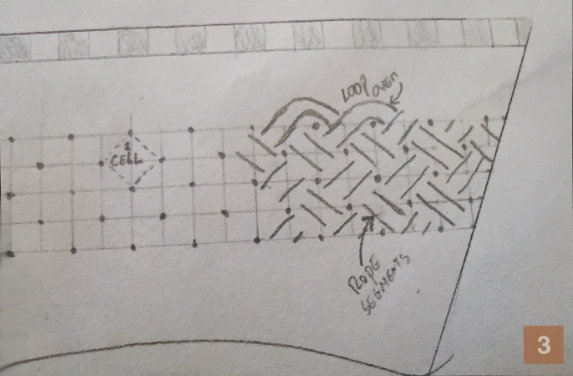
Next, I sketch in the sections of the "rope" that make up the knot, drawing parallel line segments diagonally throughout the grid and making sure to alternate directions at every cell. I continue this until the entire grid is filled, completing the open ends at the edges by looping them over to connect with the next open edge. You need at least three rows of dots to make a band, and you can make the band wider by simply adding extra rows.
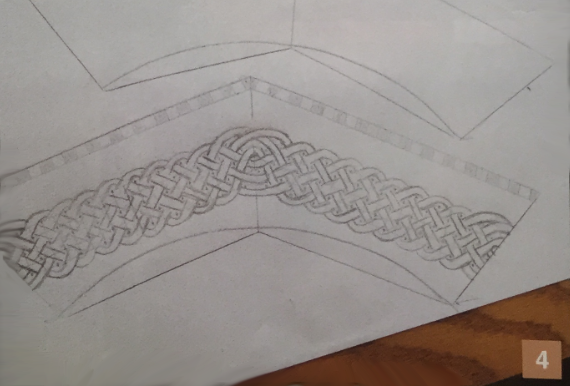
Since the mitered corner means that he grid is a little longer at the outside, the pattern gets disrupted at the joints, so I move back a cell. Then, after much fiddling around and erasing, I sketch in a transition pattern that allows the knot to continue flowing around the corner while maintaining the strict “over, under, over, under” sequence.
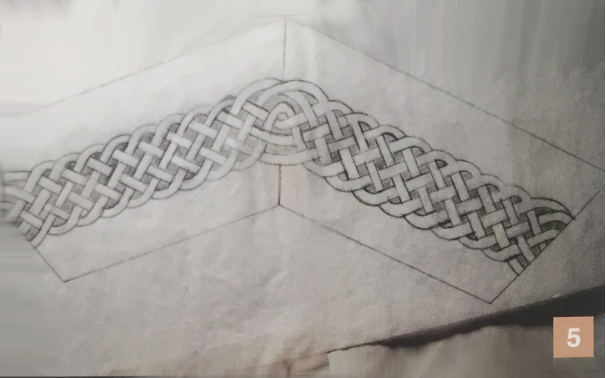
I draw the design on tracing paper, and use a ruler and a French curve to clean up my rough sketch.
I copy the design to make a working pattern, and then I transfer the pattern to my wooden octagon using carbon paper. The darkened areas are the first areas to be removed.
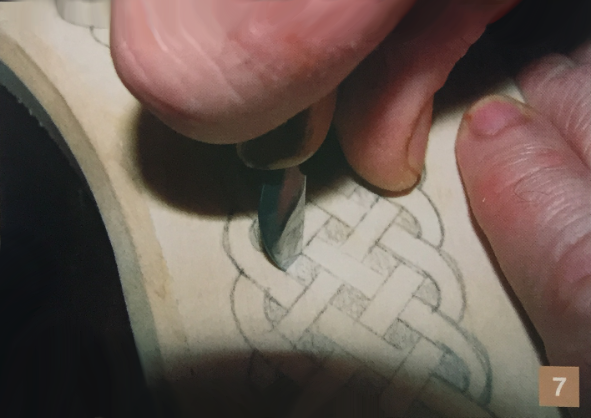
Since I own only a small selection of carving tools, I didn’t have gouges that matched the curves on my pattern very well. So I turned to my trusty chip carving knife to do the outlining for me. I start with the myriad of squares that fill the pattern and try to cut perpendicular to the surface instead of the angled cut that is normally used in chip carving. (Note: After making this clock, I immediately started on a conventional chip carving and it took a few minutes for my hand to relearn the proper angle.)
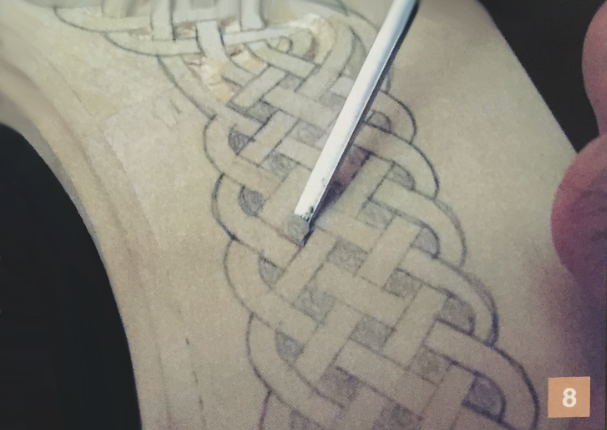
After I outline the squares, I use the smallest, flattest gouge that I have (#3-3mm) to pop out the chips.
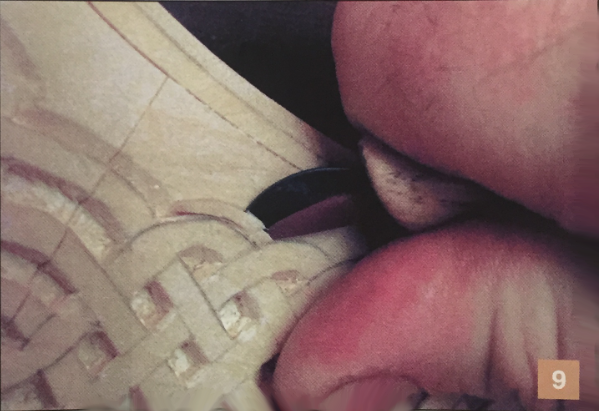
On the outside edge, I angle my cut toward the pattern to get my chip.
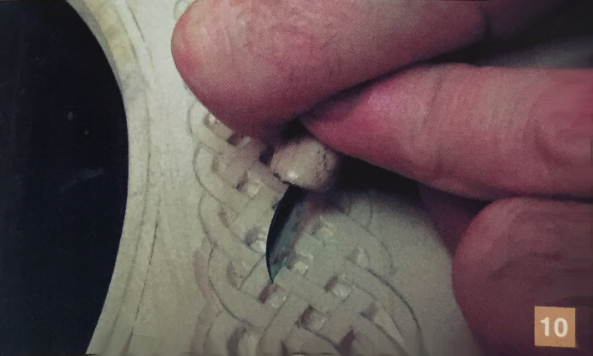
Back to the mechanics of the process: l return to the knife to cut the points of the knot and follow with a flat chisel (#10) to lower each descending "rope" as it passes under the crossing one.
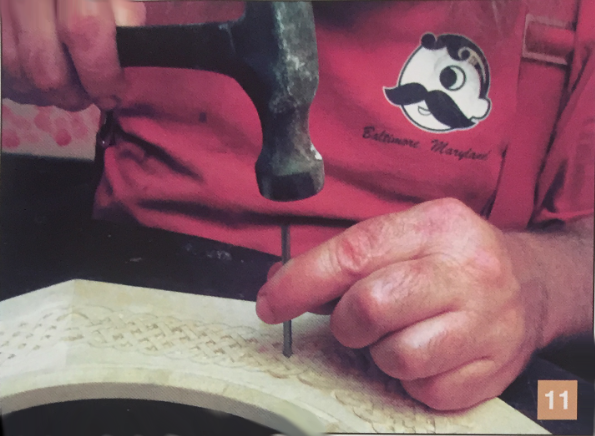
When you have completed all the crossover points, the pattern is essentially finished. However, there is still much cleaning up to do. First, I use some small background punches to clean up the small squares between the crossover points. You can make a background punch with a tenpenny framing nail and a few minutes at a grinder.
I follow up with riffler files, sandpaper, and an occasional return to my carving knife. I go over the entire project—I clean up edges that are too ragged, fix the odd crossover where I missed a cut, etc.
When I'm finally satisfied with the carving, I blow the dust off with an air hose, apply a few coats of polyurethane spray finish, and add my clock parts to complete the project.

I debated with myself about whether I should make a straight border or a more tightly drawn one, but eventually went with just "eyeballing it." With a strong geometric design, such as a snowflake (see my last two articles in this magazine), I’m usually much more strict about precision. Of course, this pattern is also geometric—it even starts out with a grid pattern, but to me it also represents a flowing, somewhat organic aesthetic. (I think of woven threads and braided ropes.) As a result, I feel less constrained by precision, and allow the thickness of the lines and the spacing to vary a bit. It’s a balancing act. I want to retain enough precision for the regular repeating pattern to keep its power, while preserving a flowing, organic look.

A large Celtic knot can be an intimidating project to take on. Just remember that it can be broken down into a series of simple steps that require very few tools. For this reason, I think that this Celtic Knot is a wonderful project for a beginning to intermediate carver, which is what I consider myself to be. The level of complexity and the precision that you wish to achieve depend on the amount of time you have to spend on the project.
By Roy Gibson
Growing up in Baltimore. Maryland. Roy Gibson learned basic woodworking as he watched his father in his workshop.
Roy still uses many of his father’s tools in his woodworking projects. For years. Roy worked as an electronics technician in Silicon Valley. After a stint in the Peace Corps, he began woodworking again and has continued for over twenty years. Currently, Roy and his wife, Patti, operate Laughing Coyote Woodworks in Stamford. Vermont.
