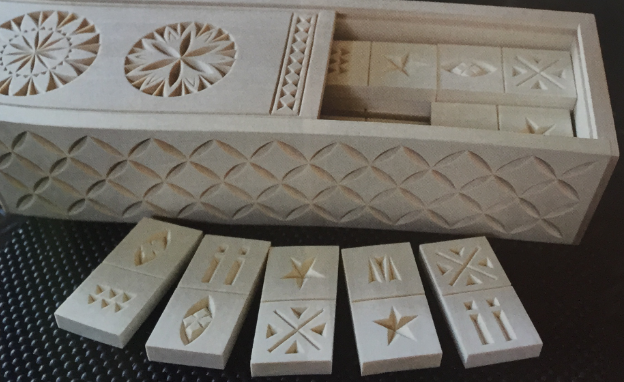
Playing card and board games are activities that my grown children still look forward to when our family is all together. Loud and raucous laughter is heard late into the night as we play our games. In this tutorial, we’re going to explore how to combine the art of chip carving with game playing as I show you how to chip-carve a one-of-a-kind domino set.
- Always prepare your wood before you begin chip carving. All 28 tiles fit nicely on three 3/8” x 6" x 12" basswood boards. Sand both sides smooth using 220-grit sandpaper. If you will be carving the sliding-lid box to store your dominoes, now is a good time to sand the box as well. Vacuum off the dust and apply the pattern to each board using either My Chip Carving Pattern Transfer Tool or graphite transfer paper. I use the Pattern Transfer Tool for all my pattern applications because it is fast and accurate. The quicker the pattern is on the wood, the sooner I can start carving! Touch up the edge on each of your chip carving knives with a few passes on your strop or white ceramic stone, and you’re ready to begin.
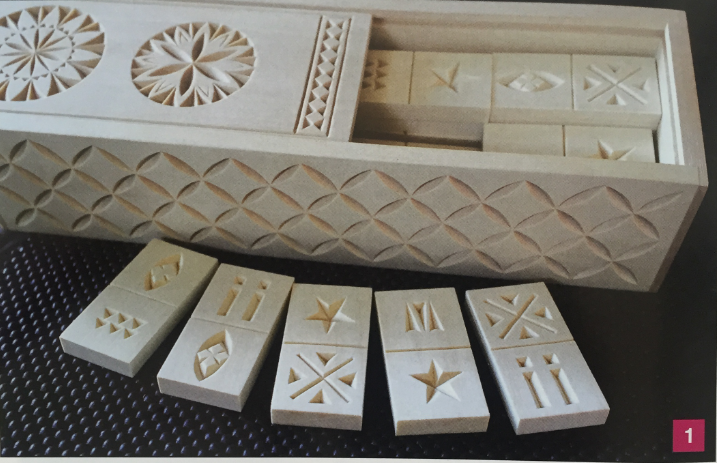
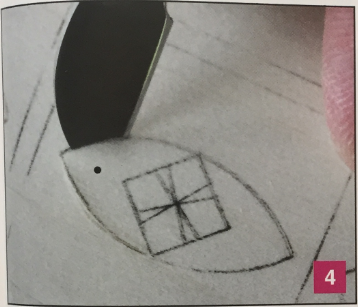
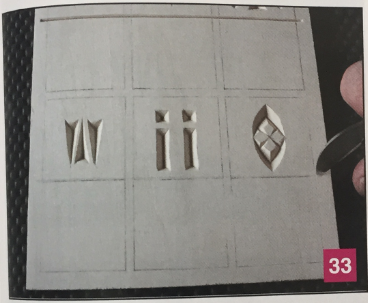
- This design represents the number one on our set of domino tiles.
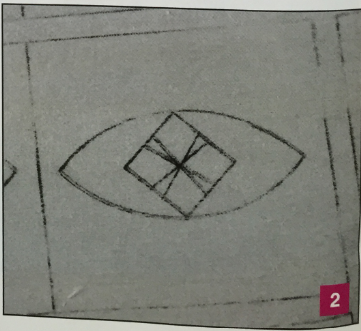
- 3. I'm using a cutting knife to carve this pattern. Lock your thumb against the handle of the knife to form a consistent cutting angle. Begin your cut in the center of the shape and make a slicing cut from shallow to deep. The deepest point of this chip is indicated by the black dot. The point of your knife should reach this dot on each cut.
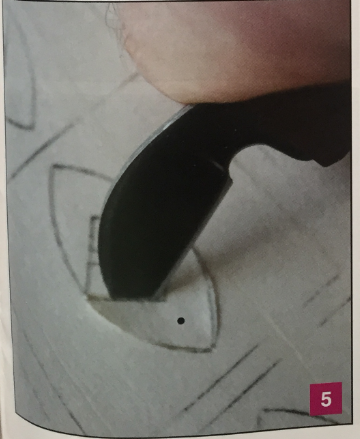
- Plunge the tip of your knife straight down toward the dot to begin your second cut. Draw the knife out of the wood as you continue your cut to the center of the shape.
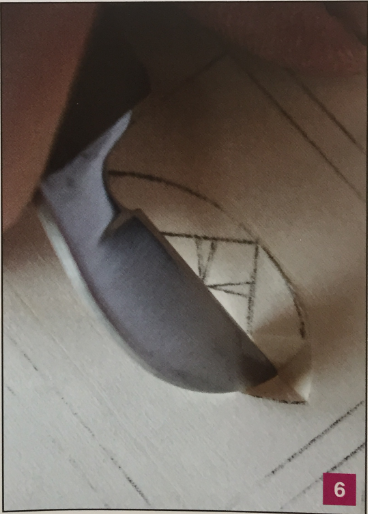
- Begin your third cut where you left off on your second cut. (Generally speaking, in chip carving, we tend to take the next cut from the point where we left off on our previous cut.) Cut from shallow to deep until part of the chip comes out. Take care not to cut too far and risk making a cut on the inner sidewall of the chip. If part of the chip does not come out on this cut, go back over your first and second cuts, slightly increasing the depth until the chip comes out.
- To complete this side of the pattern, place the point of your knife in the very bottom of the chip and draw it out to the point where you began your first cut. Repeat these four cuts on the other half of the pattern.
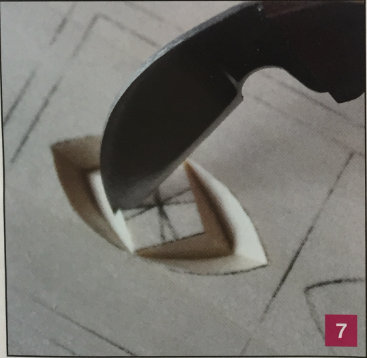
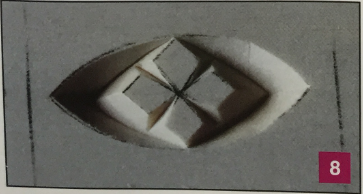
- Soften the top of the square with four flip-flop cuts. All cuts start with the point of the knife inside the chips that you just removed. Make the first slicing cut to the center of the square. Flip your knife and place your thumb on the spline of the blade to make the second cut, and remove the thin chip.
- Your finished number one should look like this. Go ahead now and carve the other number ones on your domino tiles.
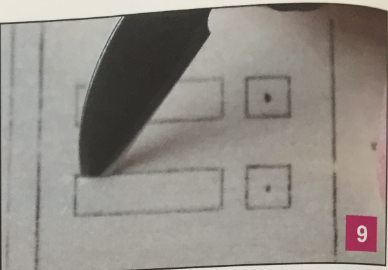
- A series of straight cuts are needed to chip-carve the number two pattern. I'm using a modified knife for these cuts. This knife is pointier, making it easier to reach the bottom of a chip, especially on the small squares. Make the two long and the two short with-the-grain cuts first.
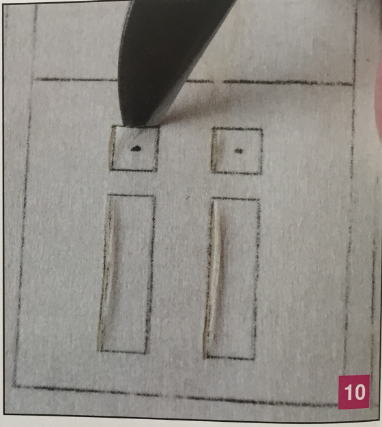
- Pick up where you left off to complete the four cross-grain cuts.
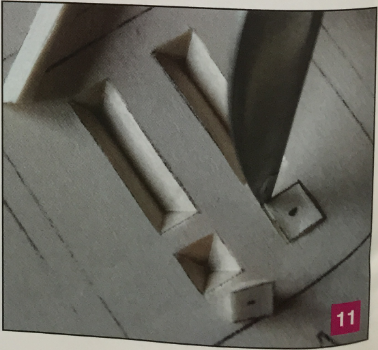
- Four more with-the-grain cuts followed by four crossgrain cuts will remove the chips. If the chips do not come out on your last cut, don't pry them out! Most likely, you’ll need a bit more depth on your cross-grain cuts to remove the chip.
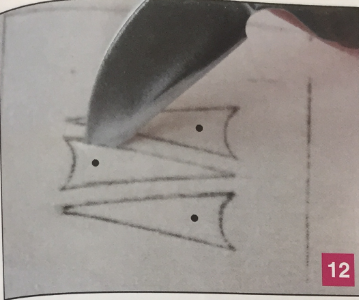
- The number three tile pattern is made with three cuts using the modified knife. Visualize the point o Уоиг knife reaching below the surface of the wood where the black dot is. Plunge the point of the knife toward the dot to begin this cut and draw it out at the end of the line.
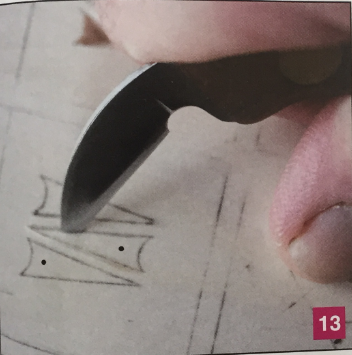
- Using the same grip on your knife, reverse this cut on the other side of the chip.
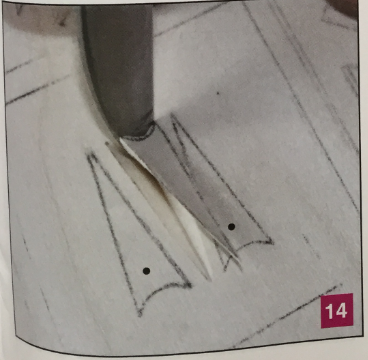
- To remove the chip, plunge the tip of the knife toward the dot and make a curved sweeping cut across the top. Did it come out? If not, try going over your third cut again.
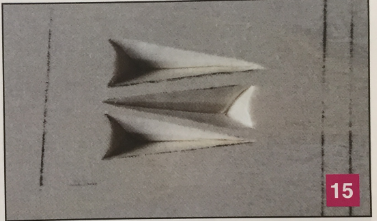
- On the two identical chips on each side, make your first cut away from the center chip.
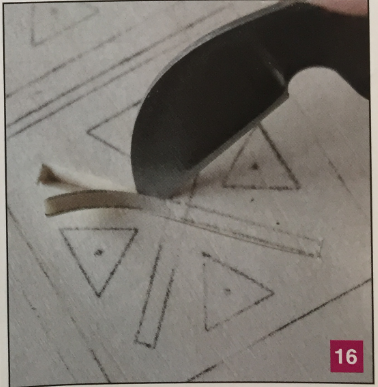
- To chip-carve the number four tile, we will start by carving the thin crossing lines forming the “X." Pick one ine to start on and make light cuts with your cuttinq knife to remove the chip.
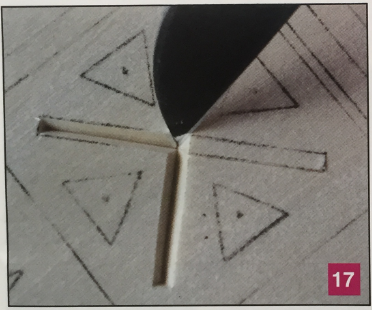
- Repeat this series of cuts to remove the other line, -utting lightly will help avoid chipout in the center of these intersecting lines.
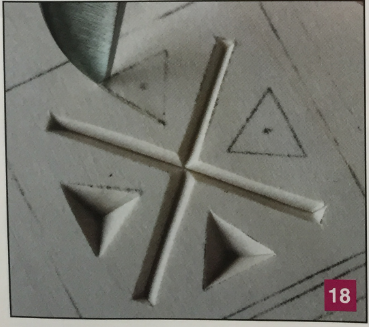
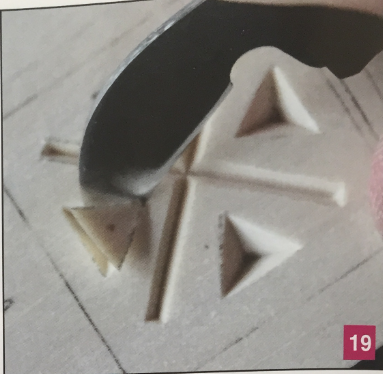
- Four three-corner chips will complete this part of the tile. Again, remind yourself to visualize the point of your knife reaching the dot on each cut. I like to make my first cut on each three-corner chip at the point in the center of the pattern.
- Continue your next cut where you left off and work your way around the chip.
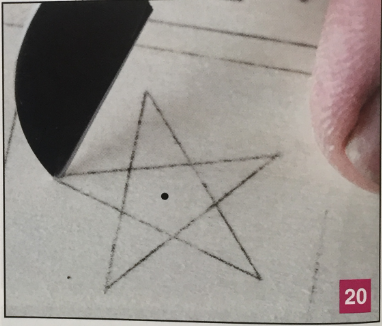
- The number five tile is represented by a five-point star, which is carved with your cutting knife. Stars are fun to chip-carve and yield striking results when all the cuts meet in the center. Your first cut will be a shallow cut that is started at one of the points.
- Slice down to the deepest part of the chip in the center and draw the knife out of the wood at the opposite point.
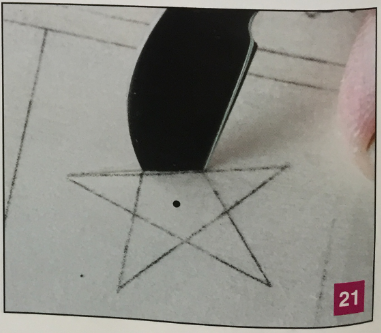
- Start your next cut at the point where you left off on your previous cut. This cut is identical to the first cut that you made: shallow to deep to shallow.
- Your third cut begins at the point where you left off and is the same cut style that you just made. Part of the star will come out on this cut. If it doesn't come out, go back over your cross-grain cut, slightly increasing the depth of your cut.
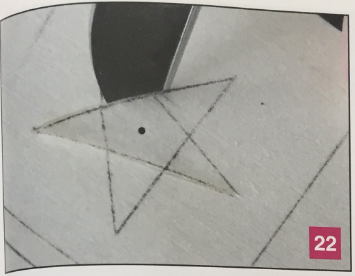
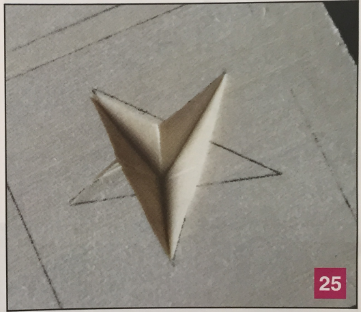
- These next three cuts really make the star jump out of the wood. All cuts are made from the center to the point of the star. Place your thumb on the spline of the blade for this cut.
- Draw your knife out toward the point to remove the chip. Try to maintain a consistent angle with your knife as you hold it in this position.
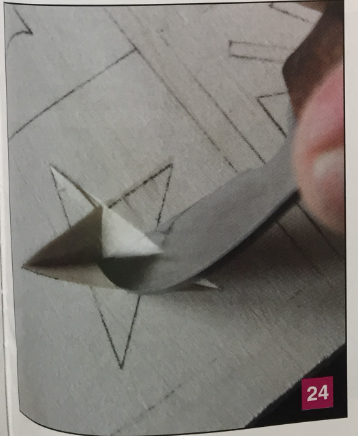
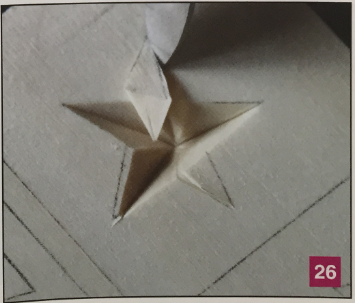
- One point of the star will require two cuts, both starting at the center. Here's what it will look like.
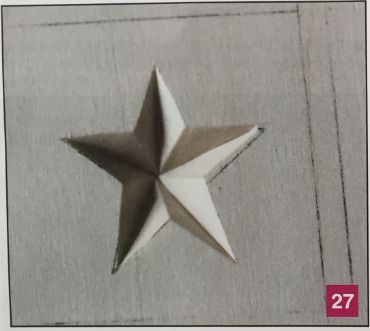
- Take one more cut from the center and your five-point star is done!
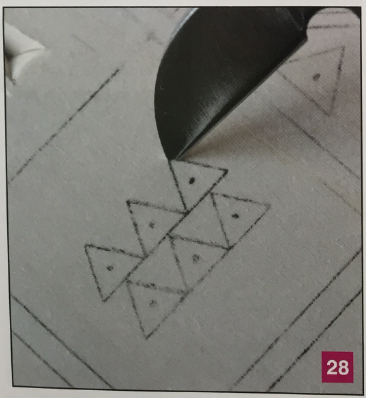
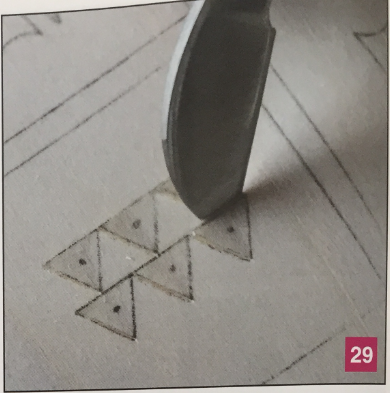
- The number six tile is comprised of six three-corner chips, which are made with your cutting knife. Making the same cut on each of the three-corner chips will lead to efficient carving and consistent angles! Start at the peak of each triangle with a plunging cut. As a right-hander, I’ll carve from right to left, which ensures that each cut will be away from the previous cut.
- Make your second cut on each triangle, one after the other.
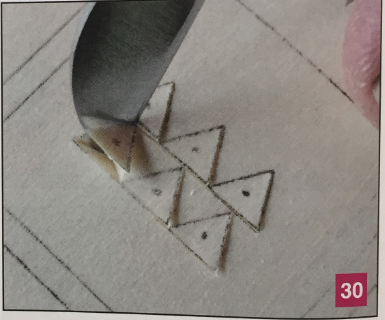
- Time for your final cut.
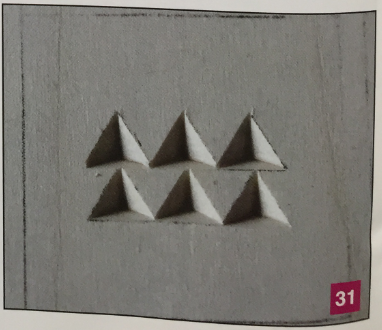
- It will remove all six three-corner chips!
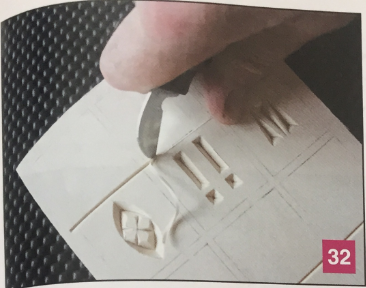
- Don’t forget to carve the lines separating the tiles in half BEFORE you cut out the individual tiles. It’s a lot easier to carve these lines now.
- Cut from one edge of the board to the other; be careful as you reach the end of your board so that you don't slip and cut yourself.

Chip-carved lines are done freehand—without a straightedge. With practice, your lines will be so straight that people will ask you how you did it. That’s when you know you're doing well!
Cut the shapes apart, sand the edges, remove any leftover pattern lines, and apply a finish of your choice. The finish shown on my domino set and sliding-lid box is my quick and easy finish: one coat of sanding sealer, followed by three coats of satin lacquer (spray-on). Online lessons demonstrating this finishing technique and other finishing techniques are available to you with a My Chip Carving Platinum Membership (see details below).
Combine these dominoes with a chip-carved storage box, and you'll have a unique domino set that will be enjoyed and envied during game night!
by Marty Leenhouts and Bethany Leenhouts Maxwell
