Supplies
- Basswood, 2" wide x 2" deep x 3" tall
- Bench knife
- Briwax (clear) and shoe-shine brush (used for buffing)
- Drill press
- Forstner Bit (1-1/4")
- Gouges/veiners (#9-3mm, #9-16mm, and #1 l-3mm)
- Paintbrushes (assorted)
- Soft cloth
- V-tool
Paints
(DecoArt) Americana Acrylic Paint: Shading Flesh and Snow White. (Delta) Ceramcoat Acrylic Paint: Light Ivory. (Plaid) Apple Barrel Acrylic Paint: Black, Burgundy, Cardinal Crimson, Flesh, Mossy Green, and Navy Blue. (Plaid) FolkArt Extreme Glitter: Hologram.
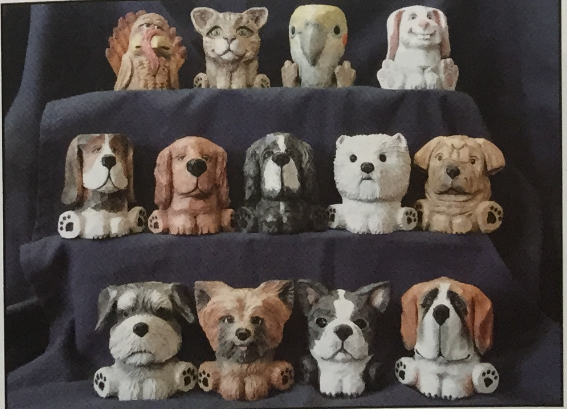
I panicked when I was asked to teach a one-day seminar. I had never finished a carving in any class that I had enrolled in, so what could I possibly teach and complete in a single day? Since my favorite subjects are animals, especially dogs, I came up with a group of simple “critters" that can be carved from 2" x 2" x 3" pieces of basswood. They are fun, easy, and relatively quick to carve. All (except the birds) are sitting with their back feet forward and their front paws in front of them.
The critters can be carved from solid blocks, or blocks that have been drilled to be either bottle toppers or toothpick holders. They make excellent gifts that people treasure—especially "critter” people.
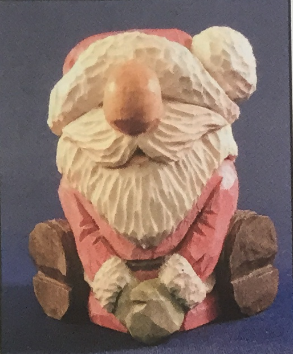
One year, I needed a Christmas gift...fast. Since I didn't have a lot of time, I created a Santa following the same simple design rules that I used when I carved the critters.
Carving
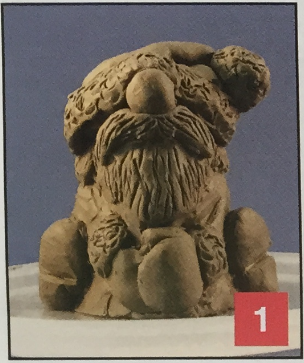
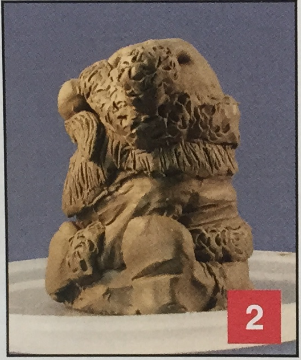
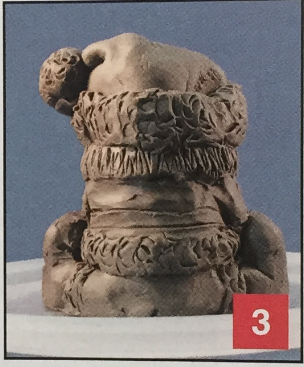
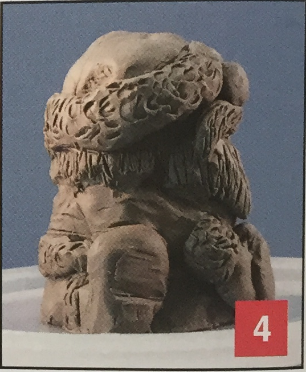
1-4. I find it easier to begin with a clay “go-by.” This way, “kinks" can be worked out before any cuts are made in the wood. The clay model serves as a visual sample for all the sides.
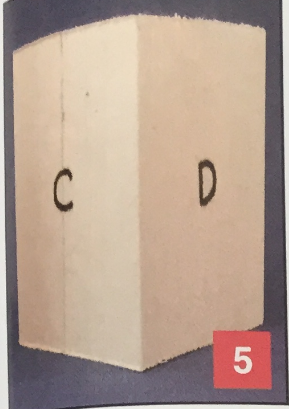
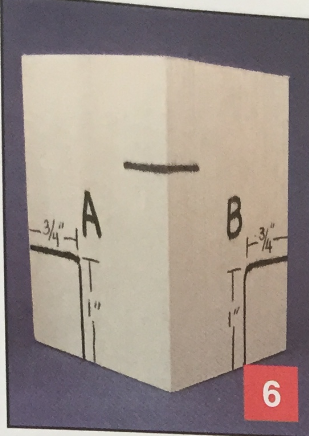
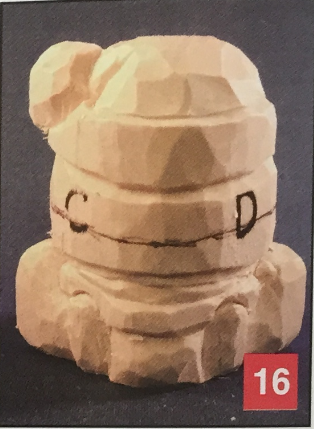
5 & 6. Begin with a 2" x 2" x 3" piece of basswood. Choose a corner for the nose, and with the corner facing forward, label the plane on the left A. Rotate the block clockwise; label the next plane B, then plane C and, lastly, plane D. Draw lines 2" from the bottom of the corner of plane A & B—this will be the bottom of Santa's nose. Draw one 3/4" wide x 1" tall rectangle on the lower left edge of plane A and one on the lower right edge of plane B. These areas are the soles of Santa's boots.
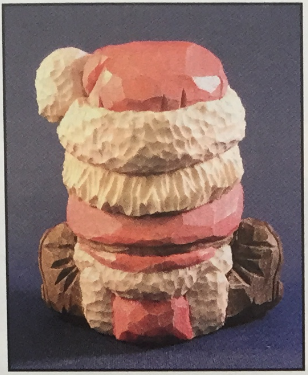
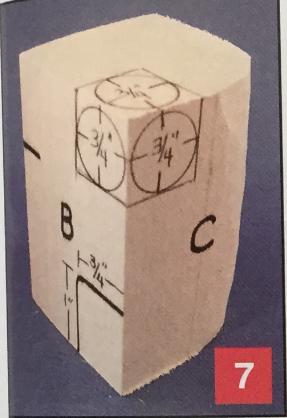
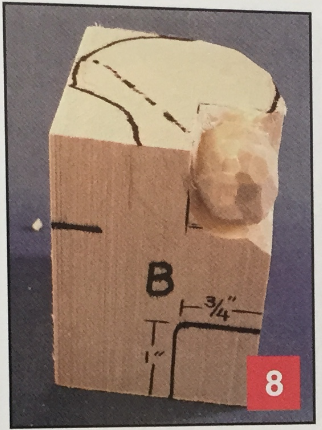
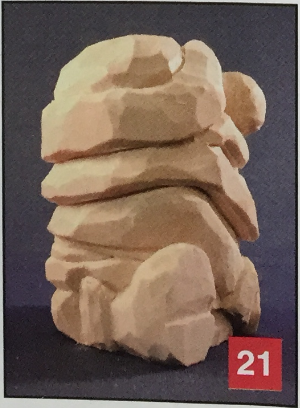
7 & 8. With your bench knife, begin carving by rounding off the corner where planes C & D connect. This is the back side of Santa and the only corner that is removed in the roughing-out stage. (The remaining corners will contain the tassel on the hat, the boots, and Santa's nose.) On the top of the block, draw a 3/4" box for the tassel at the corner of В & C. Draw a 3/4" box on the top right corner of B and on the top left corner of C. Draw circles in all the boxes. V-tool the tassel from the top and sides, and shape the tassel into a ball (the diameter should be approximately 3/4"). Sketch in the diameter of the hat, allowing for the fringe to sit on the top of Santa’s nose.
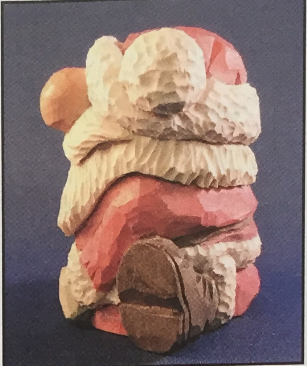
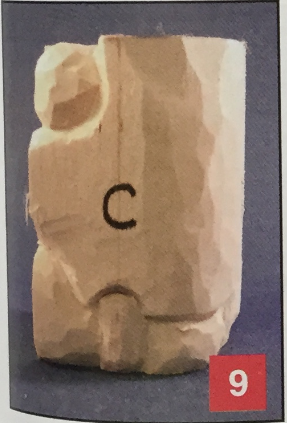
9 & 10. Draw in Santa's boots and pants with the fringe on the back panels (C & D). His boots are 1" long and 3/4" tall (the toes begin at the 1/2" mark); the fringe is 5/8" wide and 1/2" tall; his pants are 1/2". V-tool these lines to begin shaping the boots and pants.
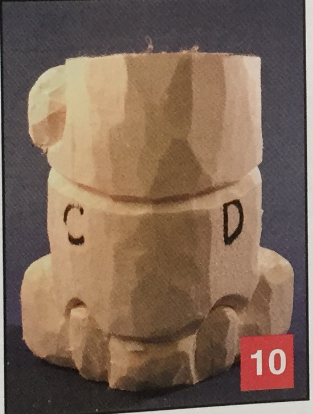
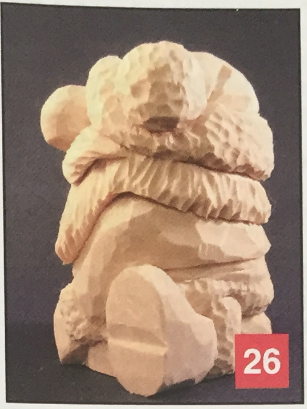
Round the corners of В & C and D & A above the boots. Once the back side is rounded, make a mark 1-3/4" from the bottom for the base of the fringe on the hat. Make another mark 2" from the bottom on the corner of D & A and В & C. Connect the marks by drawing a line for the bottom of the fringe. Carve along the line with a V-tool. This gives a reference point to begin carving the hat.
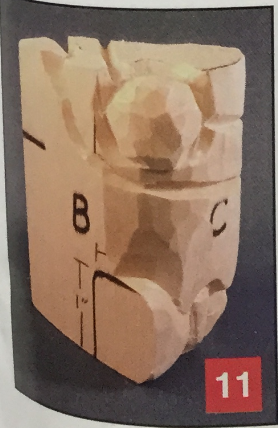
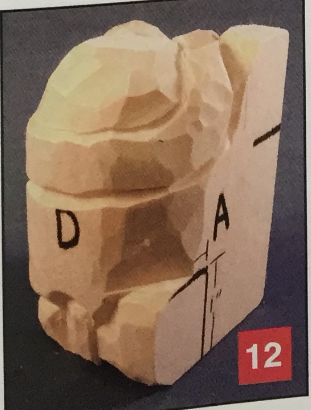
11 & 12. Round the hat down to the V-tooled cut on the opposite corner (D & A) from the tassel. On Santa’s back, draw a line about 1/2" above the V-tooled line. This will be the top of the fringe. V-tool this line and begin shaping the hat—remember to curve the fringe upward in the front to go over Santa’s nose.
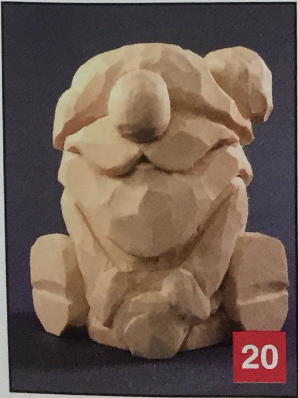
Samples of Sandy’s “Critters"
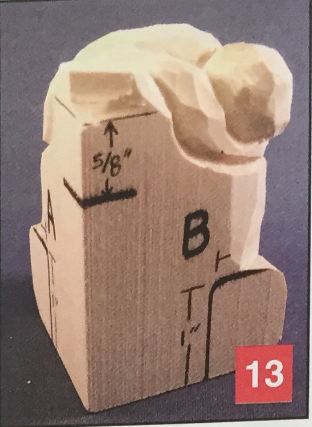
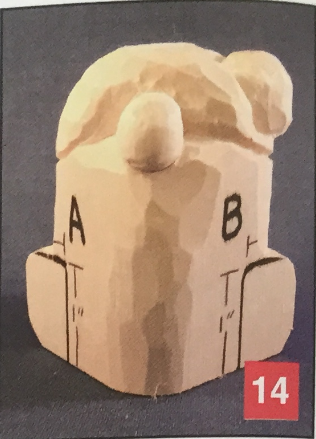
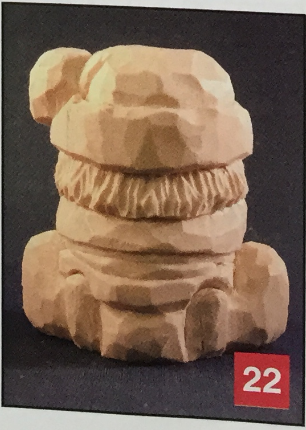
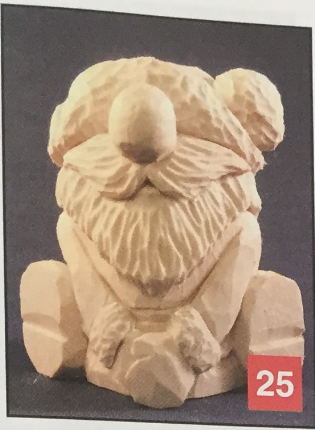
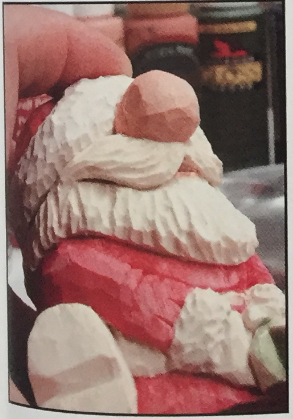
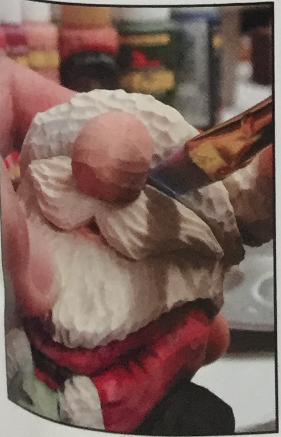
13 & 14. Begin shaping Santa’s nose by carving a 5/8" ball above the nose line that was drawn in Steps 5 & 6.1 use a #9-16mm gouge to round the nose. Round the front of Santa from the base of the nose down to the chin to begin preparing for the beard and the arms. Continue carving the hat and the fringe until they are shaped to your liking.
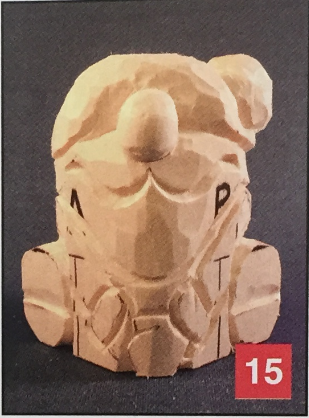
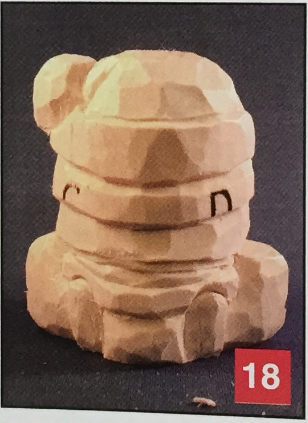
15 & 16. Draw in the soles of the boots on planes A & B. V-tool the lines to begin shaping Santa's soles. Round off the sides above the boots and carve the sides above the boots to the bottom of the fringe. Draw in the beard, mustache, and hair, and the arms with the fringe and mittens. On the back side, connect the hairline with the beard, carving the hair 3/8" below the fringe. Draw in the belt and the top of the fringe on Santa's jacket. V-tool all the lines.
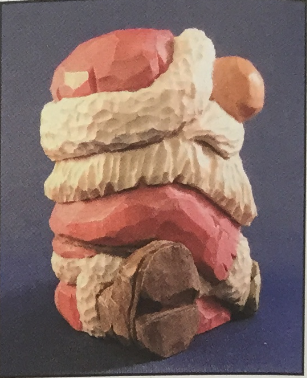
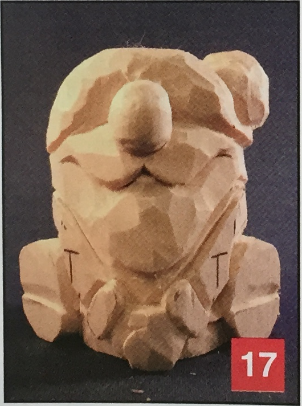
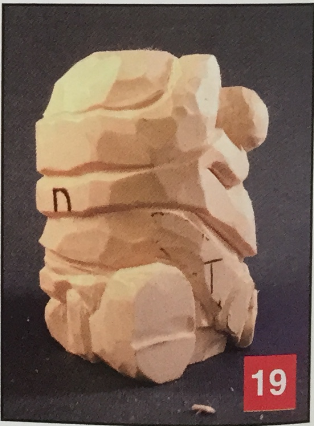
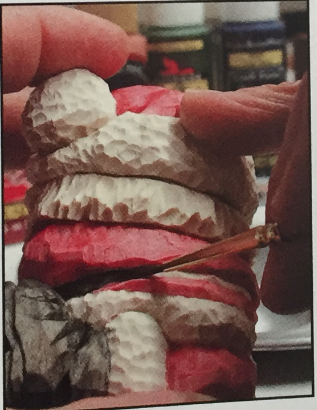
17-19. Shape the mustache, making sure that the ends of the mustache are around the nose and over the beard. Carve the arms so that the mittens are crossed. Round the sleeves and the fringe just above the mittens. Shape the boots. Carve in the belt above the fringe on the jacket. Note that as the fringe and belt wrap around Santa's waist, they pass under the toes of his boots.
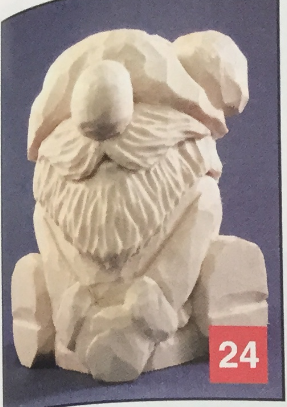
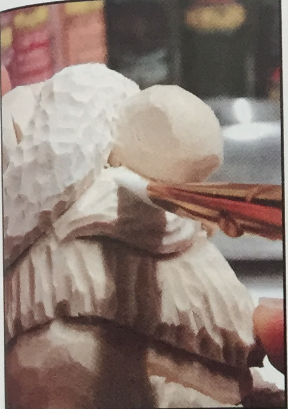
20-27. When all the attributes are carved to your liking, use a #1 l-3mm gouge/veiner to chisel in Santa's mustache, beard, and hair. Use a #9-3mm gouge to detail the fringe on the tassel, hat brim, sleeves, base of the jacket, and each pant cuff. Cut in wrinkles on the sleeves at the elbows and on the boots around the ankles. Using a V-tool, carve in the soles and heels of the boots. Clean up the "fuzzies” and Santa is ready to paint.


Painting
I use acrylics to paint Santa. Since it is easier to correct mistakes by beginning with the lighter colors, I begin painting the fringe on the sleeves, the bottom of the jacket, the pant cuffs, and the brim and tassel of the hat with a mixture of 6 drops of Snow White acrylic paint and 30 drops of water.
For Santa's beard, mustache, and hair, mix 2 drops of Light Ivory paint with about 10 drops of water. Using the Light Ivory makes it easier to differentiate between the fringe of the hat and the hair.
Mix 1 drop of Flesh and 1 drop of Shading Flesh with 20 drops of water, and paint Santa’s nose and lips.
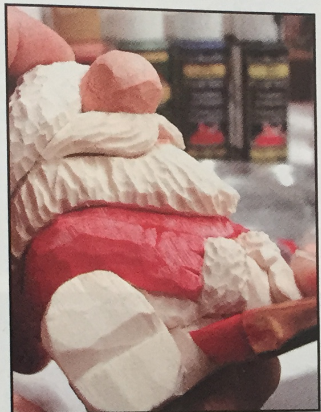
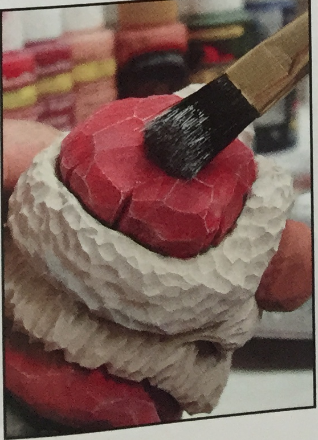
Mix 1 drop of Burgundy and 2 drops of Cardinal Crimson with 30 drops of water, and paint Santa’s jacket, pants, and hat.
Paint the gloves with a mixture of 2 drops of Mossy Green and 10 drops of water.
For Santa’s belt and boots, use a mixture of 2 drops of Black and 10 drops of water.
Once everything has been painted with the base colors, shade everything (except the mustache, beard, and hair) with a mixture of 1 drop Navy Blue and 30 drops of water. Shade the remaining areas with a light wash of Black.
Wait until all paint is dry and then drybrush Santa with Snow White acrylic paint. When dry, apply a layer of Hologram Glitter to all the fringe areas to give them a little “sparkle." Tip: Designate one paintbrush to be used only for glitter paint application.
When paint is completely dry, apply clear Briwax to your carving and buff with a shoe-shine brush.
by Sandy Smith
Sandy Smith is from Lakeview. Arkansas; she is a new member of the Caricature Carvers of America.
