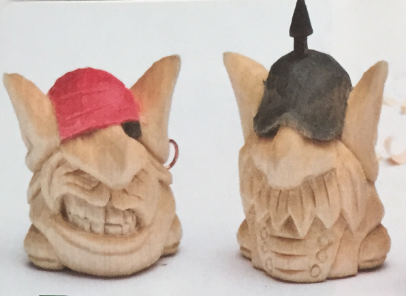
Practice exaggerated facial features with these funny fellows
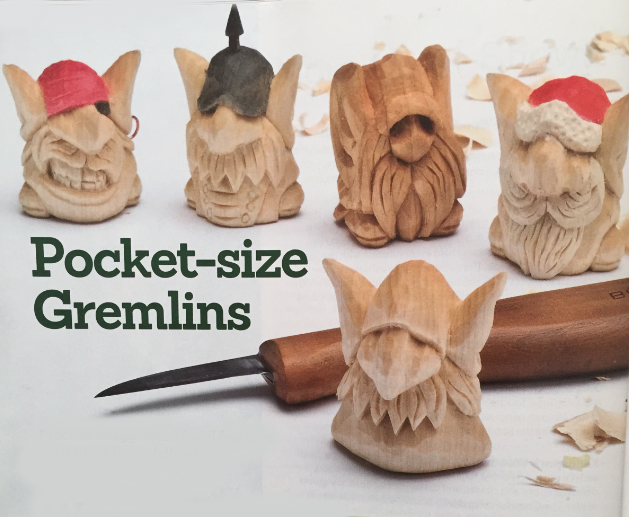
When I’m away from my shop, I like to carve but I want to limit the size of the project and number of tools I’m carrying. These little gremlins are carved from a small piece of wood with just one or two tools.
To make the project easy to hold (and to keep my fingers away from sharp tools), I start with a stick, carve the top, cut off the completed carving, and then move down the stick. These figures can be carved with just a knife, but I sometimes use a small V-tool to add texture.
While I’m out and about, I use a Warren knife with a replaceable blade. I keep a few extra blades with me and change the blades as needed. I sharpen the blades when I get back to the shop so they are ready for the next time.
Preparing the Blank
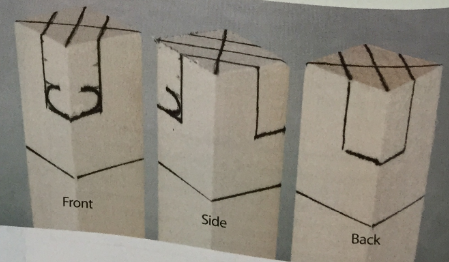
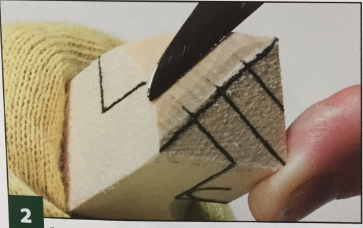
Divide the blank into four equal 1VT (38mm)-long sections. Draw crossing diagonal lines on the top. Measure W (6mm) to each side of one line and draw parallel lines; continue those lines %" (19mm) down the front and back of the blank and connect the lines at the back and front corners. Divide the front box into three % (6mm)-tall sections and draw the nose in the bottom section as shown.
GREMLIN: ROUGHING OUT THE PIECE
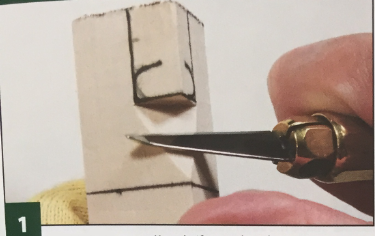
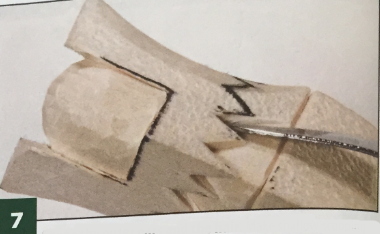
Rough out the face. Use a knife to make stop cuts along the nose lines up to the centerline. Make scooping cuts next to the nose wings along the stop cuts up to the top centerline to form the fronts of the ears. Do not carve into the sides of the nose.
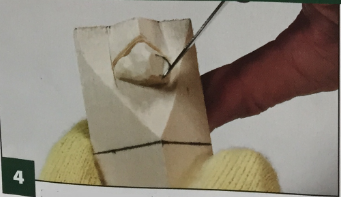
Establish the nose. Use a knife to make a deep stop cut under the nose and as wide as the nose lines. Carve up to the cut from the bottom of the section and remove a wedge.
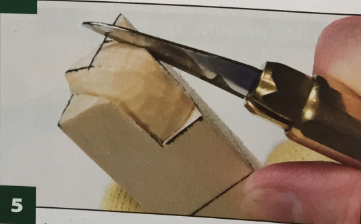
Round the back. Start at the horizontal line at the middle of the back and use a knife to round the sharp rear corner up to the top centerline (the line running from corner to corner across the top of the head perpendicular to the nose).

GREMLIN: REFINING THE CARVING
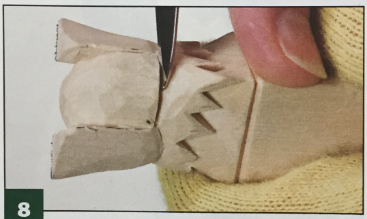
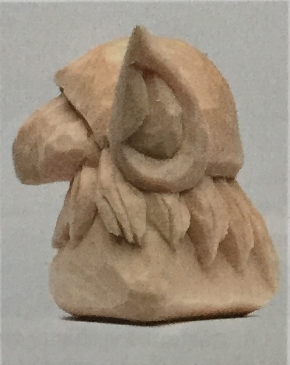
Refine the nose. Use a knife to taper the sides of the nose up and in. Round the wings of the nose. Make a stop cut up and over the bridge of the nose. Carve the nose up to the stop cut to separate it from the brim of the hat. Finish shaping the nose.
Shape the hat. Extend the parallel stop cuts alongside the nose up and over the top of the head to the horizontal line in the middle of the back. Make a stop cut along the horizontal line. Round the hat into all three stop cuts.
Shape the belly and mustache. Carve a shallow V-groove around the baseline. Round the tummy into the groove. Draw the mustache under the nose. Make stop cuts straight in along the lines and carve up to them to create strong shadows as you separate the mustache from the rest of the face.
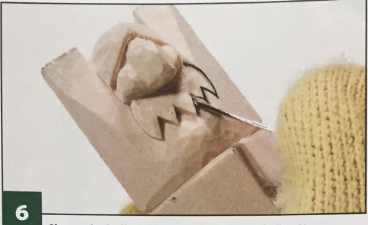
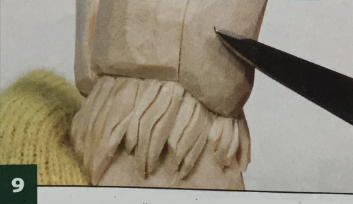
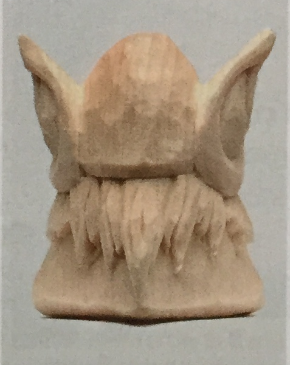
Shape the outer ears and the hair. Make shallow scooping cuts from top to bottom along the outer edges of the ears to give them a slight curve. Round the sharp edges and make sure the ears are symmetrical. Draw the hair, starting at one side of the mustache and working around the back of the head just above the baseline to the other side of the mustache. Make stop cuts along the lines and carve up to them to separate the hair from the back.
Reline the ears and hair. On both sides of the head, draw a curved line from the intersection of the hat brim and the nose in front to the vertical stop cut behind the ear; these lines define the bottoms of the ears. Make stop cuts along the lines and carve down to them to round the bottoms of the ears. Make sure the ears are still symmetrical. Taper the top of the hair up to the stop cuts to tuck it under the hat and ears.
GREMLIN: FINISHING THE PROJECT
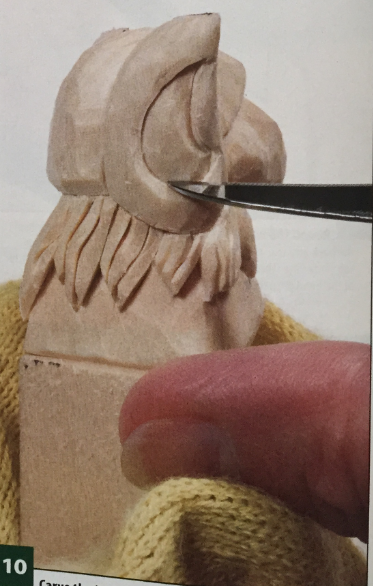
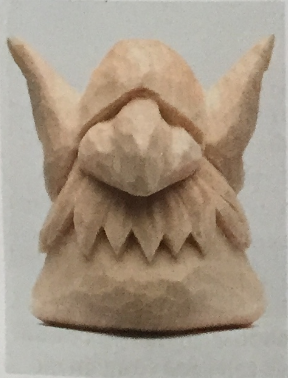
Finish the hair. Round the backs of the ears where they meet the hat and hair. Keep the ears pointed at the top. Use the tip of the knife or a micro V-tool to carve S-shaped grooves for basic hair texture. Use S-grooves to texture the mustache also.
Carve the insides of the ears. Use the pattern and photos as guides to draw the insides of the ears. Make shallow stop cuts along the lines and carve up to them from both sides to separate the insides of the ears from the edges. Do not carve too deeply.
Finish shaping the ears. Flair them out from the hat. Round the hat as needed to make the ears stand out.
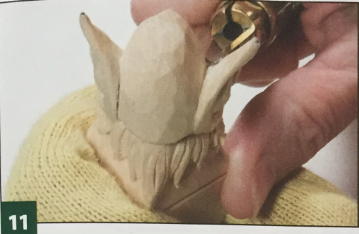
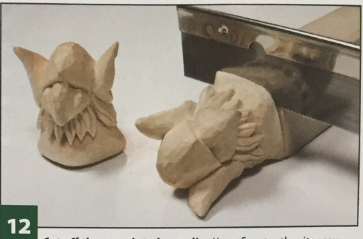
Cut off the completed gremlin. Use a fine-tooth miter saw or scroll saw to cut the completed figure off the stick. Round over the bottom edge. Paint or finish as desired.
MATERIALS:
- Basswood, 1" (25mm) thick: four gremlins, 1" x 6" (25mm x 152mm)
- Paint or finish of choice
TOOLS
- Detail knife
- Pencil
- Micro V-tool (optional)
- Fine-tooth miter saw or scroll saw
The author used these products for the project. Substitute your choice of brands, tools, and materials as desired.
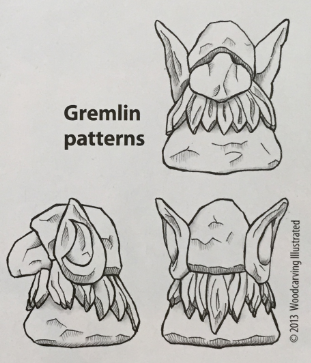
Carving More Gremlins
Draw the guidelines on the shorter stick and carve the second section. Change the hat or mustache. Add buttons or a tie. Add feet or change the ears to horns for a Viking look. Repeat for the third section, but after you have carved the gremlin, do not saw it off. Carve the fourth section using the third for a handle and then separate the last two figures.
By Tom Borecki
Tom Borecki has been carving since the fall of 1998.
He is a member of Woodcarvers of Delaware and the Conewago Carvers. Tom lives in Middletown, Del., with his wife, Mary.
