- 1. Supplies
- 2. Start with the Pattern
- 3. Cutting out the blank:
- 4. Drilling out the spoon's bowl:
- 5. Cutting out the spoon's bowl:
- 6. Carving out the spoon's bowl:
- 7. Rough shaping the back of the spoon:
- 8. Finish shaping the spoon:
- 9. Making the spoon symmetrical and consistent:
- 10. Finish sanding:
- 11. Finishing:
- 12. About the author
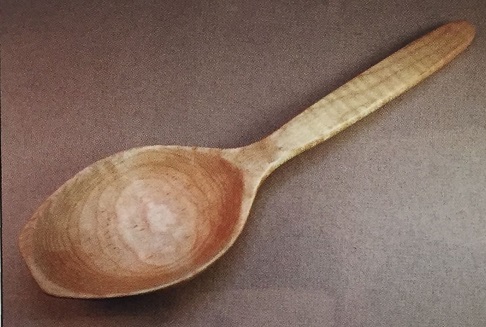
This useful spoon came into my household by way of my mother-in-law, who says that a farmhand made it way back when she was a little girl in Minnesota. In my book, since she is now 85 years old, that makes this an antique spoon. It looks like it has been around for a long while, but I was surprised to find that it was a very handy tool in the modern kitchen. It is long enough to stir a deep pot, deep enough to be used as a ladle, and thin at the edges for taking a sip of the soup. The flat end on the bowl is great for stirfry and for getting the last bits out of the skillet, like a spatula.
1. Supplies
- 12"x3-l/4"x 1" figured maple, hard maple, cherry or walnut for a useful tool; basswood or butternut if it is to be more decorative and you want to handcarve it.
- Band saw with 1 /4"-wide blade
- Drill press with 2" Forstner bit
- #9 3/4" gouge or similar tool
- #8 3/4" bowl gouge or similar tool
- Power carver with bull-nose, tungsten carbide grinding bit, 7/8" x 1-1/4"
- Large cylindrical sanding bit
- Belt sander with 60-grit belt
I wanted to copy the design, but it needed to be done in a hurry for my daughter's housewarming present, so I came up with some shortcuts. Power is used for almost all aspects of this project, but if you don't have the specified tool, you may always do some hand carving.
I made this project in figured maple for durability and good looks. This is meant to be a working spoon and not just for decoration, but the handle is nice and flat if you want to add a woodburned design or some chip carving.
The back of the handle bears an inscription which includes the coupie's names, the location of the new home, and the date. It worked so well as a housewarming gift that I made another one for my son when he moved, with that couple's information burned into the spoon.
This spoon is not only a good tool and a great gift, but it may also become a family heirloom.
2. Start with the Pattern
1. Copy the pattern and cut around the outside to make it easier to position on the board. Choose a board that is flat and has square edges, or make your board square using a jointer or hand plane.
2. Lay the top pattern on the face of the board to take advantage of grain and color or to avoid bad spots in the wood.
3. Trace around the pattern using an indelible marking pen that will be visible as you cut the pattern out.
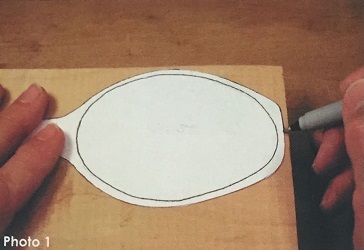
Transfer the pattern to the board with a dark line
3. Cutting out the blank:
4. Cut out the top pattern with your band saw.
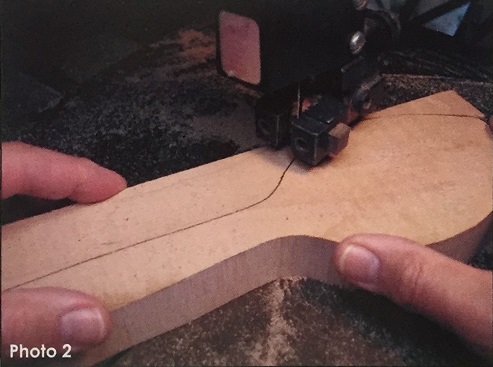
Position your fingers well away from the path of the blade when using the band saw to cut out your blank.
If you don't have a band saw, then a scroll saw would do a fine job. Alternatively, you could use a jigsaw, but that would be difficult and somewhat dangerous. A coping saw would also work, and it has the added advantage of building up your arm muscles.
4. Drilling out the spoon's bowl:
5. You can, of course, carve this spoon without using the drill press, but it is a lot easier to carve the bowl shape with most of the wood already removed. Use a drill press and a 2" Forstner bit to make the hole marked on the pattern. Use clamps to hold the spoon in place for drilling unless you are stronger than a horse. Drill presses are usually 1 HP, and without a clamp you will not be able to keep the large bit from spinning the blank out of your hands. Set your depth gauge to drill just 3/8" into the blank.
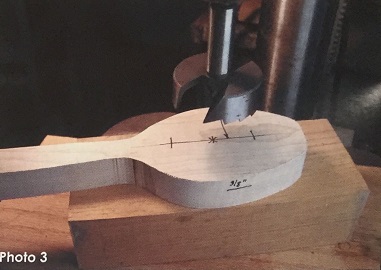
Drill a 2" hole where marked.
The point of the Forstner bit will go another 1 /8" into the blank. It will end up 1/2" from the bottom. This point will serve to remind us when to stop as we are rough carving the bowl.
5. Cutting out the spoon's bowl:
6. Tape the pieces back together using heavy-duty double-sided tape.
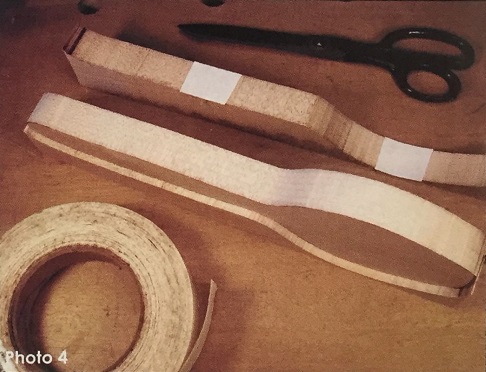
Tape the assembly back together the way it was. In this photo, the pieces are staggered to show how they reassemble, but you should lay them on the workbench so they are perfectly flat like the board from which they were cut.
After the pieces are together, put the board on its side and give it a good smack with your carving mallet to make sure the pieces are stuck together very well.
7. Transfer the side pattern to one of the sides of the board.
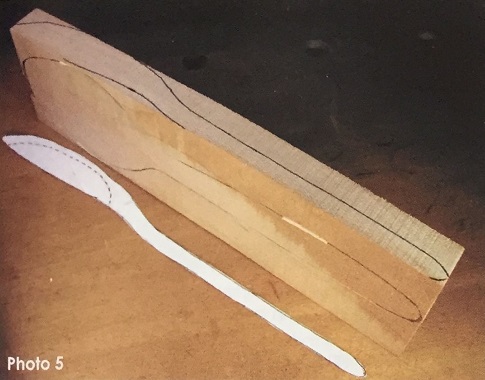
Side pattern transferred to side of board.
Make sure you have oriented the pattern in the right direction and that the best side of the board will end up on the top of the spoon.
8. Helpful Hint: Any time you need to bandsaw a piece of wood that is tall and thin, like this project, you need to use a stabilizing block to help keep the board steady and square to the table.
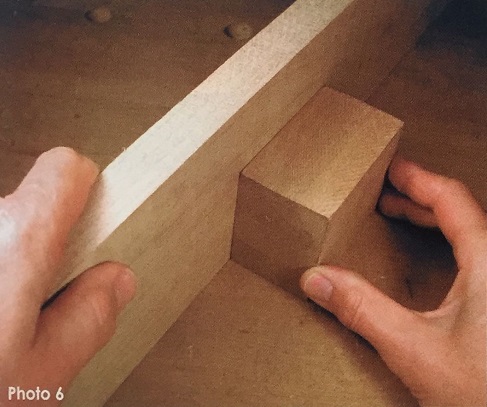
Using a stabilizing block
9. Attach a square block of wood to one side of the board (with the tape, again) at the same level as the side that will be against the band saw's table. This block will help to keep the board upright as you cut the side profile, and give your guiding fingers a safe place to hold. Make certain that the band saw blade and the board are both square to the table, and carefully cut the side profile. Make your last cut on the side with the stabilizing block.
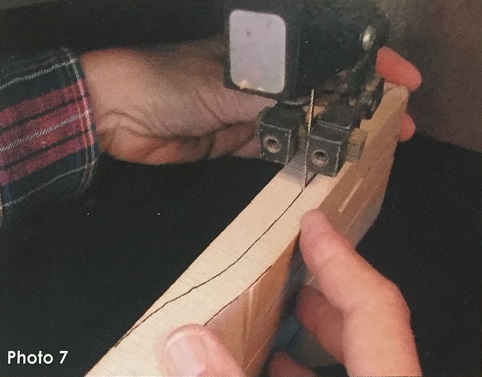
DON'T DO THIS: Cutting without a stabilizing block can ruin the blank unless you are very careful and have a lof of experience in using the band saw. It can also lead to a run-in with the blade. It only takes a minute to attach a stabilizing block to ensure your safety and success.
6. Carving out the spoon's bowl:
10. It will help if you have a good way to secure the blank for carving. Clamp it securely to the workbench or clamp it with the bench's vise as I have here.
Clamp and carve
Keep the handle scrap under the handle to make it easier to clamp and to keep your carving level. Make shallow stop cuts, using either a bench knife or gouge, on the line indicating the inside edge of the spoon's bowl. Then, carve in a curved path from these stop cuts down to the Forstner bit cut using the 3/4"-wide #9 gouge.
Carve from the inside edge of the bowl to the edge of the drill bit hole.
Now switch to the bowl gouge and continue the cuts in a gentle curve until the Forstner bit’s point hole is carved away and there is a smooth curve all the way around the interior of the spoon's bowl.
Use a bowl gouge to finish the hand carving of the spoon bowl.
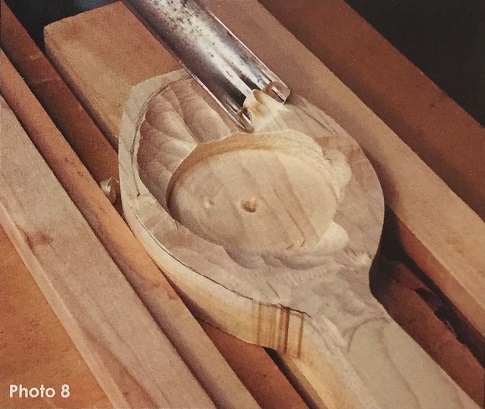
11. Helpful Hint: Use the side of the spoon's bowl as a pivot point to lever the spoon gouge as you remove wood from inside the bowl. Just take a little wood at a time or you risk prying out more wood than planned.
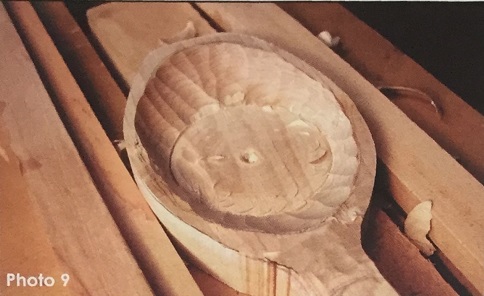
12. Use a fairly large bull-nose tungsten carbide bit to finish shaping the bowl's interior.
A two-handed grip gives you a lot of control
7. Rough shaping the back of the spoon:
13. You could shape the back of the spoon by using either hand or power carving tools, but you will be amazed at how quickly and easily it can be done with a belt sander and a 60-grit sanding belt. There will be lots of dust, so you will want to do this either outside or using a good dust collector. In either case, wear a good dust mask to keep the dust out of your lungs. If you do not have a stationary belt sander, you may use a portable machine if it has been secured, upside down, in a vise.
14. WARNING: Using the belt sander freehand is an inherently dangerous technique, but people who make band saw boxes do it all the time. It takes a bit of experience to know exactly how much pressure to apply to the piece and how to approach the spinning belt. Always touch the lower end of the wood to the belt first, and then follow immediately with the rest of the piece. You need to hold the wood firmly, but touch it to the belt gently.
15. Safety first: Make sure you know where your fingers are at all times. Even though the belt sander is not as dangerous as some other shop power tools, it can remove a lot of skin in short order. Hold the spoon blank firmly, yet gingerly, so you can let it go if there is a problem. You can always cut a new blank, but growing back your skin is another story. Do not rest the blank on the table or you will not be able to manipulate it to curve the spoon's back.
Shaping the back of the spoon's bowl.
16. Then, using the end of the belt roller, shape the neck of the spoon.
Shaping the neck of the spoon.
Finish by rounding the back of the handle from a centerline to the front plane, in a "U" shape. Don't overdo this belt sanding. The objective is to remove excess wood and establish planes close to the final shape but not to achieve sanded perfection. It is too easy to sand off important pieces of wood with such a fastacting machine.
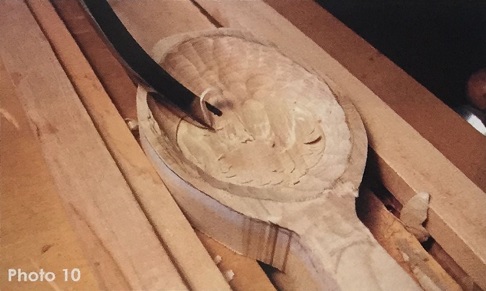
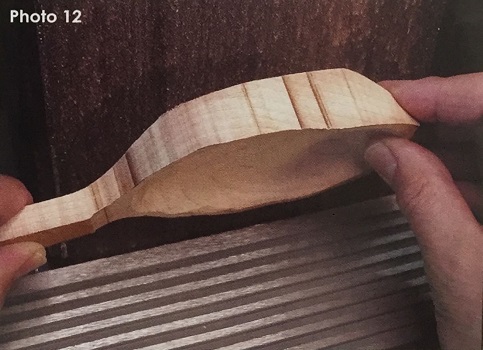
17. The photo below was taken with half of the job done and half still squared. Check frequently to be sure you are not removing some wood that you will need when doing the final shaping/sanding. Keep the spoon's bowl thickness at about 3/16" for now.
The left side of the spoon has been sand- ed to shape. The right side has not been shaped.
8. Finish shaping the spoon:
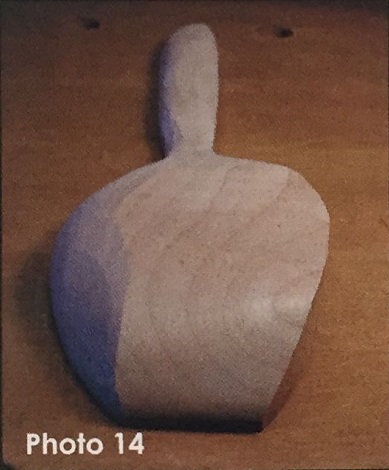
18. Use the grinding burr again to smooth out the planes generated by the belt sander.

Here, I'm comparing the new spoon to the old one to make sure I'm getting the right shape.
Comparing spoons.
9. Making the spoon symmetrical and consistent:
19. Unfortunately there is no way I know of to effectively sand the interior of the bowl-except by hand. It is a rough job, but somebody has to do it. Think of it as the “Zen of Sanding,” and get to work. Start with 50-grit paper and work your way through 100, 150, 180, and 220 grits. If you have any fingerprints left when you’re finished, you probably need to go over it again.
10. Finish sanding:
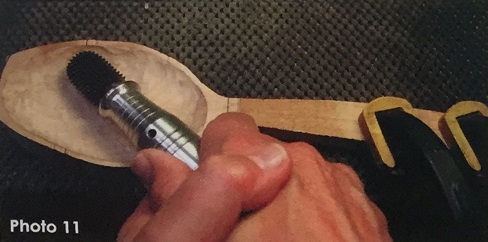
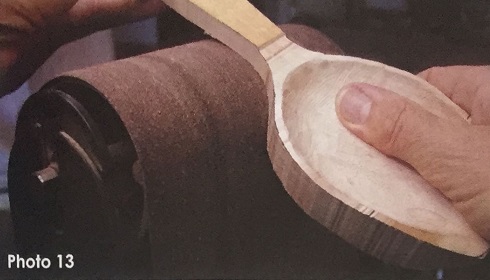
20. For the outer surfaces, there is nothing better than a “Tootsie-roll" sander. Again, you will need to work your way up from coarse to fine sandpaper, but this will be easier on your fingertips.
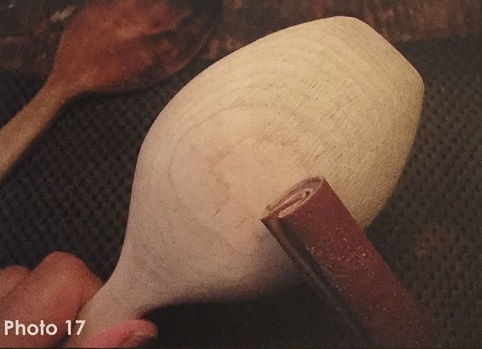
“Tootsie-roll" sander helps to save fingertips
21. Helpful Hint: When you have to do a lot of sanding, keep a directional lamp nearby. When you think you have finished with one grit of sandpaper, clean off the sanding dust and look closely in the angled light at the scratch marks it has left in the wood. If there are any deeper scratches, then you need to sand until they are gone before you go on to the next grit. If you leave those scratches in the wood, you will just be polishing the wood between the scratches when you sand with the finer grits.
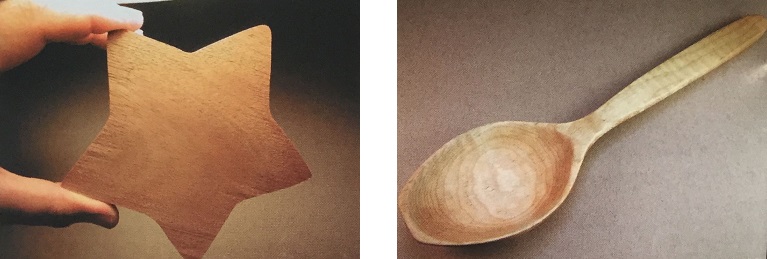
Looking at a sanding job in direct light reveals irregularities in this piece of mahogany. The center is perfectly smooth, while the outside edges are still rough and finished spoon, top view. It measures 11 x 3 x 7/8".
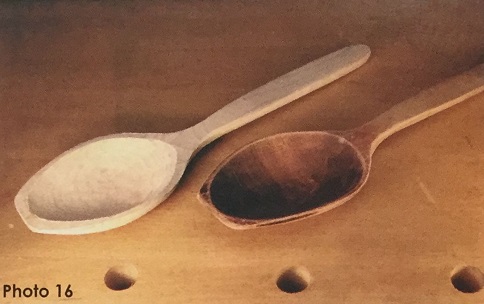
22. When you have a perfect 220 finish, take a few extra minutes to sand by hand with 320-grit sandpaper, then 400 and 600 grits. This final sanding will really bring out the chatoyance, or, “cat's eye” figure, in the figured maple.
11. Finishing:
23. The completed spoons can be finished with non-toxic oils like mineral oil, butcher-block oil, or walnut oil. Maintenance for this kitchen tool is to renew the oil whenever it looks dry. Alternatively, it can be finished with a salad-bowl finish. This spoon was finished with butcher-block oil. It is not, of course, dishwasher safe, but it is ready for many years of ladling out oatmeal and stirring the Bok Choy.
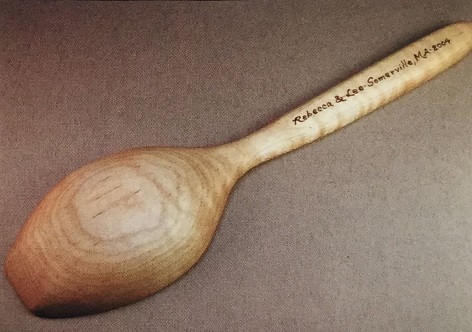
Finished spoon, bottom view. It's made from figured maple with an oil finish.
12. About the author
 Donna has been involved with promoting woodcarving since she became a member of the Central Texas Woodcarvers Association in 1995. She was secre- tary/newsletter editor of this club in 1996 and President in 1997. She is also a member of the Texas Woodcarvers Guild and has taken classes at their biannual meetings since she started to carve. She has taught classes at these get togethers since 1996. She has also taught carving classes for many other clubs in Texas.
Donna is running a new group on Yahoo called "woodworking_women.” It includes women from all over who share their expertise and encouragement as well as their problems and inspiration for all sorts of woodworking projects. Donna is also hard at work writing a book about band saw boxes. Look for it in 2006!
