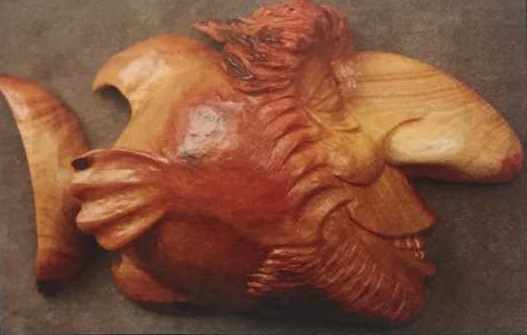
We discovered Gary Burns while checking out some Internet websites and this pine knot fish jumped out at me. We immediately thought that the readers of Carving Magazine would enjoy this creative project. SeaBastion the Fish can easily be adapted for hand tools as well...have fun!
Please refer to all manufacturers’ label instructions for proper product usage.
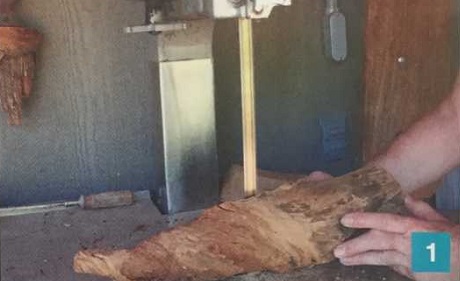
1. This is a pine knot. A pine knot is an area of a pine tree from which a branch grows. Carvers have found this part of the tree to be excellent project material. The rib¬bing on the outside corresponds to the growth rings in the tree. The pointed end starts at the center of the tree and the other end is where the branch breaks off outside the tree. The tree has to have died, fallen to the ground, and rotted before you can get the pine knot out. A tree that has fallen in the shade of other trees has the best knots because moisture stays in and around the area of the tree that's in the shade, which promotes the rotting process. To stabilize the knots, I dry them under cover for a year or more. I pick a knot that is solid and the size I am looking for when carving a fish. I then cut the knot in half on my Hobart Band Saw. This has been an awesome saw for me. It was built in 1948 as a meat bandsaw.
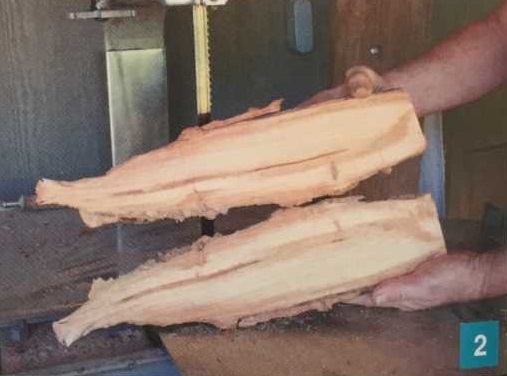
2. Here, the knot has been cut and I inspect the middle of the knot to make sure that it isn't rotted or cracked too badly. Many times I can use a knot for a fish that won't work for a wizard, for example, because the knot isn't shaped well for a wizard or there is a crack where the face would be.
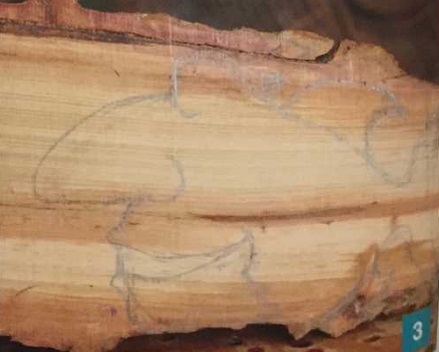
3. Now I can design the fish. I use a pencil to draw the fish on the flat cut. I love making the fish with human features. It just cracks me up. It helps carving a profile like this, as you don’t have to worry about the symmetry. There is only one eye, half a mouth, and half a nose. The drawing doesn’t have to be anything fancy. The lines are really only for cutting the piece out. Once it’s cut out, you will turn the piece over (flat side down) to do all the carving and you won’t even see the lines anymore. You can always turn the piece over to reference your drawing to see what you had in mind, but I hardly ever do that.
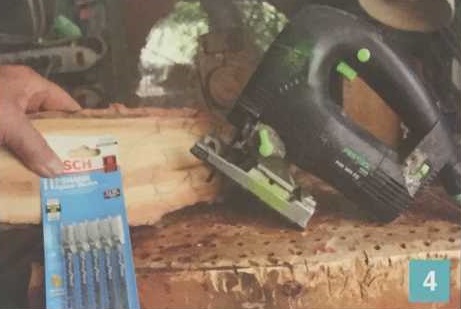
4. Now it’s time to cut out the design. I use a Festool Jigsaw. There are many saws made now that would do this job well. I feel that, maybe, the Festool Jigsaw is the best and most expensive saw of its kind. Bosch makes a very good saw as well. A jigsaw's adjustable reciprocating feature is the most important feature to me. The blade movement is controlled by a metal wheel down near where the blade attaches to the saw. It has four to five settings. The most aggressive setting allows the metal wheel to move back and forth, pushing the blade back and forth as the blade is going up and down. This makes the blade lunge (somewhat) and helps to keep the blade from getting pinched.
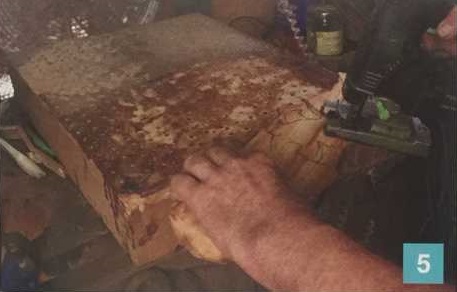
5. When I saw any pattern, I want to leave the line that I drew. If the line is there, I can see where I went wide and can come back to adjust it.
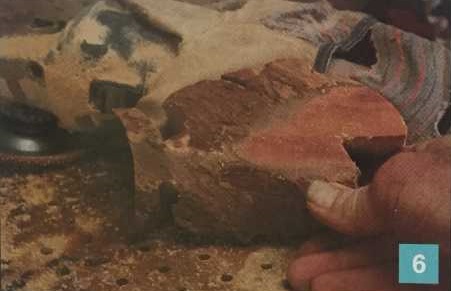
6. This is the fish on the side that I am going to carve.
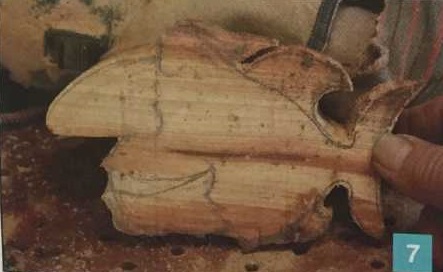
7. This is the back side. I leave the drawing on until I am done carving in case I want to look at it while I am carving the other side.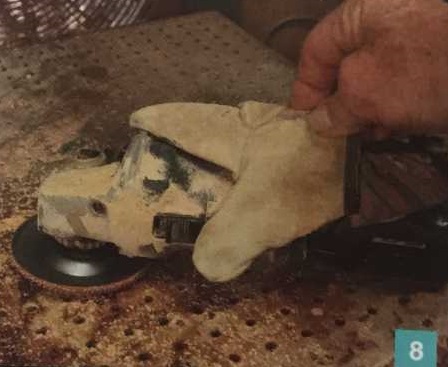
8. I love the Bosch & Amp Angle Grinder. It is powerful and just within the weight range for me I can hold it for an hour if I have a lot of grinding to do. I hold the carving that I am working on with my left hand, and I hold the grinder with my right hand. I glued a loose-fitting glove on the grinder in the spot that I like to hold This same holding system could be achieved using Velcro as well. I have had this angle grinder jump out of my hand too many times and hop right into my clothes I'll tell you from experience that wakes up a person!
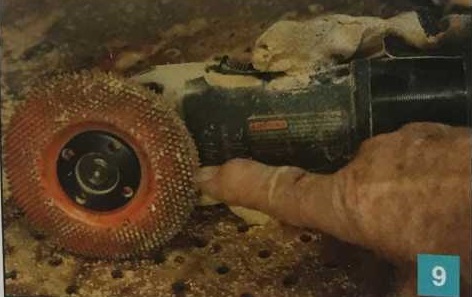
9. This is the cutter that I use on the angle grinder. This is the coarsest of the four that most retailers carry. With the glove on the grinder, this is an amazing cutter. It is like a chainsaw, but it's right there in your hand. And it does things that a chainsaw can't do. The edge is just like a chainsaw, but the flat area is like a wide chainsaw. It can round over things very quickly. I have been using this tool for about 10 years and it has allowed me to do so many things.
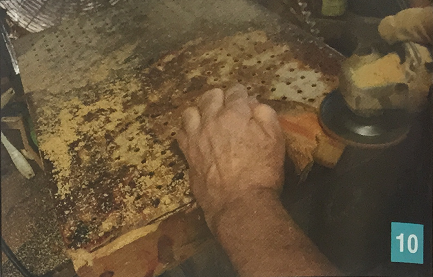
10. Here, I am roughing out the fish with the tapered wheel on the angle grinder. I can carve the fish almost completely with this tool. Once it is roughed out, I only need to clean up the fish and add some detail with the Dremel.
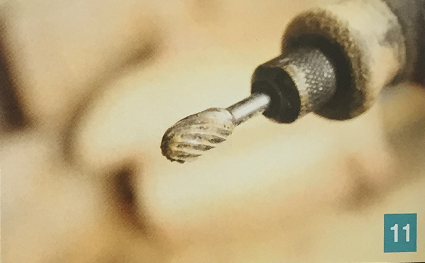
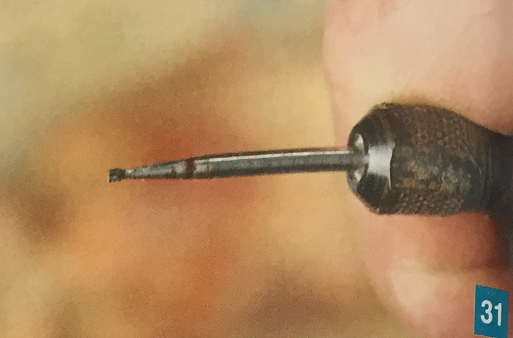
11. This is an incredible bit. There are many varieties of bits some have all the flutes (cutting edges) going to the top; one bit may have a few flutes going to the top and the others end on one that is going to the top. When all the flutes go to the top, there is no bite on the tip of the bit, so the bit doesn't want to go into the wood even if it is balsa wood. But if only a few go to the tip, the tip is hungry and wants to lead the cut. (All the bits that I have are made this way.) And the more flutes that you have on a cutter, the less aggressive the cutter is.
Note: Because the pine knots are so pitchy, the bit will sometimes get clogged. I have tried many different ways to clean out the bits and found that using a 2 x 4 works the best. Have a dry piece of 2 x 4 on your bench, and when the bit gets clogged, just carve into the 2x4 and the pitch will fly right out. It is amazing all the pitch will be gone!
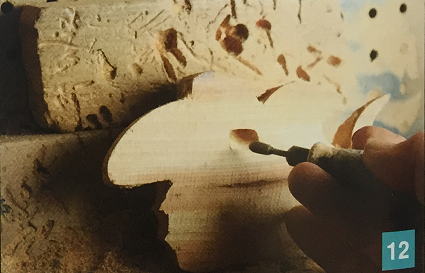
12. I carve a hanger in the back with the Dremel this is the very first thing I do. I like to get this done right away so that I don’t forget and later find that I can't hang the piece. The flat back is the perfect place to sign the piece as well. Signing your piece is a great way to add just a bit more meaning to your work.
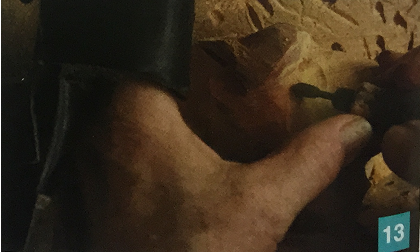
13. The way that you hold the Dremel is very important! So many people hold the Dremel in one hand and the carving in their other hand. It is very difficult (if not impossible) to have the control needed using that method. I hold the Dremel like a pencil in my right hand and then use the thumb of my left hand to stabilize it. Both hands also brace against the carving for extra stability. I can't stress enough how important this is! One little slip with the Dremel and you may wipe something out that you will never get back!
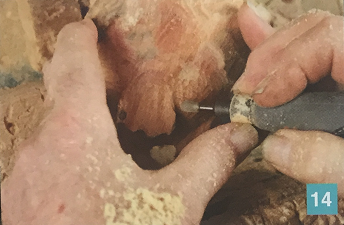
14. This bit leaves a mark like a gouge chisel. I go over the entire fish with the bit. Some areas hardly need anything done, since the angle grinder really gets in right to the nitty gritty. The eye, mouth, fin, and tail need the most work. I don’t want to go too far with this bit, but I want to do everything that I can. It can take a little experience to know when you can keep going and when you have done enough.
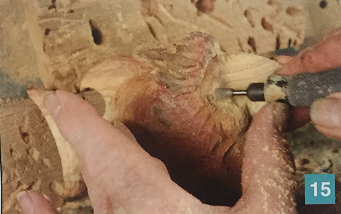
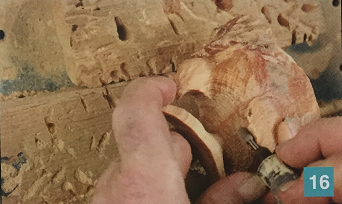
15. Here, I am finishing the eye. I like to get the eye opening started with this bit. It slides right across to get the opening started without catching on the grain. I will go back in with a smaller bit soon (notice where my left thumb is). The thumb and the first finger of my right hand are holding the Dremel, and the other three fingers of the right hand are braced against the fish. I never clamp anything. I want to be able to move the piece around quickly and always have the right angle to work.
16. Now I am working on the side fin. Notice how my hands are holding the fish and the Dremel. I have complete control of the Dremel. You can have the piece almost completely done, but if you don't have control of the Dremel, it can jump and remove a very important part of your project.

17. I am working on the mouth and teeth here. You don't need to worry about the fine detail. You will be going in with finer bits soon. You just want to get the general shape completed. It requires some experimenting to see when you're done with one bit and ready to go on with another. At first, you might be going back and forth a little. If you are carving a fish right now, don't worry about the outcome. You are in a process of evolution.
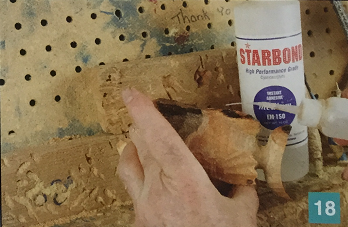
18. I must mention this incredible glue (I wouldn’t be able to carve without it) cyanoacrylate glue (CA or superglue). I use extra thin Starbond for stabilizing and strengthening, and I can fill very large cracks with fine sawdust and the thin glue. I also use the thin glue to coat my completed tree carvings when I am all done to make them more durable. It has no surface tension, so it penetrates immediately. I use the medium glue for repairs and filling smaller cracks. You can spray on accelerator so that the glue dries faster. And this glue is great for gluing your fingers together, so watch out! In addition, this glue can make you a hero around the house. You can mend shoes, pottery, dolls, fabric, hard plastics, and much, much more! It will glue anything that it can soak into. (Acetone is the solvent for CA.) I purchase 16 oz. bottles of glue and then I transfer it into smaller bottles so that I have a convenient size to work with.
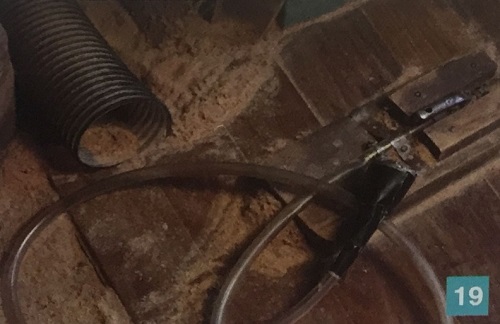
19. This is a very important tool for me. It is an air gun connected to a piece of pine with plumber's tape and metal strips with holes every 1 /2" or so. It is connected to an air source and I connect a piece of plastic tubing to the blowing end with a hose clamp. The tubing is about 3-1/2" long. I have glued and taped a small piece of pipe insulation on its end so that my left forefinger can slip in. My finger is everywhere that I am carving so that on woods that are pitchy (such as pine knots) I can blow the sawdust off my carving as I go. It is especially important when doing eyes and small details. If the piece keeps loading up with sawdust, there is no way to see what is being worked on. I was very pleased years ago when I came up with this idea!

20. This is a great bit to remove the marks left by the rounded bit that was used to rough out the fish. It has a 1/4" shank and a long, flat surface for smoothing. I will go over the entire fish with this bit. It doesn’t take long and it really cleans up the piece. It also has a very sharp point that is useful in many situations.

21. This bit is great for getting in where the first bit couldn’t. It is very pointed and I love the way it holds up. It has been hard to find a bit that is pointed this much and is still aggressive and won’t dull quickly. I am using it to detail the eye. You can see where the pitch is loading the tip here. I push the bit into a piece of 2 x 4 and it is just like new!
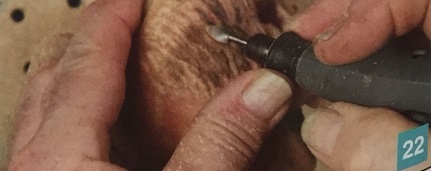
22. I am using the pointed bit to detail the hair for the fish's goatee. I started the hair with the first bit and now i am defining the hairs.
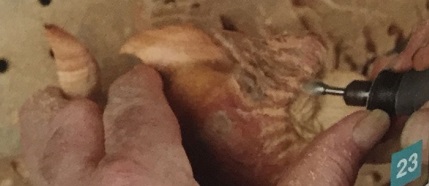
23. Here, I am detailing the hair on the eyebrows. Again, notice how I am holding the Dremel hand piece. Having my left thumb on the end really helps me do just what i want to do.
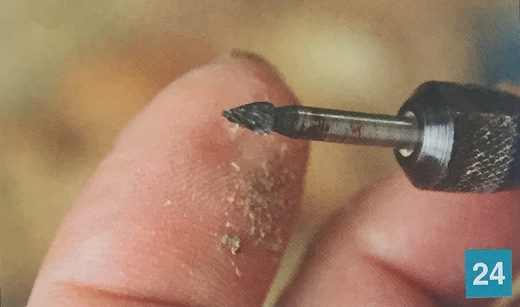
24. This is a cone bit. It has the same flute configuration as the other bits (all the flutes do not go to the tip). I use this bit to reach into areas that other bits are too big for. I use it in the Dremel 300.
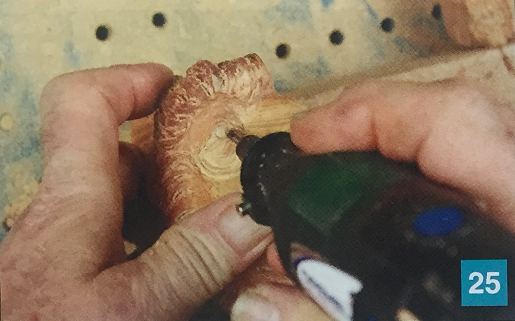
25. Now, I am detailing the eye. This bit has a nice point and is fairly aggressive. It has a little more taper than a flame bit, and can refine any crevice or line that I have started with the other bits. I like this eye style for the fish. I carve a little ball right in the middle for the pupil. It seems to show up a little more in a profile eye, such as this one.
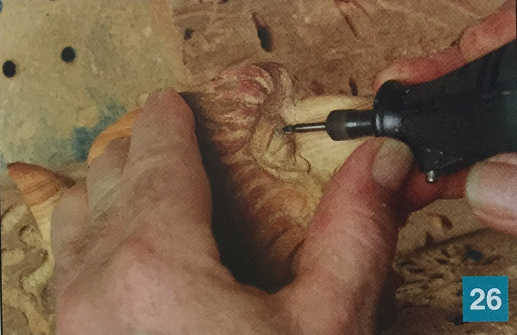
26. Here, I am holding the hand piece while I’m working on the pupil. I can push against my left thumb to control the spin of the Dremel. I can do the most precise cuts holding the hand piece this way.
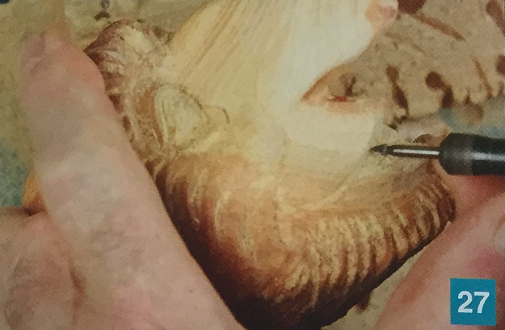
27. In this step, I'm starting to outline the teeth.
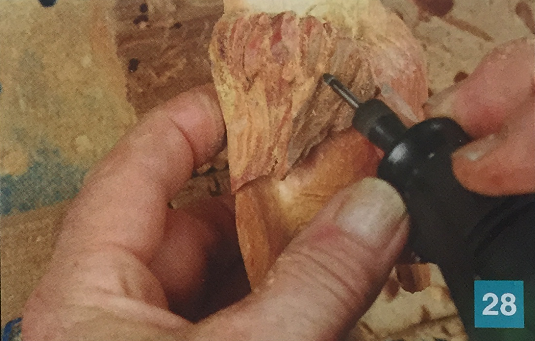
28. I am defining the hair on the eyebrow here. I go in and deepen the lines that I roughed in with a flame bit.
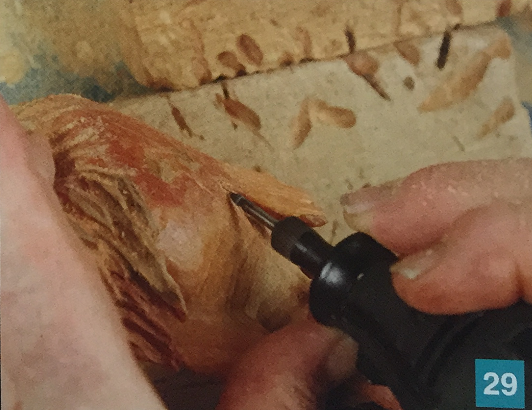
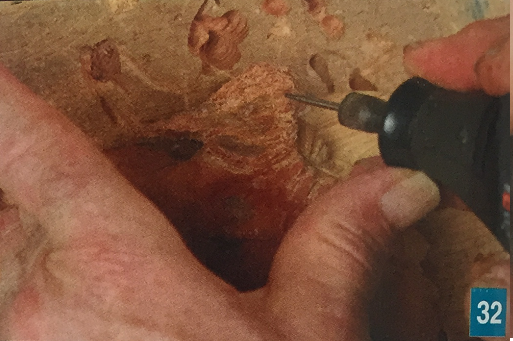
29. Here, I am refining the fin, running the cone bit around the back so that it makes the fin stand out. I just get it deep enough so that you can't see the line carved when looking at the fish straight on. There is no need to go too deep, as it can weaken the fin.
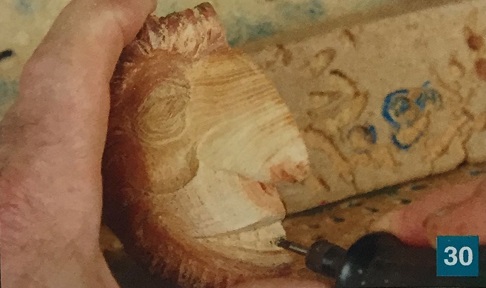
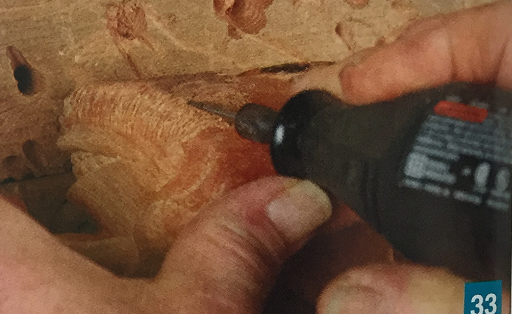
30. am refining the teeth here. I don’t want a big space between the teeth, so I use a bit with a tip that is a little too wide to go in too deep around the teeth. I outline the teeth lightly. The teeth add a fun element to these fish carvings. It gives them a human quality that adds a little humor to the piece. Of course, the nose helps with this human element as well!
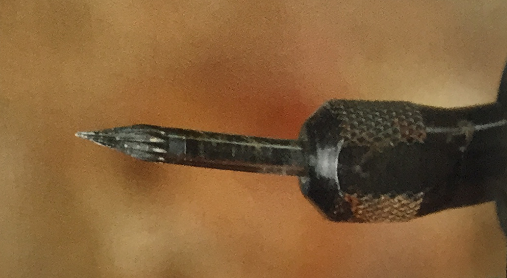
31. This bit is called an inverted cone. The ones I use are called dental lab burrs. They are carbide, have long shanks, and hold up for a very long time. Each has a 3/32 shank so that the collet, the part of the hand piece that holds the bit, needs to be one size down from the 1/8 collet that all the previous bits are. When this bit is held at about a 45-degree angle, it cuts like a small V-gouge chisel. I detail all the hair with this bit. (I also do all the detail on my tree carvings with this bit.)
32. Here, I am detailing the hair on the eyebrow. I am making smaller lines between the ones that I have already made. These are not really deep. I carve them parallel to each other, and then I change the angle of the hand piece and go over the parallel lines. When I am done, I want it to look like overlapping hair. I change the angle several times, going over the same areas. I don't want the lines to look parallel anywhere. This creates the most realistic hair for me. In my opinion, the best hair starts with large clumps. I like to break these large clumps into smaller clumps, which only add detail to the large clumps. First, I use the flame, then the cone, and finally the inverted cone bit.
33. I detail the goatee in the same manner as the eyebrow. I tip the Dremel at a 45-degree angle to the surface and make long, unparallel V-gouge marks. This goatee is thinner than the eyebrow, and it isn't as wavy or as bushy as the eyebrow. It's a fun thing to add to the fish!
34. This is a Dremel 9909 Bit. I order these directly from Amazon. They are carbide and very pointed! After using the cone, this bit can go in and really make a deep pointed groove. It’s wonderful for the very end of the detailing process. When it gets full of pitch, you can run it in a small piece of fir or pine. This will immediately clean the pitch.
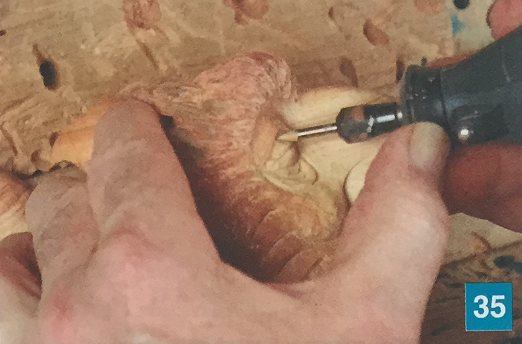
35. In this photo, I am cleaning up the eye area. This bit isn't aggressive, but if you don’t have too much for it to do, it will hide the end of a groove so that it looks like the eyeball is behind the eyelid. It doesn’t need to go too far to give it this effect.
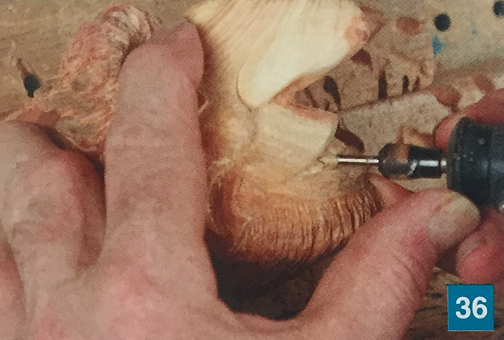
36. This bit is perfect for finishing the teeth. I carve up under the teeth so that the teeth look as if they are under the lip.
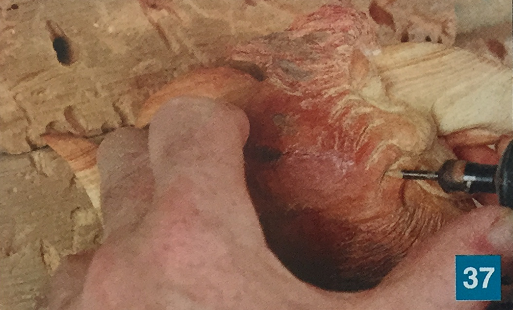
37. This bit is great to use in any area that you used the cone bit. It deepens the original cut just a bit more to hide the bottom of a groove.
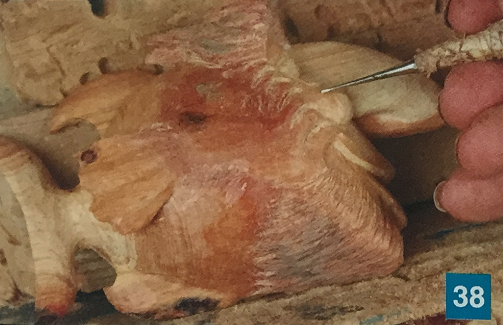
38. I have taken a dental pick and wrapped it with masking tape to make it easier to hold. I worked the end on a belt sander to get the shape I wanted, and polished it so that it is sharp and has a little width. I use the pick in any area that has a groove. The pitch in this knot smears, so it requires some extra work to clean it off. It depends on how pitchy the knot is, as knots aren't all the same. Jeffery pine and ponderosa pine have the best knots. But sugar pine and Douglas fir also have workable knots. Some are extra heavy and obviously have a lot of pitch.

39. Notice that I am using my left thumb here just as I do with the Dremel. It gives me a lot more control and I have the most strength in my hands when I hold it this way. I'm cleaning the eye detail here. I go over the entire knot, cleaning out all the pitch.
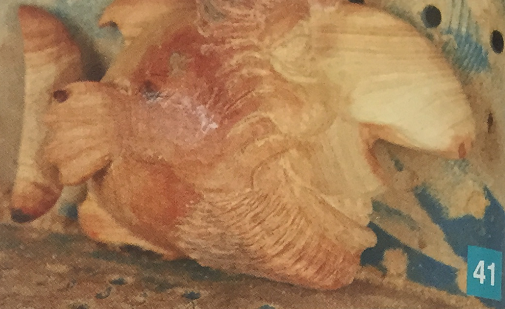
41. The fish is carved and now it's time to clean ou the pitch.
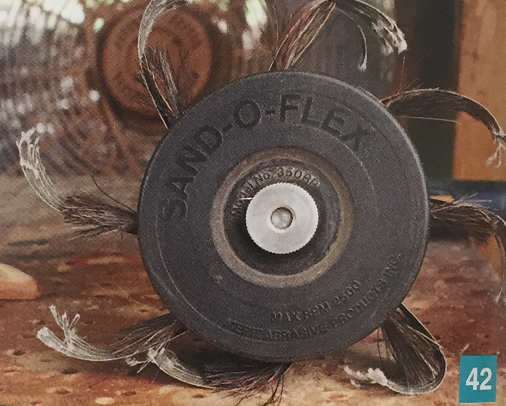
42. This is a Sand-O-Flex abrasive wheel. I use the 120-grit refill that is scored, which allows the sandpaper to tear off when it is worn out, and it frays so that it can wrap around your details. If you use the sandpaper that isn scored, it generally sands your details off. I don't recommend using this kind for detailed carvings.
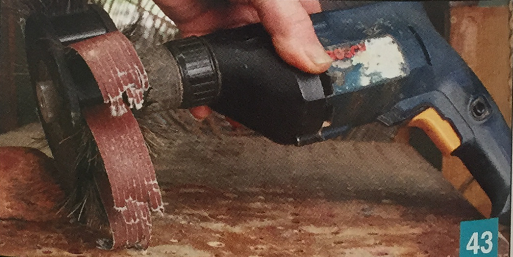
43. There is a brush that backs each strip of scored sandpaper that holds the paper out away from the drum. When these get worn and start bending, I undo the cap and slide each one out and turn them around so that they hold the paper out again, i like having the paper 1" or so past the brushes. This really saves the brushes and prevents the sandpaper from being too aggressive. To replace the paper, unscrew the end nut and pull off the cap. The old paper will come out with the cap. The replacement is a set of eight strips stapled to a cardboard square. I straighten all the strips and place the cardboard square over the center hub in the drum. Then I start slipping the sandpaper strips into each slot. When they are all in place, I screw the cap back on (but not tight). Then I turn the cap and the strips feed around the inside hub. When they are sticking out about an inch from the brushes, I tighten the screw that holds the cap and the Sand-O-Flex abrasive wheel is ready to use.
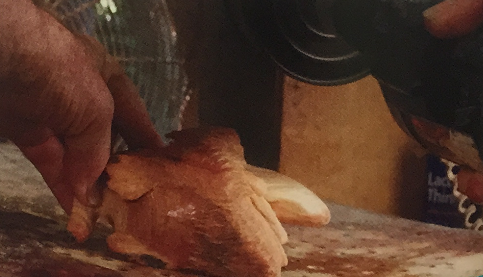
44. Here, I am running the Sand-O-Flex over the fish. I go over the entire piece and then move it one-eighth of a turn; I always turn the piece in the same direction (counterclockwise) so that I can keep track of where I have been sanding. After completing one rotation, I go over the entire piece again. I keep moving one-eighth of a turn until I am back at the beginning. Once I am back at the starting point, I assess the sanding job and may go around once more. I never have to go around more than twice, and sometimes once is enough. It doesn't completely sand all the cavities and dips in the carving, but it is amazing how much it does sand!
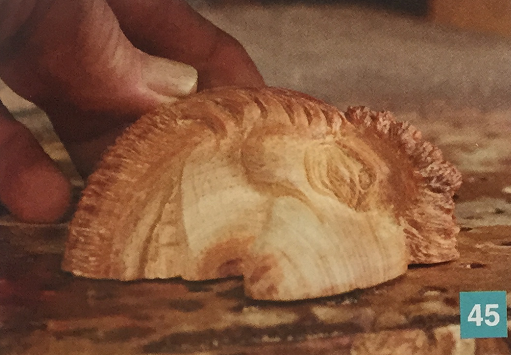
45. Since these pine knots are so pitchy, they are very difficult to sand. You should have carved your piece with a flame bit (or another flat-sided bit) so that as many gouge marks as possible were removed. Your carving should be as smooth as possible before using the Sand- O-Flex.
Note: It’s important that you keep the carving secure as you are using this tool so that the carving doesn’t fly out of your hand. I hate it when that happens!
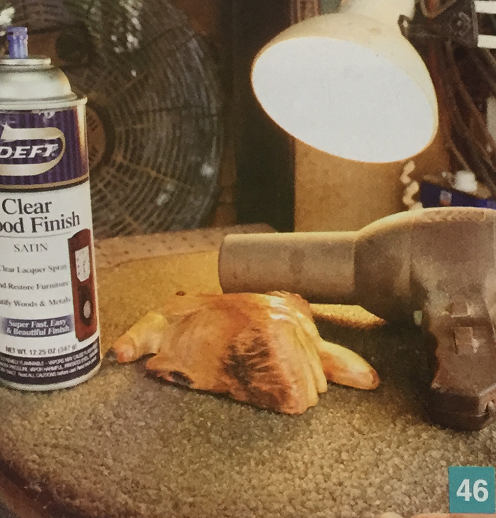
46. It’s time to apply the finish. I use Deft Satin Spray Lacquer, which I get at Ace Hardware. I love this product. It dries fast and isn't too shiny. I always have a light behind the work that is being sprayed. I like the light to bounce off the piece as I am spraying so that I can see where I have been. It's better to apply a number of thinner coats rather than a few heavy coats. And you want to watch that you don't overlap too much. The lacquer can build up and look too heavy. I place the carving on a lazy Susan so that I can turn the piece as I spray on the finish. I glue a piece of cardboard onto the top of the lazy Susan. I shake the can for a minute and then I flood the fish with a very heavy coat of lacquer. I let it set for just a few seconds and then I use a compressor to blow off the excess. Next, I brush the entire carving with a scrub brush, working the lacquer into all the crevices. This will help dissolve any pitch that may not have been picked out. This is the only time that I flood a carving with lacquer. It only works if I immediately blow off all the excess before it can build up and create a mess. Then I use a hair dryer to finish drying the lacquer. A hair dryer is a big help if you have a small shop and nowhere for things to dry. For me, it is also great in the winter when my shop is really cold. I can heat up the spray can and then the lacquer so that it dries quickly.
About the author
Gary Bums (the Tree Wizard) is self-taught and has been carving since 1971. He lives in Cave Junction, Oregon, and sells his unique creations through amazon.com
