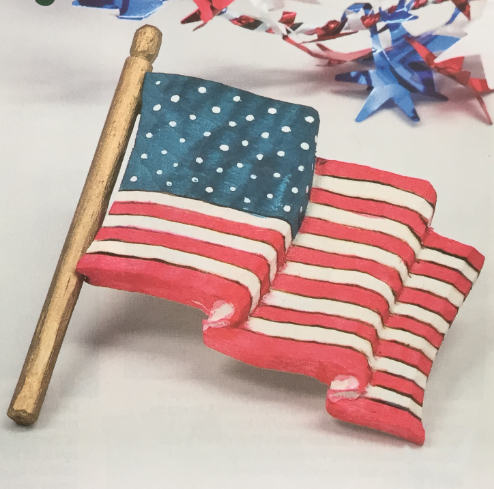
Make this patriotic project in an afternoon
When my wife wanted something patriotic to wear during Desert Storm, I carved my first flag pin. Since then, our local carving club has carved many flags and donated them to many organizations, including the Red Cross, and to the local National Guard unit when it was deployed. Like those famous potato chips, you can’t carve just one!
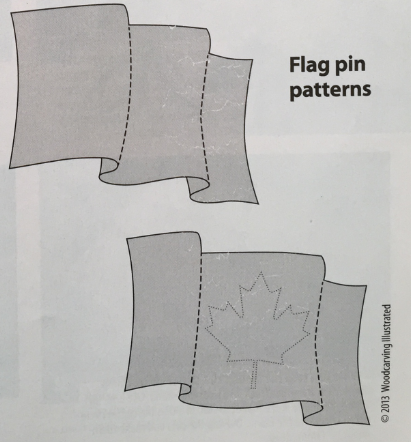
FLAG PIN: ROUGHING OUT THE PIN
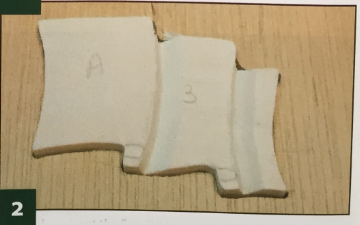
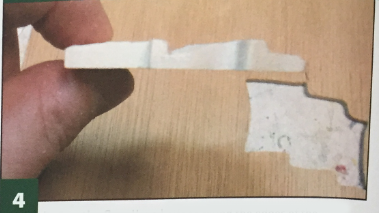
1. Prepare to carve the flag. To make a convenient jig to hold the blank, transfer the pattern to a thin piece of plywood, drill a blade-entry hole, and use a scroll saw to cut the outline; discard the cut-out and damp the plywood square to your bench. Transfer the pattern to the blank and cut the outline of the flag. Place the blank in the slot in the prepared plywood. Draw the details on the blank and label the panels.

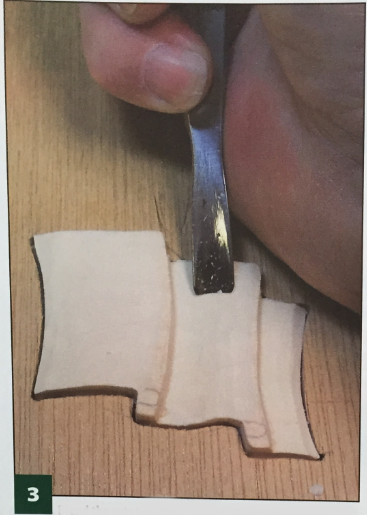
2. Rough out the flag. Hold a 1/4" (6mm) V-tool so the left wing is vertical as you carve just to the right of the pencil lines. Do not remove the pencil lines. Make several shallow cuts to remove about half the thickness of the blank.
FLAG PIN: REFINING THE PIN
3. Blend the cuts together. Use a 3/8 (10mm) #5 gouge to round from the pencil line to the left edge of panel A, leaving the edge about two-thirds the thickness of the blank. On panel B, round from the pencil line down to the bottom of the V-groove. On panel C, round from the V-groove to the edge, leaving the edge about one-third the thickness of the blank.
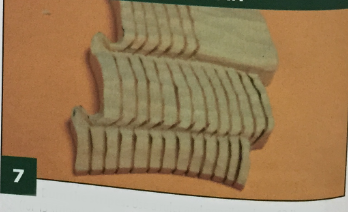
4. Refine the flag. Use a knife to round the edges of the V-grooves. Remove the pencil lines and roll the edges into the V-cuts. Do not make the surfaces smooth; we want to see tool marks.
5. Carve the Z-curves. Redraw the Z-shaped pattern lines between panels A-B and B-C at the bottom of the flag. Use a knife to make a stop cut along the diagonal portion of the Z. Use a Vs" (3mm) #9 gouge to scoop out the top curve, working from right to left and leaving a lip about Узг" (1mm) thick between the scoop and the stop cut. Carve the corner of panel B off until the bottom curve is flush with the rest of the panel, being careful not to break the thin lip between the curves. Repeat the process for the Z-curve between panel B and panel C.
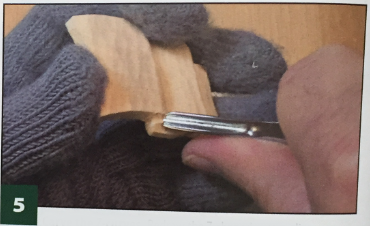
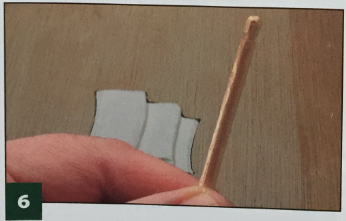
6. Carve the pole. Use a 1/8 (3mm) #9 gouge to make shallow grooves in the left corners of the flag to accommodate the pole. Then, use a knife to carve a stop cut around the pole blank W (6mm) from the top. Round the top of the pole to form a ball. With a knife, remove any saw marks from the edges of the pole and flag.
FLAG PIN: FINISHING THE PIN
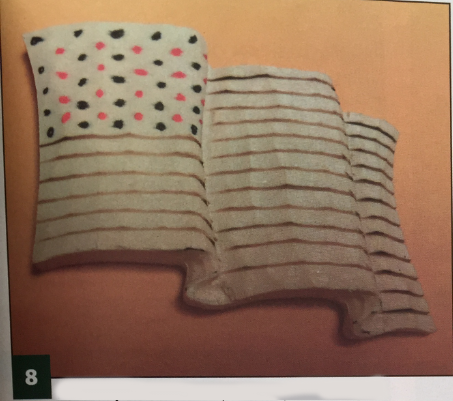
7. Burn the stripes. Use a ruler and pencil to draw 12 lines (for 13 stripes) about 3/32 (2.5mm) apart. On the folds, draw angled lines to connect the stripes on one panel to the next. Set a woodbumer hot enough to make a mark but not hot enough to char the wood, and burn the lines. Note: The burned lines keep the paints from crossing from one stripe to the next.
8. Paint the pin. Use the dots of paint in the photo above to position the stars. The final column of stars is hidden by the fold. Thin acrylic paint slightly so it flows easily and paint the stripes, star field, and stars. Thin the paint more for a faded look. After the paint dries, seal the pin with two coats of matte spray finish.
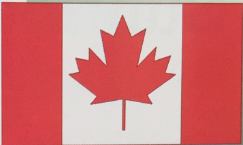
Carving a Canadian Flag
The Canadian flag is red and white with an 11-point red maple leaf. The flag is twice as wide as it is tall. The red panels are one-quarter the width of the flag, and the white panel is half the width of the flag. Because of these proportions, it is difficult to carve a Canadian flag using the U.S. flag pattern. We have provided a separate pattern for our Canadian carvers.
MATERIALS
- Basswood, 3/4" (6mm) thick: 2" x 2 1/2" (51mm x 64mm)
- Plywood, 1/8" (3mm) thick: holding jig, 12"x12" (305mm x 305mm)
- Dowel, 3/16" (5mm) diameter: 2 3/4" (70mm) long
- Acrylic paints, such as Delta Ceramcoat: fire red, white, navy
- Spray finish: clear matte
TOOLS
- Scroll saw with blade
- Carving knife with a thin blade
- V-tool: 1/4" (6mm)
- #5 gouge: 3/8" (10mm)
- #9 gouge: 1/8" (3mm)
- Woodburner with pen: skew tip
- Ruler
- Pencil
- Paintbrushes
The author used these products for the project. Substitute your choice of brands, tools, and materials as desired.
By Steve Oliver
Steve Oliver lives in Evansville, Ind., with his wife of 40 years, Linda. Steve is a veteran of the U.S. Air Force, now retired. He whittles with his grandson, Devin, who also likes to carve.
