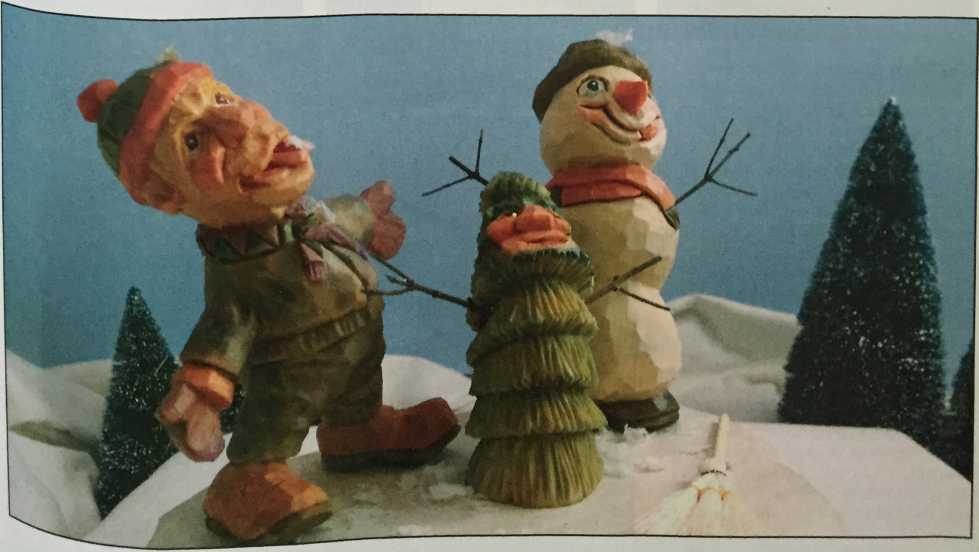
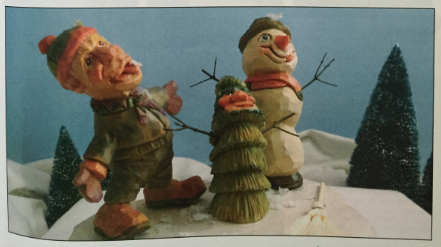
The anticipation of those first snowflakes of winter is a magical sight that only kids can truly understand. Kids see those first glorious flakes and everything winter becomes a reality. Sledding, skating, snowballs, igloos, SNOW DAYS from school, and the granddaddy of everything that is winter—Christmas!
What better way to usher in the season than with three good friends out catching snowflakes on their tongues and frolicking on a fluffy carpet of white.
In this article, we will go through a step-by-step procedure to make the little boy. You will need a 2" thick x 6" long x 5” wide piece of basswood.
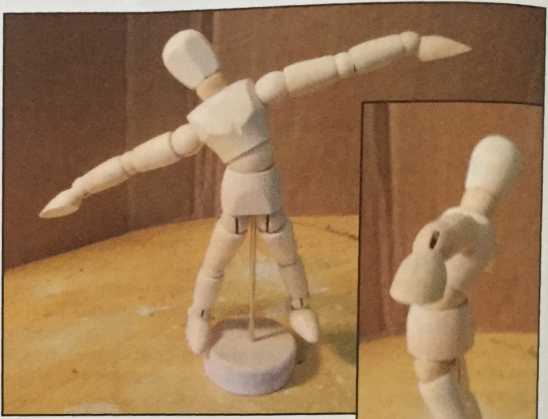
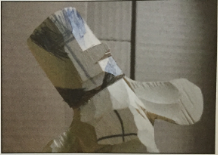
The little boy carving presents several challenges. The body being tilted and angled, along with the head looking up, create some orientation issues that don't occur in a straight pose. That is what makes this fun. I will do my best to pass on some ideas to make this easier to accomplish. The first two pictures show a small human form guide, which you can purchase from most craft stores for just a couple of dollars. It helps immensely to achieve proper orientation and body tilt. It is a good and fast reference that can be shifted as needed.
Transfer a rough sketch of the boy onto the basswood stock. I use old-fashioned tracing paper and a pencil for this step. You can also cut and glue the pattern to the stock. We are just going to bandsaw-cut this in one dimension. Note how the pattern was turned slightly so that the head and face are running vertically to the grain of the stock. The head is perfectly lined up, but the remainder of the pattern is running closely with the grain.
Where do you cut first? Before you cut, strop your knife nd gouges- Make sure that you are working with a good adge on all your tools. This caricature has some cross-grain ruts so Уои want t0 make sure that you are making clean cuts'and not roughing up the wood.
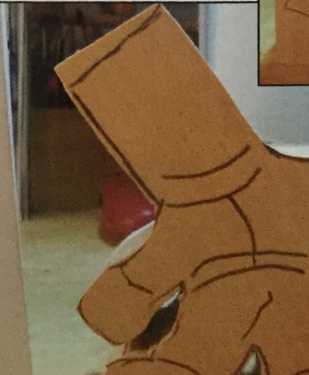
For the head, I draw in horizontal and vertical lines to ensure that the eyes, ears, and nose are not out of alignment. This is a very easy mistake to make if you do not use the reference lines. You will notice that I start with a large mass of wood for the head, work it into a cylinder, and then start to develop the features. That is a specific technique that I learned from the lessons in Marv Kaiser-satt’s caricature carving instructional book. It has been an immense help as I try to tackle more complex carvings.
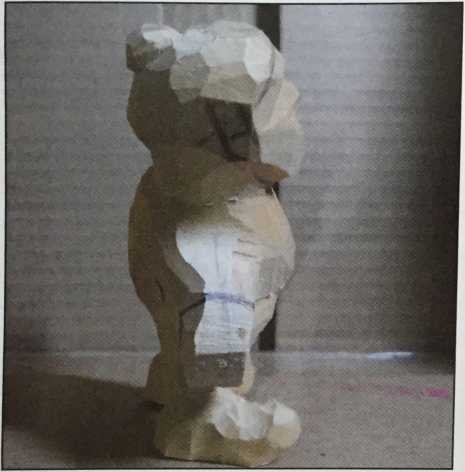
Our young man is starting to take shape. Notice how I shaded some areas on the head cylinder as well as left a wedge of wood protruding from the right-hand side of the head. This is a mass of wood left in for the tongue. Since I wanted the tongue extended catching snowflakes, I left a great deal of wood in the general area so that I could bring the final carving down to the finished look.
Remove the wood in the shaded areas to define the neckline as well as the angled-back forehead. Note the angled-back line on the side view. That is the general tilt angle of the head. You can see how the shaded part of the forehead is aligned at the same angle.
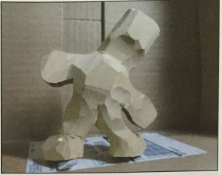
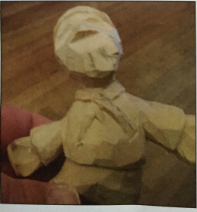
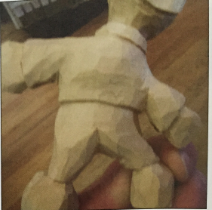
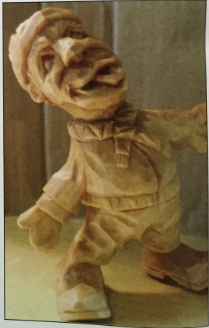
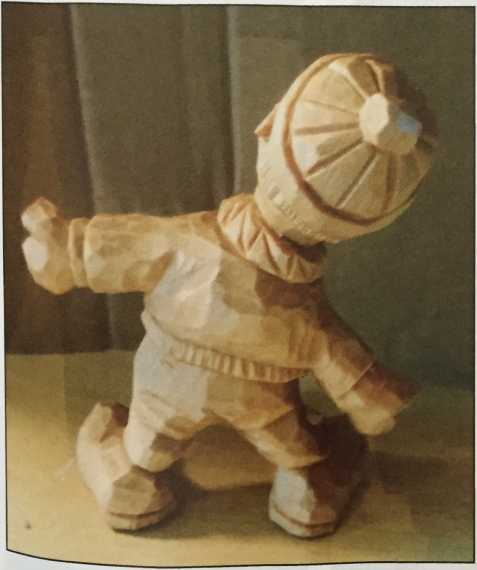
Now that the wood has been removed from the shaded areas, you can start to see some definition. Start defining other landmarks: Glove, hat brim, coat, pant, and shoe lines. This is a good time to notch out the nose and rough in the eye sockets. Remember to follow your orientation lines to ensure that the eye sockets are where they need to be. You also need to start developing the curve of the spine. You do not want a back that is straight up and down (it will look stiff).

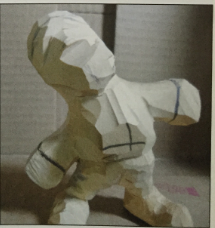
Continue to do more refining and getting proper proportion so that his feet, hands, head, etc., are to scale. Our young man is short and stocky, but he is in great shape. Cut in his scarf lines and continue working on his posture. Remember: He has a curve to his spine.
Now that everything is in proper proportion and aligned, it is time to finish up the details. Carve in the gloves, shoe detail, and fabric texturing. Having the body tilted creates some different clothing folds. The easiest way to visualize that is to lay some clothes out or even have a family member do some modeling for you.
Painting and Finishing
I like to add some highlights to the scarf, coat trim, and other areas where the paint may bleed; I use my wood-burner because the burning helps to control the bleed. I also brush the carving well with a stiff-bristle plastic brush to get the fuzzies out. A toothbrush is just not firm enough to tackle this.
Once that is completed, I dip the carving in boiled linseed oil. I let it dry for about ten minutes and then blot the carving with a paper towel. Important: When I'm finished blotting the carving, I soak the paper towels in water and dispose of properly.
After a couple of hours of air-drying, I paint the boy with thinned acrylics. Once I’m done with the painting, I let the carving dry for about 48 hours. After drying, I apply one coat of satin polyurethane to the carving and allow it to dry again. I then rub it down with a crumbled paper bag and wipe to remove any dust. I finish with 2-3 coats of matte spray sealer. Finally, I use a high-gloss brush-on finish on the little boy’s eyes. This really makes the eyes shine when the light hits them properly.
Supplies
- #3-1/2", #8-1/4", and #8-3/8" gouges
- 30-degree V-tool
- Acrylic paints and paintbrushes
- Basswood, 6" x 5" x 2" block (for the little boy)
- Bench knife
- Detail knife
- Boiled linseed oil
- High-gloss finish (brush-on)
- Matte spray sealer
- Satin polyurethane
- Stiff-bristle brush
