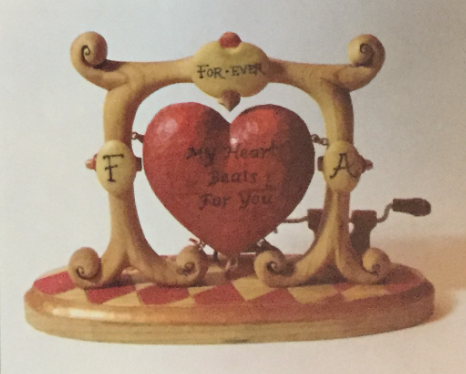
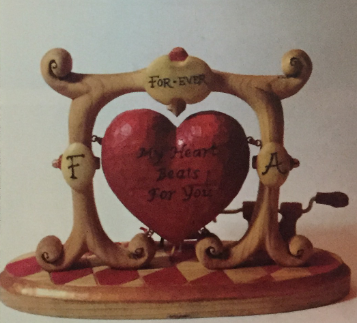
This project came about when I was looking for something to carve for my wife on Valentine’s Day. Well, I drew a blank and with procrastination (which is one of my endearing qualities—just ask my wife), I missed that date, and so I shot for our anniversary. While I wondered where my muse was hiding, it came to me as I was watching an old movie on TV. It began with the studio trademark of a sweaty fellow striking a gong on a frame. This morphed into a heart on a frame minus the sweaty fellow. The inscription on the heart came from a memory of those candy hearts with “I LUV YOU." After finishing the frame with its flourishes, I think that maybe Dr. Seuss was lurking somewhere inside my head.
Preparing for Cutouts
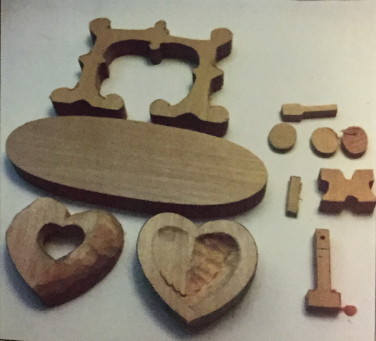
Let’s start by making a working copy of the pattern. The original copy will be used as a reference and a backup as needed. Use the rubber cement to attach the copy of the pattern directly to the wood, and cut as directed. Drill holes through the pattern as indicated. When choosing wood, use a piece of 3/4" x 8" x 18" clear straight-grain basswood. All parts of the carving will be cut from this one piece. Where thicknesses other than 3/4" are noted, you will need to saw to those thicknesses before cutting the final shape. Please note the grain orientation (especially for the frame) when applying the pattern to the wood.
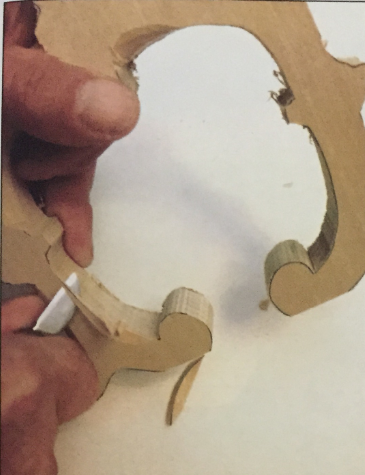
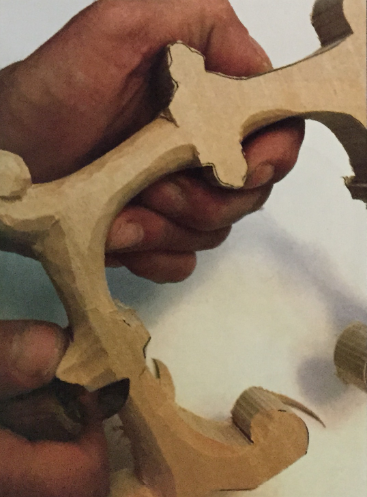
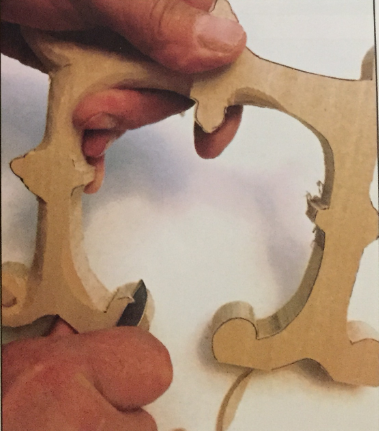
Carving the Frame
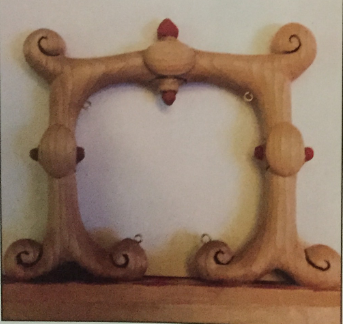
We'll begin carving the frame first. Actually, most of the carving will be done on this piece. Because the frame flows with, across, and diagonally to the grain, you will find yourself changing carving directions often to avoid gouging into the wood. This is basically a simple exercise in rounding over all areas (leaving the base flat). This will give a fluid motion to the frame, especially at the curl ends and feet. Carve up to the finial on top and to the side rosettes. Carve these last after everything else is finished. When all is done, you may choose to leave the tool marks or to sand completely. As a final step, I accented and defined the finial, rosettes, and curls with a pyrographic pen. At this point, carve and install the three shields and install four eyelets into the frame.
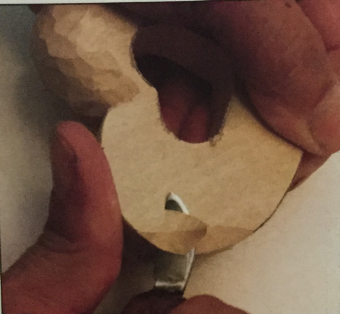
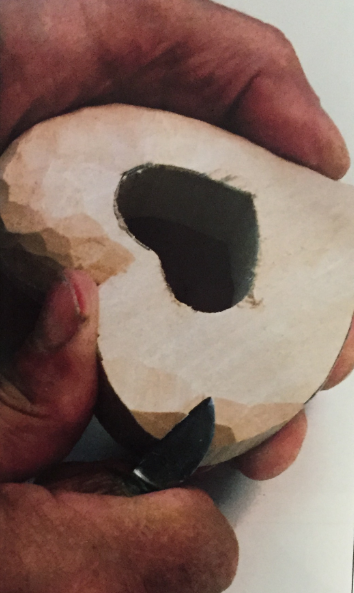
Carving the Heart
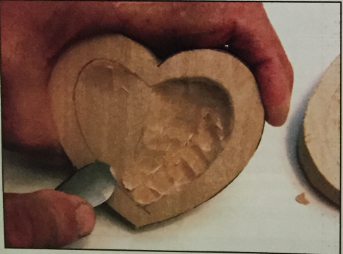
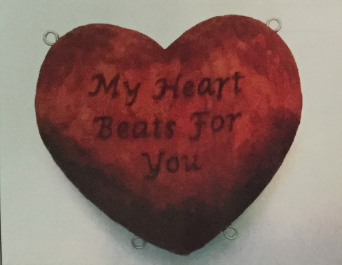
The heart is comprised of two pieces that are carved separately and then glued together. Before carving the two pieces, use your jigsaw to make the small heart cutout on the back side of one half of the heart. Carve the outside of both halves completely before moving on to the inside. With the outside finished, hollow out the inside to as far as you feel you can comfortably go without carving through the wall of the heart. Leave about 3/8" all around the edge to have a gluing surface. I use a U-gouge to carve from the outside toward the center. When both halves are completely carved, glue and clamp together, taking care that the halves do not shift apart. After the glue is dry, blend in both halves at the seam to complete the carving. I prefer to leave a fine-tooled finish. You now have the equivalent of a heart-shaped wooden drum.
Inscription
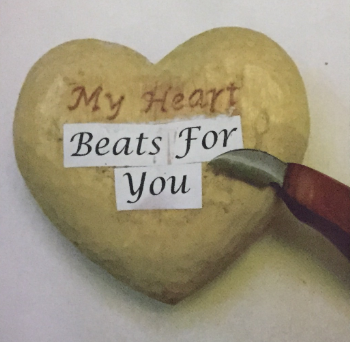
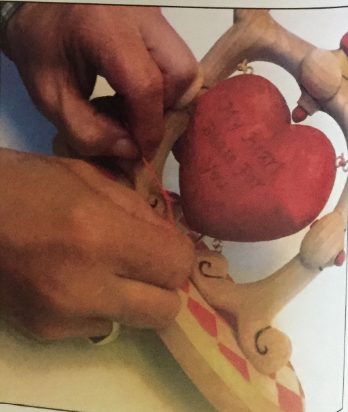
Now let's take the time to offer a personal message to a spouse or sweetheart. I printed out the words "My Heart Beats For You" from my computer. I cut out a template, pasted it directly onto the heart, and then chip-carved through the pattern to create the carved message. If you are not comfortable chip carving, you may add your message on the heart using a woodburner or a permanent marker.
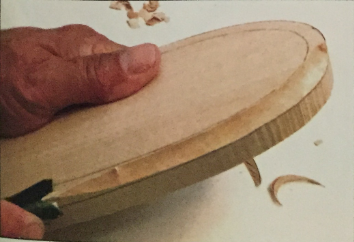
Base
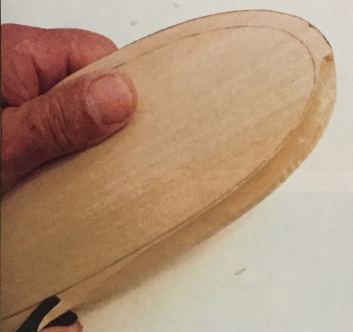
The base may be left as a flat oval cutout, or you may decorate or carve the edge as I have. I drew in a diamond pattern and incised the lines with a chip carving knife. I find that when I use a chip carving knife (rather than a V-gouge), I get cleaner cross-grain lines. I use a U-gouge to create a simulated molded edge around the base. Take note of grain direction as you carve the perimeter. At this time, glue the frame to the base. The frame should be centered on the base's length and 1/2" forward of the lengthwise centerline.

Finishing the Heart and Base
Take the heart and finish to your liking. I finished mine with a mixture of Tomato Spice acrylic paint and water. I used about one drop of paint to five or six drops of water. I painted the diamond base with the same color and mix.
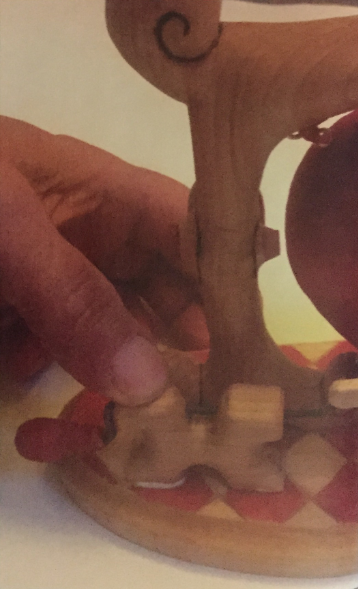
Installing the Heart
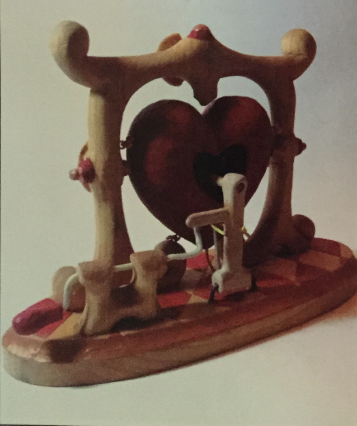
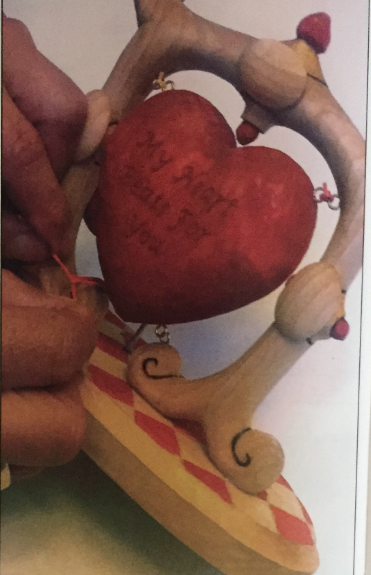
Lay the heart in the frame and mark four points along the heart's seam to correspond to the eyelets on the frame. Screw the four eyelets into the heart. Next, take four rubber bands, which will pass through the eyelets, and cut each to make an elastic strip. With the heart lying in the frame, thread and tie an elastic strip through each pair of eyelets, allowing some slack. When completed, the heart should hang suspended loosely in the frame. Note that this step may be a bit frustrating and awkward (it is similar to threading a needle). A pair of tweezers may be helpful to get into small spots.
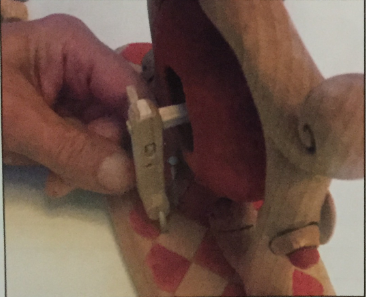
Crank Assembly
Carve the crank handle with a blank that has had a hole drilled into it so that it can accept the wire shaft. It may be easier to drill a hole into the blank before carving. Bend the wire to the dimensions on the pattern, but do not make the final bend until it is installed into the crank base. Round over the edges of the crank base, and drill a horizontal hole through the base (as indicated on the pattern) to accept the crankshaft. This hole will allow the crank to move easily. Ream out the hole with your drill if necessary. After the crank has been installed into the base, make the final bend in the crankshaft.
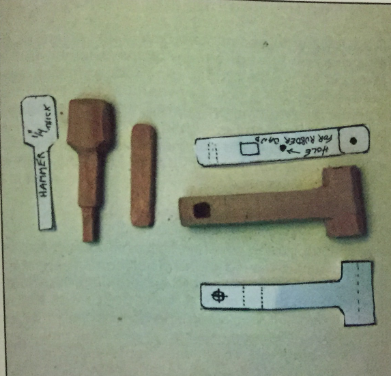
Hammer Mechanism
Assemble the three parts of the hammer mechanism, and glue. Drill a hole through the hammer post base to accept the wire hinge. Install the “L" shaped wire hinge into the post base and check the movement of the hinge. It should turn VERY EASILY. Ream out the hole if needed. Finally, bend the hinge so that it forms a “U."
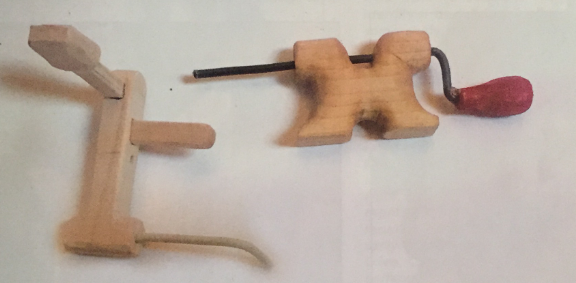
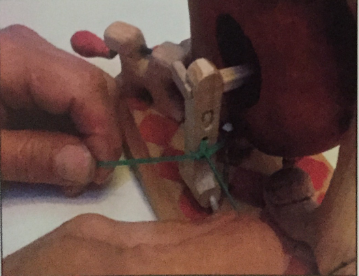
Installing the Hammer Post Assembly
Drill two holes to accept the hammer post assembly, Qs indicated on the pattern. Install the assembly in the holes just above the base to allow rocking motion without binding. Drill a hole between the heart and the hammer post, and insert the nail. Cut a small rubber band to make another elastic strip. Thread the strip through the hole in the hammer post, and tie it to the nail so that the hammer post pushes just slightly on the interior wall of the heart.
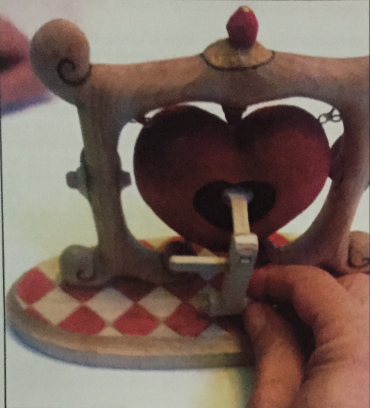
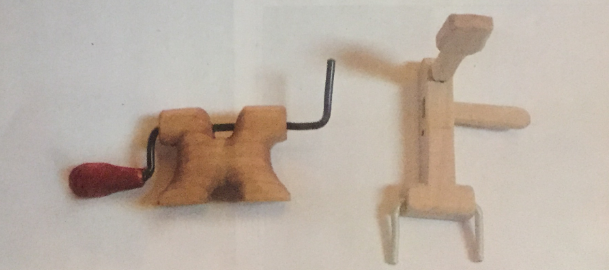
Positioning the Crank Mechanism
Take the completed crank mechanism, and place it so that the right-angle leg of the crankshaft just engages the paddle on the hammer post. Holding the crank mechanism in place, crank it slowly CLOCKWISE (away from the heart). It should push the hammer until it snaps back, striking the heart. After you have found the right position, glue the crank mechanism into place. Adjustments may be made by trimming or bending the crank end slightly. When the project is finished, you should have a heart that beats both audibly and visibly on its flexible attachments.
Supplies
- 8asswood (1 piece of 3/4" x 8" x 18" clear straight-grain)
- Carpenter's glue
- Bectrical wire with insulation (1 piece of no. 12)
- Permanent marker
- Rubber cement
- Sixpenny nail (1)
- Small eyelets (8)
- Small rubber bands (6)
- Tomato Spice acrylic paint
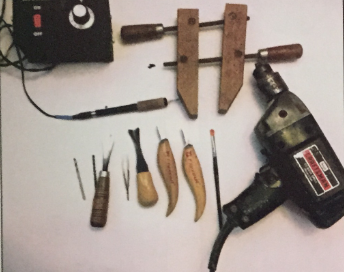
Tools
- 1/8” or 5/32'drill bit
- 3/4" U-gouge
- Chip carving knife
- Detailed carving knife
- Electric drill
- Jigsaw
- Needle-nose pliers
- Tweezers
- Paintbrush
- Woodburner (optional)
- Wood clamp
NOTE: You may have noticed that I am carving without a glove. This was done so that the carving process was clear in the photos. You should always use hand protection when carving. Also, the safest tool is a sharp one. You will use less effort and pressure with a tool that has a well-maintained edge and be less likely to cut yourself. Take a moment to strop your tools during the carving process. If you think you need to strop, YOU DO.
Tip: In many of the photos, you will note that I am using a chip carving knife. Although it is designed specifically for chip carving, I find that this knife works well for small carvings. It is especially handy when carving faces on small figures and for other details, such as clothing seams and pleats.
by Frank Napoli
Frank Napoli began carving about 20 years ago after receiving a carving set for Christmas. His first project was a duck decoy "hacked" out of a 2 x 4. When his wife was able to successfully identify it as a "duck" after some study, he was hooked on carving. Frank belongs to the Suffolk County Wood-carvers Guild and the Long Island Woodworkers Club. He teaches adult education classes in woodcarving. His taste in carving runs from caricatures to canes and found wood. He also has completed a number of pieces that include cameos and netsuke in Corian and bone. Frank is currently counting down the days to his retirement so that he can devote all his time to carving, teaching, and his bride of thirty-four years (not necessarily in that order).
