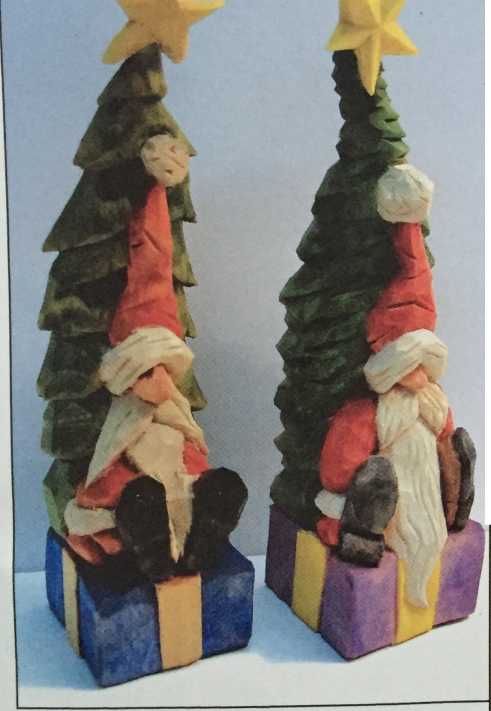
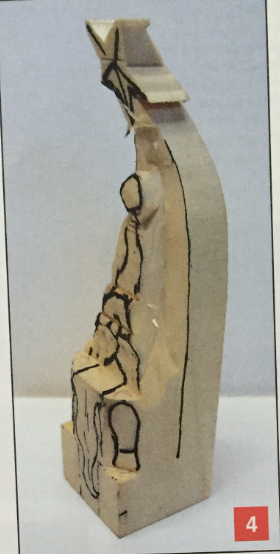
Poor Santa is overdue for a little rest and relaxation after a long night delivering presents around the world. This is a quick and fun project. Make simple changes to the pattern to create your own unique carving—be creative.
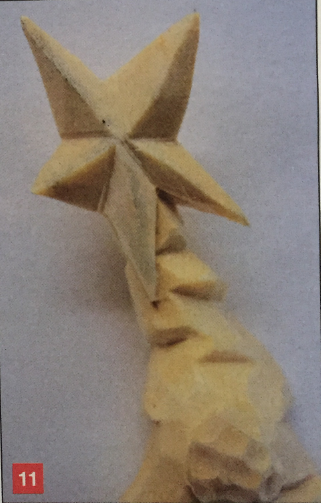
Before you get started, I suggest that you carve the star on the top of the tree last, because the grain direction makes it a little fragile. This area will require light cuts that are made with sharp tools.
Preparation
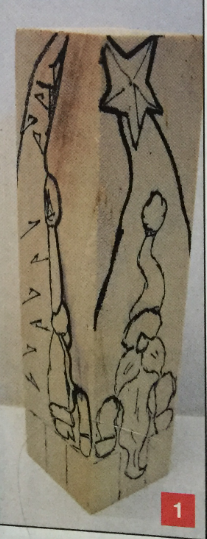
1. Transfer the pattern onto a 1-1/4" x 1-1/4" x 5" block of basswood; make sure that the grain direction is running lengthwise.
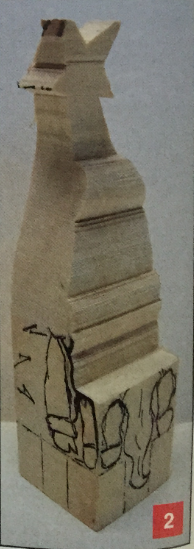
2. You can remove some of the scrap wood with a bandsaw or just start carving.
3. Redraw any pattern lines that were removed in the rough-out process.
Carving
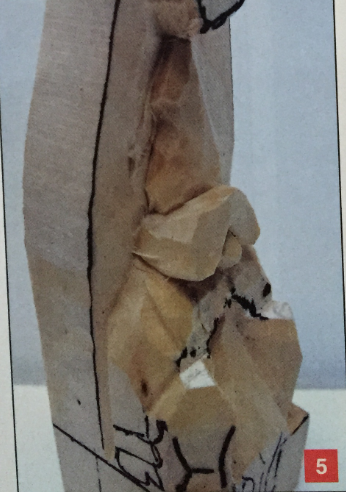
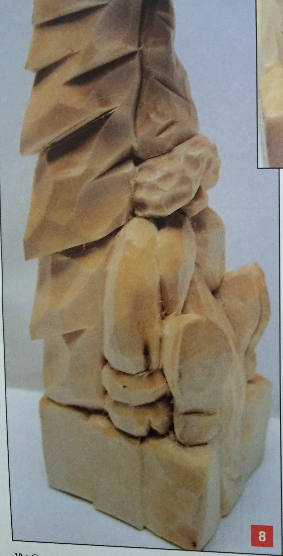
4. Mark a line about 1/2" from the back as shown in the photo. Start removing material around the hat and carve up to this mark to set the tree into the background. Make cuts so that the bottoms of the shoes are approximately 45 degrees from the front of your carving. Redraw pattern lines as needed.
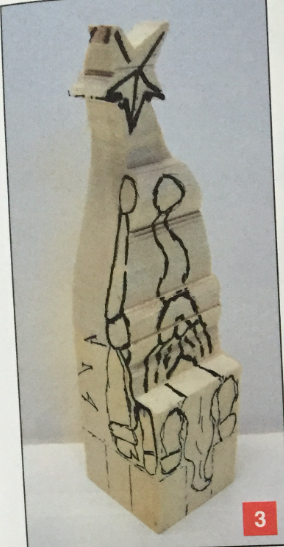
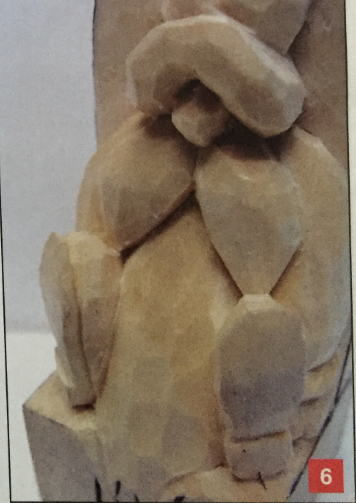
5. Start rounding areas like the hat and beard. Notice how I left the ball on the hat.
6. Now you can start adding some detail. I use what I call a triangle cut.
I carve two stop cuts to form my corner, and then I remove the chip with a third cut. These are great for adding detail to any carving. There are many areas on this carving where this can be done.
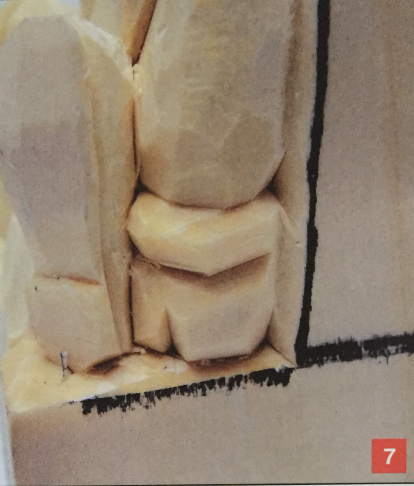
7. Use triangle cuts to shape the mittens. I used a small Г" 70-degree V-tool to create the sole of the boot.
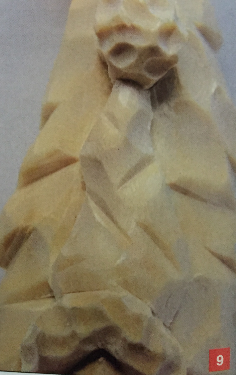
8 & 9. Start rounding the tree; then make stop cuts and remove the extra wood to create the appearance of boughs. I used a small gouge to make the ball and trim on the hat. You can use a small V-tool to carve the ribbon on the Christmas present. Then use your knife to clean up from the comers to the ribbon.
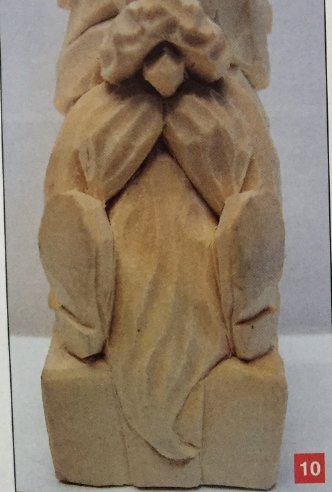
10. Use a small gouge to add some texture to the beard and mustache areas.
11. Once you are satisfied with the rest of your carving, you can work on your star. This photo shows one way to carve the star. I like this technique because the star appears more realistic to me. This is a delicate area because of the grain direction, so take small cuts. This would be a good place to strop your tool as well. Take your time and you should have no trouble. If you do accidentally break off something, reattach with CA glue.
Painting
Before painting, I spray a few squirts of a Simple Green cleaner (or a similar cleaner) onto my carving and scrub it down with a stiff scrub brush. This removes extra pencil marks and any oils that my hands may have left on the carving.
I paint my carving while it is still wet. This will help to keep the paints from bleeding into areas that I don't want colored. I start with lighter colors and paint the tree last. I thin my paints with water to at least a 50/50 mix.
To finish my carving, I use a mixture of half linseed oil and half mineral spirits with approximately a shot glass full of oil-based walnut stain. You can always add more if you would like. This gives a somewhat antiqued look to your carving. Some people add a 1-1/2" or 2" squirt of Burnt Umber oil paint from a tube in place of the walnut stain. Or you can just spray a clear finish onto your carving.
Steve would like to hear from you. Please send him comments and photos of your version of this project.
