Carved wooden signs are often used to identify the owners of cabin and vacation homes, in some parts of the country - notably Nantucket Island, Massachusetts - individual houses are named or set off with a humorous title, always carved in wood. Pine is the most common material for such signs because of its weather-resistant properties.
Carved lettering is far more interesting than painted text, and such signs make great gifts for family and friends. This article reviews simple directions for carving a sign board. The process is relatively easy, even for a beginner, and small mistakes or imperfections will generally go unnoticed at normal viewing distance.
Begin by choosing a type face and size for your sign. There are many computer programs available that can be used to assemble a pattern, including word processors, desktop publishers, and graphic design packages. Take care to choose a practical font. For example, very wide letter strokes can be difficult to work with and are unattractive in carved form. Fonts having very thin serifs may not be visually interesting in carved form.
For this project, we chose the Bookman Old Style typeface, which has well-proportioned and attractive letters.
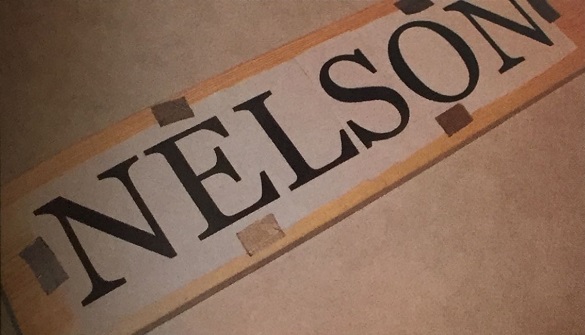
Using a graphic design program, the letters were sized at 4" high (173 points) to fit a 2" x 8" pine board. Since the full name at this size won't fit the width of a standard 8" x 11" sheet of paper in landscape view, the letters were printed out on separate sheets and taped together with proper spacing maintained.
The next step is to select a straight, clear board with an attractive grain pattern. Close and highly visible wood grain gives an interesting effect because of the change in direction that appears in recessed letter areas. A search for just the right board section is well worth the effort. Small knots are acceptable if lettering can be arranged around them.
Center the lettered guide on the board, top-to-bottom and side-to-side, and tape it in place.
You may want to slip carbon paper between board and paper to help create a guideline.
*Note that this will leave thin black lines in the wood that may or may not be objectionable, depending on how the sign is finished.

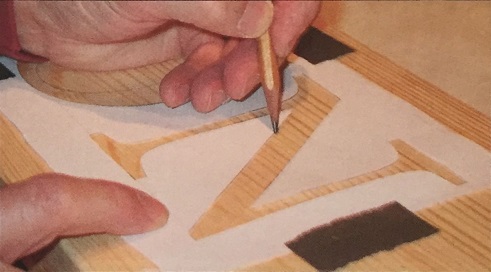
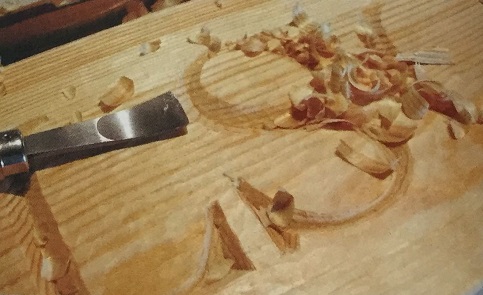
Using a very sharp carving knife, trace the outline of each letter to create light stop cuts in the wood. Before you remove the paper, you may want to trace around inside each cut out letter with a pencil to help mark the stop cuts. Since this pencil line is slightly inside the cuts, it will be eliminated as you carve.
Remove each paper letter to confirm that outlining is complete.
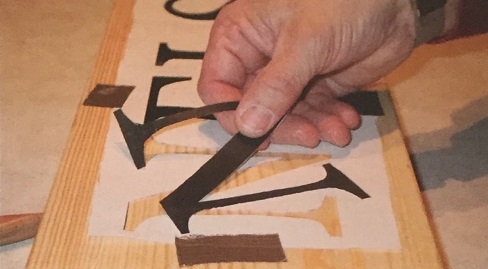
Tracing the letter forms with a pencil will make stop cuts easier to find.
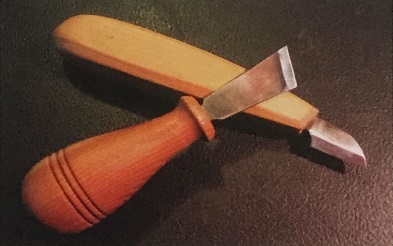
This letter carving method involves two primary knives - the same tools used in chip carving. One tool is a short bladed knife, and the second tool has a chisel-like blade with a diagonal cutting edge. You may also use a conventional straight blade carving knife to clean up details, and a gouge to help in shaping curves.
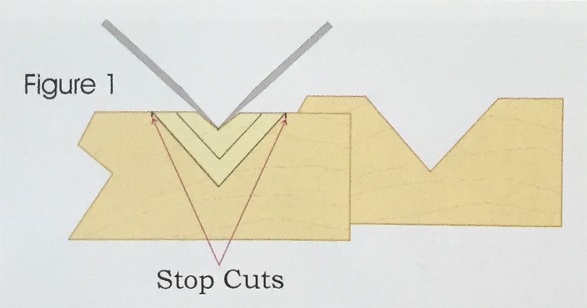
Begin carving by marking the centerlines of each letter. It is helpful to make a stop cut along these centerlines, since you'll be carving from the outsides toward the middle to develop a deep V shape.
Straight horizontal and vertical letter elements are cut with the chisel tool.
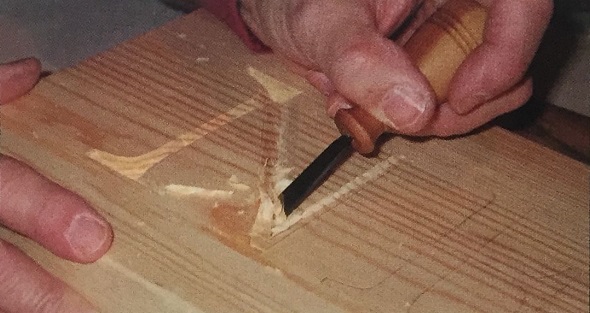
The angled knife is used for curved segments.
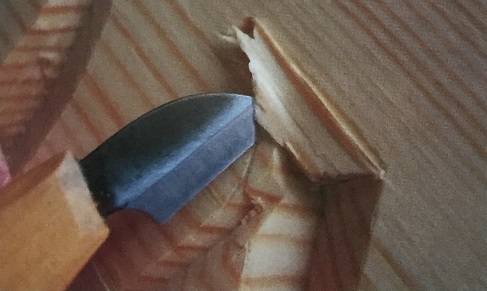
Always work alternately from both sides towards a stop cut in the center, making multiple passes until you reach the outside stop cuts and full depth at the center. Working in stages minimizes blade marks and helps achieve straight, uniform letter elements.
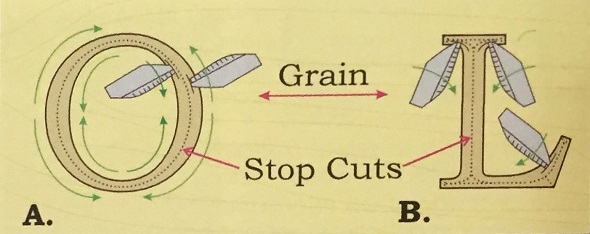
Remember to carve with the grain. This means that multiple sequences of four passes will be required to shape the inside of the letter “O," as well as another four passes for the outside as shown in Figure A. Figure B shows how the ends and intersection points of the letters are carved. With a little practice, you'll find letters easy to carve in this manner.
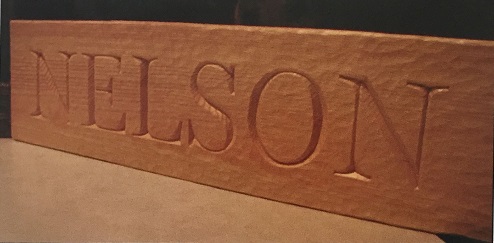
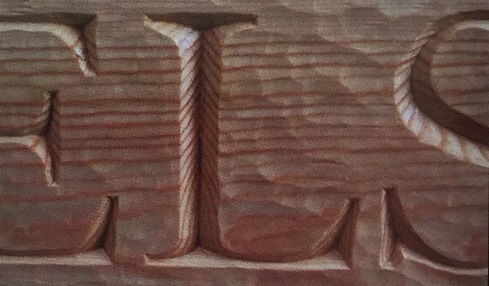
The completed sign has deep letters that catch the light and create a dimensional shadow pattern.
For a hand-hewn look, use a shallow gouge to roughen the flat surface of the entire sign after the letters have been carved. Include the areas around and inside each letter. Alternately, you can sand the entire sign face to remove tool marks and other imperfections and give it a smooth appearance. Since the inset lettering is deep, sanding will not remove details or degrade the look of the sign.
There are several options for finishing an outdoor carved wood sign, including keeping the natural look staining or painting. While exterior grade varnish can be used to seal the surface, normal expansion and contraction of the wood will eventually cause the varnish to craze, degrading protection. Another option is to cover the surface with multiple coats of lung oil or other mineral oil-based finish, which penetrates the wood and better wishstands weathering. Some darkening will occur with sun exposure, but an occasional re-coat with oil will preserve the sign's appearance and shield it from the elements.
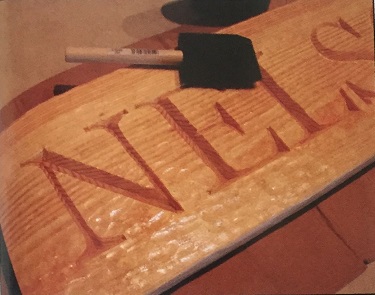
A penetrating oil finish tends to emphasize grain patterns and increase contrast between light and dark areas in the wood for a pleasing appearance. The sign pictured in this article was protected with several coats of non-tinted oil that is supplied in gel form. This finish was applied with a foam brush and the excess oil was wiped off. The surface was allowed to dry between coats.
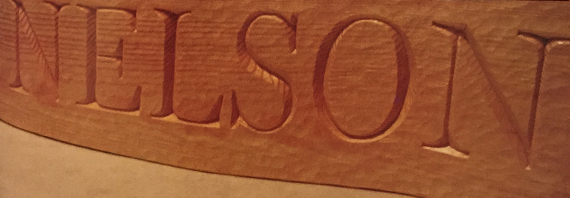
This name sign, carved in aspen, shows sign of weathering after more than five years of exposure at my Wisconsin cabin.
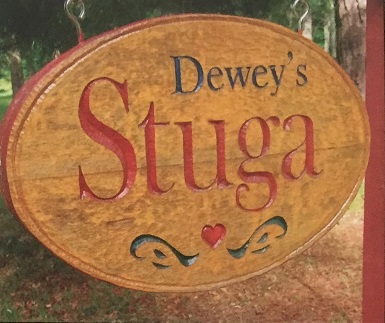
Here is the final look at the sign.
About the Author
 Tom Dewey is president of Dewey Communications, Inc., a technical public relations firm that he founded in 1976. His work includes researching and writing articles for technical trade magazines and websites.
In his spare time, Tom enjoys a variety of carving projects including miniature figures, personalized signs, and whimsical banks made for his grandchildren and others in the extended family. He has carved name signs for the vacation homes of various friends and family members, and prefers working with close-grained pine or butternut for these projects.
Tom and Joan Dewey make their home in the Minneapolis suburb of Bloomington, Minnesota.
Read our latest articles at Carving Magazine homepage.
