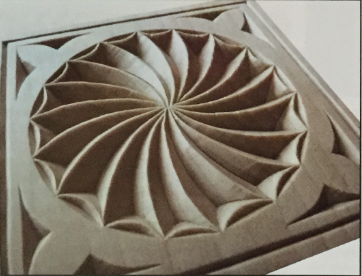
The swirl rosette is a classic carving pattern that has been found on furniture and other household objects for many years. Its beauty, elegance, and sweeping curves make it suitable to use on almost any item that you wish to embellish. It's not hard to carve, which should encourage you to give it a try. As with any carving, if it looks too intimidating at first, try it on a basswood practice board. This will help you build your confidence and technique as you prepare to carve a finished project.
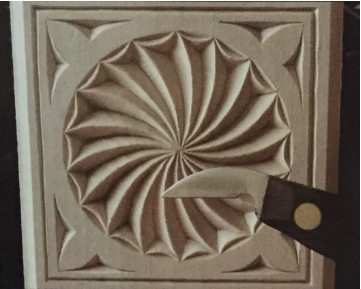
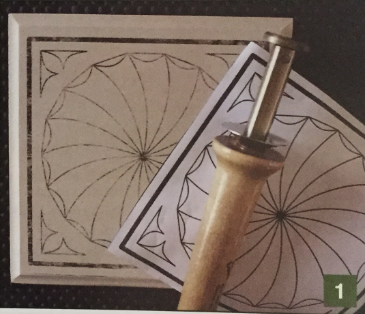
The swirl pattern (included in the Pullout Section) is sized to fit the lid of a 5" x 5" basswood box. Information on ordering boxes and other chip carving tools is available at the end of this article.
1. Prepare the wood prior to applying the pattern by sanding with 220- or 320-grit abrasive paper. Remove the dust and apply the pattern to the wood. The Pattern Transfer Tool is my choice when it comes to pattern application.
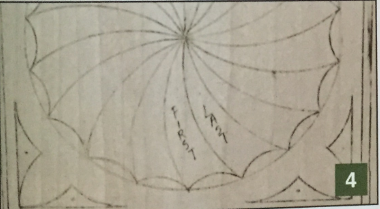
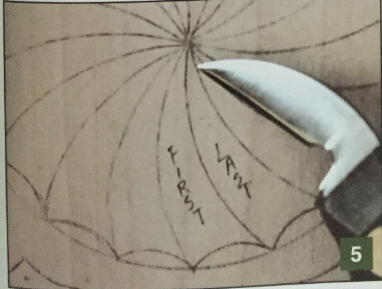
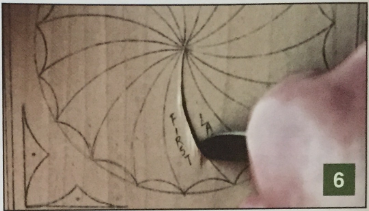
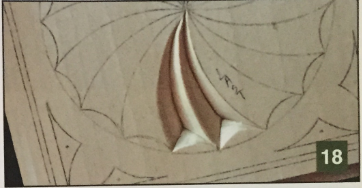
2. Determining where to make your first cut is important when carving this swirl because all the chips are back-to-back. When deciding which cut to make first, think about which cut you’ll make last. The grain on our box runs up and down.
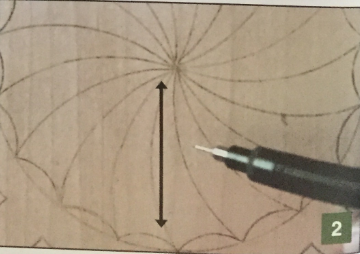
3. If I start in the center of the rosette and make my first cut on this line (I am right-handed, so the cut will be angled to the left), then my last cut on the chip immediately to the right will finish with the grain.
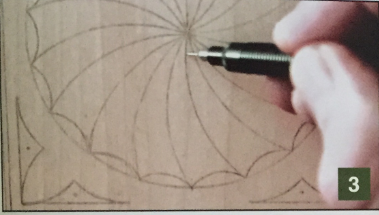
4. That's what we want because finishing with the grain will lead to less chipout in the delicate area in the center of the rosette. I’ve labeled the first and last chips so that you can see how the back-to-back cuts align with the grain.
5. The Modified Knife is your best choice of knives when it comes to carving the swirl. With less metal on the spline of the blade, it is easier to make smooth, sweeping curves. And since it is pointier than a regular cutting knife, it is easier to reach to the bottom of each chip.
6. Lock your thumb against the handle of your knife, and place your knuckles and the tip of your thumb on the wood. This should form a stable base for your hand and allow you to hold the knife so that the blade is at a 55- to 65-degree angle. If your hand falls off the edge of the box, slide another object next to the box for your hand to rest on. (The object should be the same height as the box.) Start with a very shallow cut in the center of the rosette, and gradually increase the depth of the cut as the chip gets wider.
7. Start the second cut where you finished the first cut (again, start with a very shallow cut).
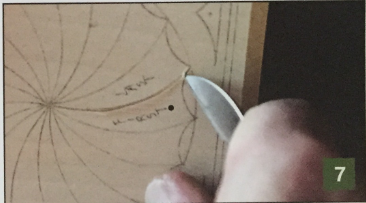
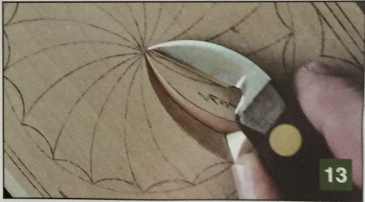
8. Quickly increase the depth of your cut so that the point of your knife reaches directly below the dot, as shown in the photo.

9. Rotate your project to make the third cut. This cut is opposite your first cut. Start with a deep cut and draw the knife steadily out of the wood as you follow the curve toward the center of the rosette.
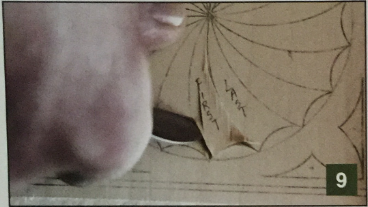
10. If the chip does not come out after your third cut, don’t pry or wedge it out!
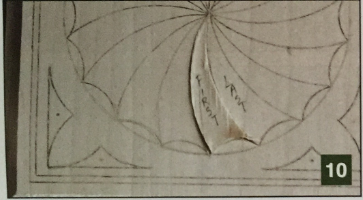
11. Instead, hold your knife at the same angle and go over the cut again, starting with the cross-grain cut. Most of the time, it will be the cross-grain cut that needs a little more depth to remove the chip.
12. If any wood remains in the bottom of the chir* k your knife at the same angle and carefufy remaining wood with a tight cut.
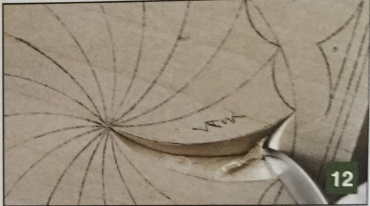
13. The center of the swirl is the most deiicafe par* of — rosette, as all the chips converge at one location. excessive undercutting will weaken the wood one cause chipout, especially on the cross grain.
14. To help preserve this delicate center area, remember that all your cuts do not—and should not—start or the very center of the swirl. Starting a bit away from —e very center will help the wood remain strong, and keec the complete rosette firm and intact.
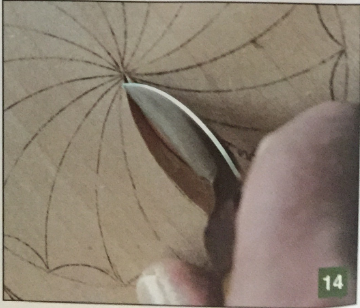
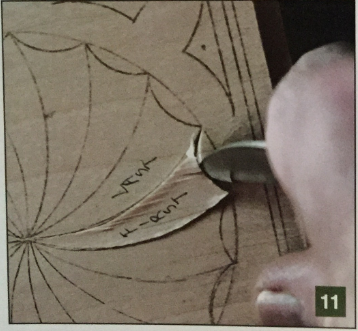
15. Your first cut on the next chip should be cutting away from the chip that was just removed. Carve as close to the edge of the previous chip as possible. This will form a nice sharp ridge between the chips, and will give your carving a precise and crisp appearance.

16. Your next cut on this chip starts out with the grain. Your knife will want to follow the grain instead of easily making the curved cut. To transition from the grain to across the grain, you may need to draw your knife slightly out of the wood, make the transition, and then go back down to the needed depth.
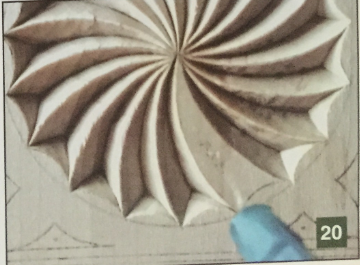
17. Cleaning up your chips is a very important step. Make light cleanup cuts, returning your knife into the chip as few times as possible.

18. With two chips done, you are ready to repeat this process as you work your way around the rosette. Take your time and learn from one chip to the next. If chips continue to need cleanup on your second cut, make the necessary corrections to your technique so that you don't have to clean up each time.
19. As I was carving this particular basswood box, I noticed that the wood was dry and brittle and started to flake on the top sharp edges.

20. If you experience the same thing, spray the wood with rubbing alcohol. This will temporarily increase the moisture content and allow for easier carving when the wood is extra dry and brittle. You can dilute rubbing alcohol with water (50:50) if you like, but don’t use straight water. Rubbing alcohol evaporates quickly and won’t raise the grain as much as water will.
21. Very soon, you will be ready to remove the |o of the swirl. Your first cut will be the same as all the' ous first cuts that you made.
*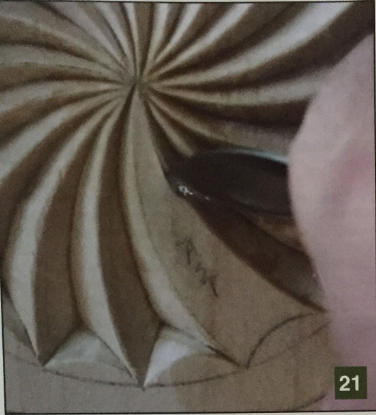
22. As you moke your last cut, you will be glad that you planned ahead to make this your final cut. As this cut is with the grain, it will not chip out as you complete the cut
23. Remove the last chip and do any necessary clean, up.

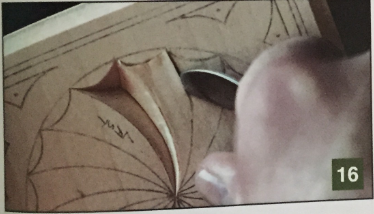
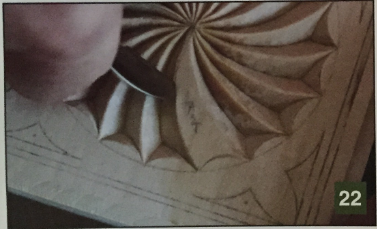
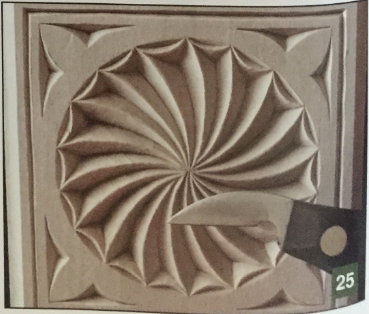
24. When removing the two-sided chips on the outer edge of each petal of the swirl, make all your inside cuts first, working your way around the rosette. Make the outside cuts in one continuous motion, shallow to deep to shallow, removing all of these outer chips. Be careful not to cut too deep on your second cut and risk chipping out part of the swirl.
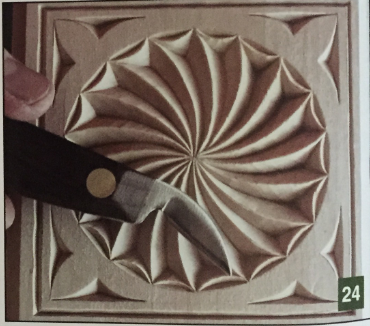
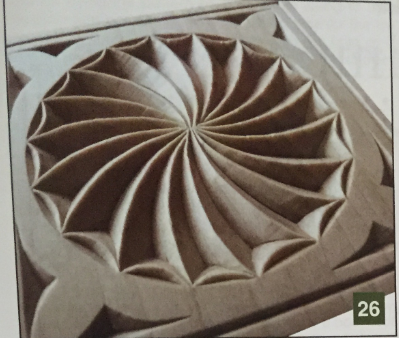
25. The three-sided chips on each corner and the border lines frame and enhance the swirl rosette.
With your carving complete, you are ready to remove any leftover pattern lines and apply a finish. Remove graphite transfer paper lines and Pattern Transfer Tool lines with a Tombow Sand Eraser. Do not sand off these leftover lines, as this will flatten the tops on the sharp ridges that you worked so hard to carve. After all the lines have been removed, wrap a piece of 220- or 320-grit abrasive paper around your fingers and take a couple of very light passes across the surface of the wood. Vacuum off the dust.
26. Apply one coat of wax-free sanding sealer to the entire project. Lightly sand and then remove the dust. Spray, don’t brush, two to three light coats of satin lacquer, lightly sanding and removing the dust between coats. After spraying the last coat, let it dry, and you're done!
Marty Leenhouts has been chip carving for over 28 years, and seeks to equip, instruct, and inspire chip carvers around the world with personal instruction, online tutorials, chip carving patterns, high-quality tools, and basswood products to carve.
