I love the simplicity of chip carving. With small projects like these fireplace bellows, I can carve almost anywhere. That comes in handy during the winter months, when it’s a lot easier to carve at the dining room table than it is to heat up my shop. However, I wanted to break away from the highly geometrical designs (such as snowflakes and rosettes) that I commonly use.
Eventually, I decided to work on snakes. They allow me to combine and contrast the elements of regular repeating patterns (the basic principle of most chip carving) with irregular nature.
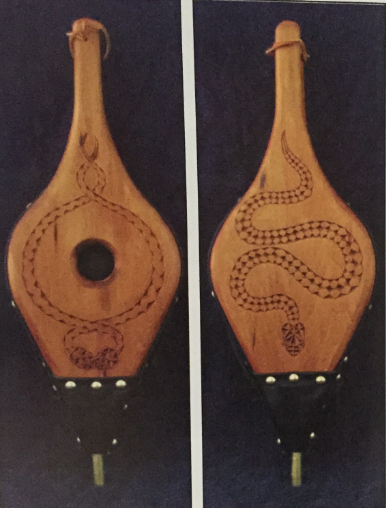
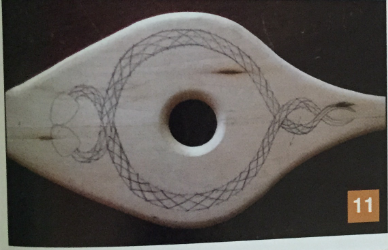
I'll start with the two intertwined snakes on the intake paddle. Since I had a center hole to avoid, I decided to use two snakes to frame it, almost like a caduceus. I sketched my ideas on a paper template of the paddle until I had something that I liked (Photo 1).
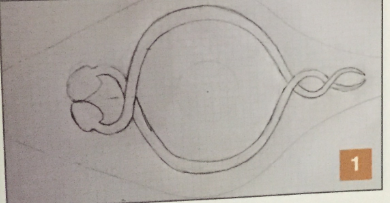
I liked one of the snakes better than the other one, so I laid a clear plastic grid on top of the sketch and traced it. I purchased this template material from a fabric store that caters to quilters; I imagine an art supply store would also have it. Unlike many types of plastic, you can write on this with a pencil.
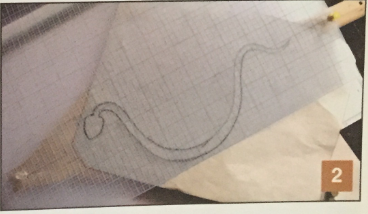
I then moved the pattern over to my basswood blank and secured it to the centerline with a couple of map pins (Photo 2).
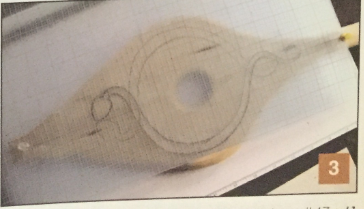
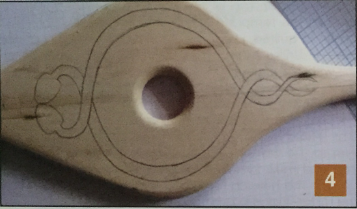
I used carbon paper to transfer the pattern to the wood. I flipped it over, using the two holes from the map pins as reference points and lining them up with the holes in the wood (Photo 3), and then drew the mirror-image pattern (Photo 4).
When you trace the shape of the snake with a pattern that has been adapted to the chip knife, you can think of it as a border pattern—the type you might put around a box lid. The problem here is that the “border” is a snake's body that twists around and also changes in width. To get a handle on it, I first drew in centerlines. I have a loose relationship with rigid accuracy, switching between drawing freehand and using instruments, depending on what effect I want and how much trouble it is. In this case, I simply drew them in by hand, aiming for the visual center (Photo 5).

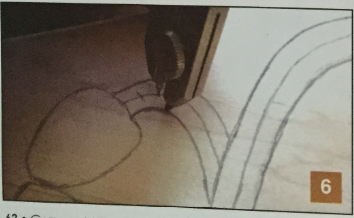
In the next step, however, I did make use of a technical aid, because I found it a fast way to an acceptable result. Since I wanted my pattern to vary in size with the snake's body, I needed to mark out my grid pattern on a variable scale. I used a compass to mark off steps proportional to the width of the body at each point (Photo 6).
When I was finished with the entire length of both snakes, I drew freehand bisecting marks on the outside edges (Photo 7).
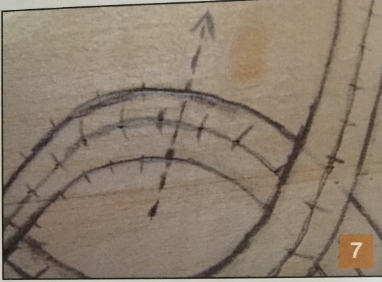
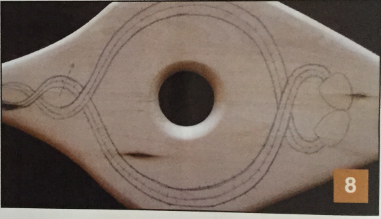
The diagram shows that I'm imagining a line that cuts squarely through the curve, halfway between two marked points on the centerline. I couldn't come up with a way to do this more accurately that wouldn't have been tedious beyond my tolerance. I marked the entire length of both snakes this way (Photo 8), making them resemble cacti (Photo 9).

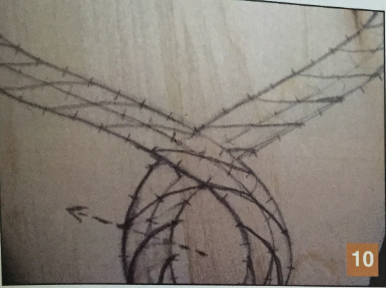
Once the marks were in, l started connecting them in a pattern that I had previously experimented with on paper (Photo 10), drawing diagonal lines through every other group and then crosshatching in the other direction (Photo 11).
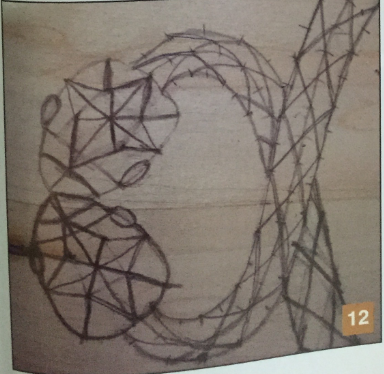
I then quickly sketched in some lines for the heads (Photo 12).
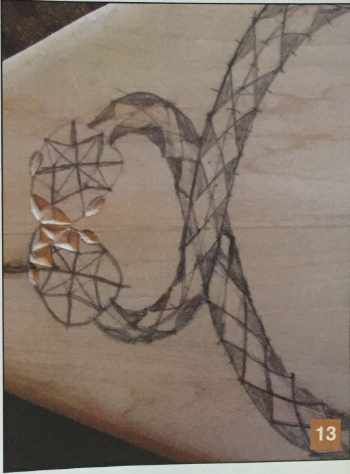
Once I had filled in the areas that would be chipped out, leaving the “land" unmarked, I started carving at the head (Photo 13). I didn't bother to color in the heads; I decided on which parts to leave uncarved as I got to them. I was more concerned about losing track of the repeating pattern on the bodies, but it's not a bad idea to mark everything.
For the single snake on the flip side, I didn't have a center hole, so I decided to stray even further from geometric convention and make a nonsymmetrical snake.
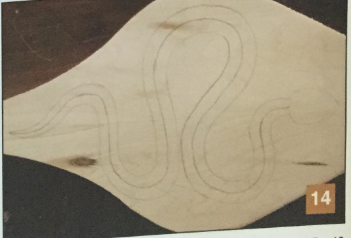
Once again, after drawing some sketches on paper, I traced my outline on the wood with carbon paper and drew in the centerline (Photo 14).
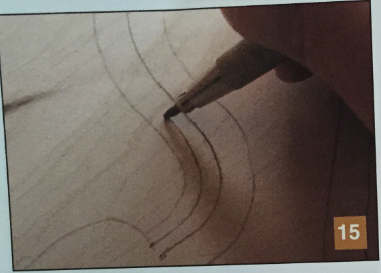
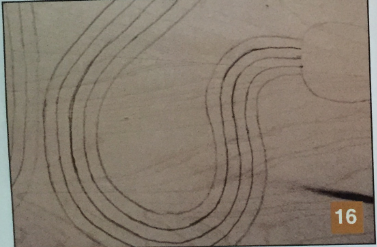
And this time, since I had a trigger body to ptay with, I added additional Hnes, plso drawn freehand (Photo 15 and Photo 16).
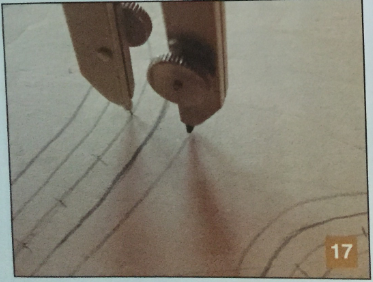
I used the compass again when i made my marks of varying lengths (Photo 17).
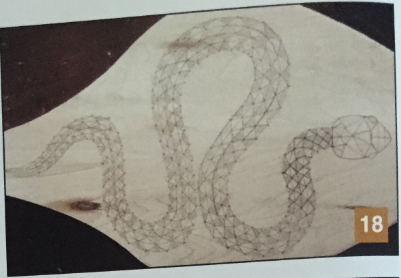
Using a diagonal grid similar to the first design, I marked off my large snake (Photo 18).
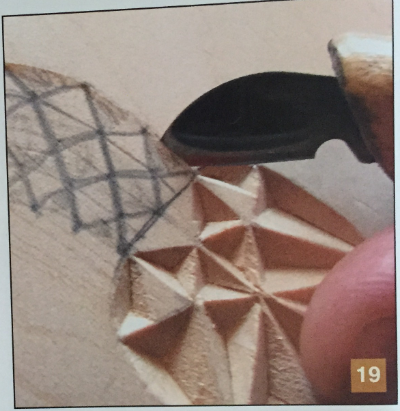
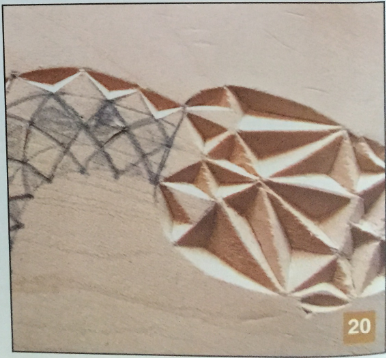
Instead of taking out individual chips one at a time, I decided to cut all the outside edges in a string of four or five chips first. This helped I me follow the flowing lines (Photo 19 and Photo 20).
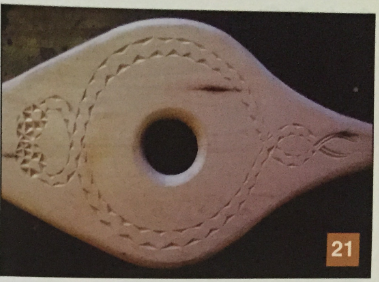
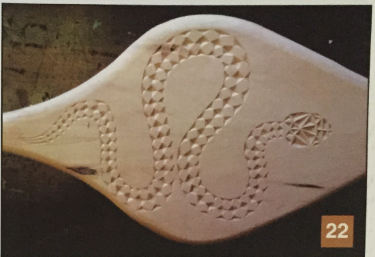
Once both sides were carved, I used an eraser and sanded lightly to remove the layout lines (Photo 21 and Photo 22).
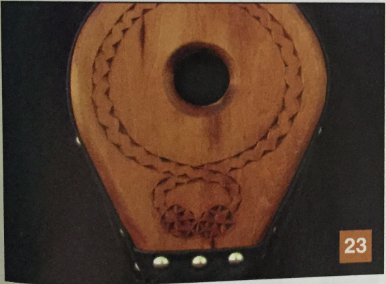
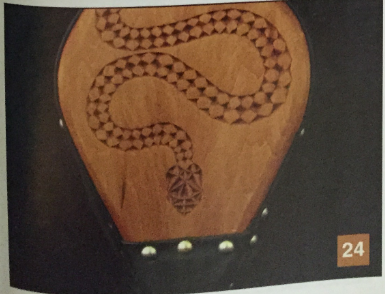
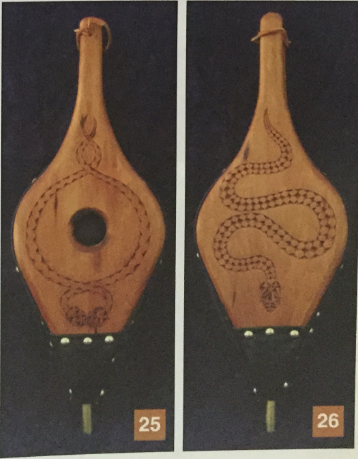
I used an orange shellac finish on my project—the same finish that I used on my snowflake bellows. I brushed on f'nis feW coats and then I used a rag to apply several §|1 coat$. After I added the hinge and leather, the gLt was complete (Photos 23-26).
So, next time you're looking for a chip carving idea, free yourself from strict symmetry and take a walk on the wild side!
by Roy Gibson
Growing up In Baltimore, Maryland, Roy Gibson learned basic woodworking as he watched his father in his workshop. Roy still uses many of his father's tools in his woodworking projects. For years. Roy worked as an electronics technician in Silicon Valley. After a stint in the Peace Corps, he began woodworking again and has continued for over twenty years. Currently, Roy and his wife, Patti, operate Laughing Coyote Woodworks in Stamford, Vermont.
