Realistic habitat accent teaches texturing techniques
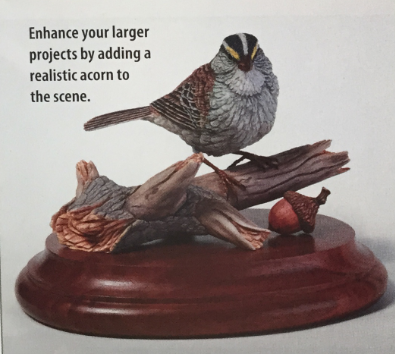
When you are carving a bird or a small animal, add realism to the scene and help balance the composition by including an acorn in the habitat.
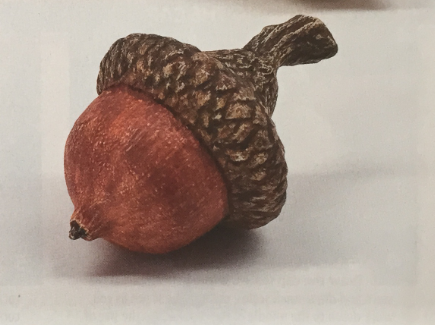
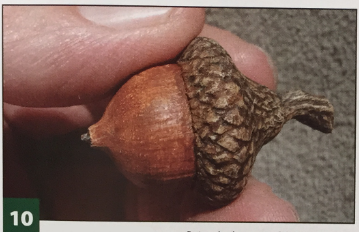
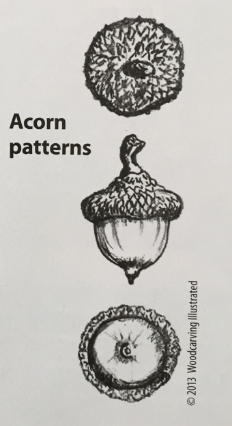
Acorns come in a variety of shapes, sizes, and types; this one is from a black oak. Colors vary depending on the maturity of the acorn—early acorns have a little green on the bottom portion and more mature acorns are darker in color. Although I have provided a pattern, keep a real acorn handy for reference as you carve and paint.
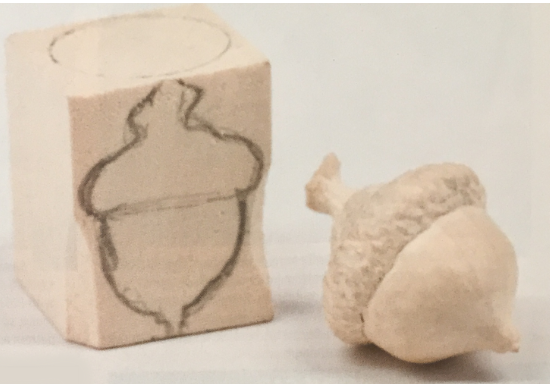
Start by transferring the pattern to the blank. I slip carbon paper between the pattern and the blank, and then trace the pattern onto the blank. You could also rub a soft graphite pencil on the back of the pattern and then trace the pattern onto the blank.
ACORN: CARVING THE SHAPE
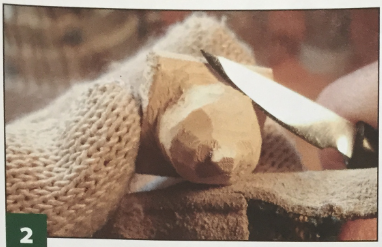
Rough out the blank. Use a knife to remove wood from outside the pattern lines until two sides are roughed out. Rotate the blank 90° and sketch the side view onto the blank. Remove equal amounts of wood from the remaining two sides to create essentially a square acorn. Leave extra wood on the cap for the stem.
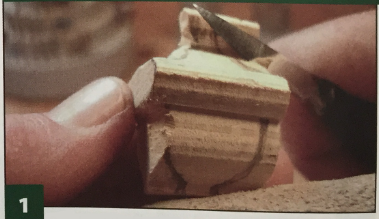
Shape the acorn. Use a knife to round and shape the bottom portion of the acorn. Carve the bottom into a point. Then, round the cap and carve the stem. You could use a rotary tool instead of the knife. Use a ruler or calipers to make sure the elements stay symmetrical and in proportion. Be careful, because it's easy to remove too much wood from a small carving.
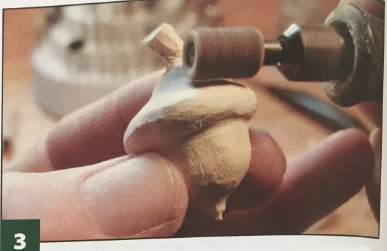
Sand and smooth the acorn. Use a Ve" (10mm)-diameter sanding drum with a 220-grit drum in a rotary tool, or hand sand with 220-grit sandpaper. Remember, acorns are not perfectly round, so smooth it until you are happy with the shape. Use the pattern as a guide.
ACORN: DETAILING THE CAP
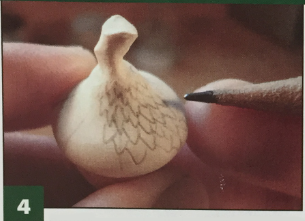
Draw the cap scales. With a pencil, start at the stem and draw small scales; enlarge the scales as you work down to the middle of the cap. Reduce the size of the scales near the edges. Stagger the scales so no two begin or end directly under each other.
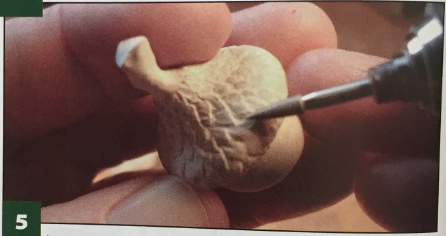
Carve the cap scales, stem, and tip. Use a flame-shaped ruby bit in a rotary tool to carve the scales. Then, go over them a second time with a small cone-shaped diamond bit laid on its side. Begin at the top of the scale and work downward, tapering the scales so they overlap like roof shingles. Use the same bit to carve a few small grooves in the stem and to finish carving the bottom point.
Burnish the carving.
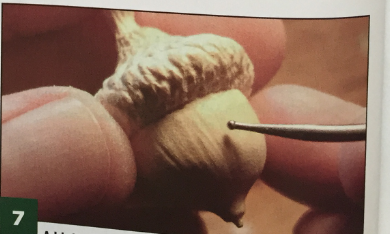
Use a ball burnisher/stylus (or a modified dental tool) to round and compress the cap scales and stem. Remove the sharp corners from the acorn and enhance the overlapping transition from scale to scale. Then, use the same tool to compress the wood on the bottom of the acorn to give it a shelllike texture that will not swell when you apply paint.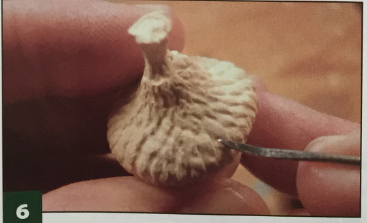
Add the details. Use the small ball stylus or dental tool to press in a few vertical grooves from cap to point around the perimeter of the bottom part of the acorn. Start just below the cap, and press firmly on the stylus as you scribe random grooves toward the tip of the acorn. Reduce the pressure before you reach the tip. These grooves make the acorn look realistic.
ACORN: PAINTING THE PROJECT
Apply the basecoat. Seal the wood with Deft clear wood finish. Apply a coat of full-strength gesso with a soft #6 royal liner brush. Mix equal parts yellow oxide or yellow ochre with white and apply this basecoat to the entire acorn.
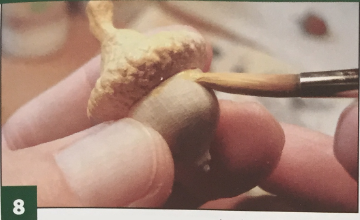
Paint the acorn. Use the #6 brush to paint the cap and stem with a watery mixture of equal parts burnt umber and Payne's gray. Apply three or four thin coats to build up the color. Allow the paint to flow into the recessed areas of the adjoining scales. Once the paint is dry, lightly wipe the cap with a damp paper towel to bring out the highlights of the scales. Use the paint mixture to add a few vertical lines around the lower portion of the acorn from the cap to the tip (stay within the burnished grooves). Build up the color with three or four coats of paint.
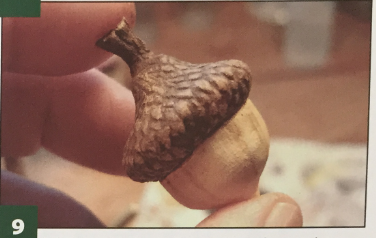
Finish painting the acorn. Paint the bottom of the acorn with five coats of thinned burnt sienna. Mix 4 parts white with 1 part yellow oxide and lightly dry-brush this full-strength mixture on the cap and stem.
TOOLS
- Pencil
- Ruler
- Ball stylus burnishers: Royal D-25, Royal D-5, Fiskars Vi' (3mm) wide
- Carving knife
- Calipers (optional)
- Dental tool (modified to V-shape)
- Rotary tool with bits: 3/8" (10mm)-diameter sanding drum, flame-shaped ruby, small cone-shaped diamond
- Paintbrush: Royal #6 liner
MATERIALS
- Tupelo or basswood, 1" (25mm) thick: 1 x V/г (25mm x 38mm)
- Carbon paper
- Real acorn (for reference)
- Clear wood finish, such as Deft
- Gesso
- Acrylic paint: yellow oxide, Payne's gray, burnt umber, white, burnt sienna
- Sandpaper: 220 grit
Acorn patterns
Butch Clark has been carving realistic birds and ducks since 1992 and is a member of the Brukner Nature Carvers. He has won numerous awards at woodcarving shows throughout the country, including The International Woodcarvers Congress and The Ward World Wildfowl Competition. Butch lives near Bradford, Ohio, with his wife, Janie.
