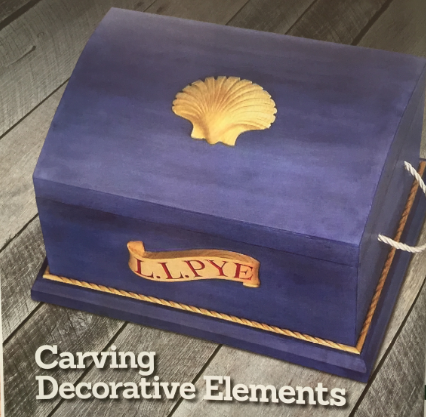
Learn to carve rope molding, a lettered banner, and a scalloped shell
This toy box started life as a simple, mass-produced, but well-made paintable box. I converted it into a sea chest by adding a rope molding around the base, a seashell on the lid, and a scroll-like banner to the front with the name of the little pirate who was to own it.
All of these applied elements could find homes on other projects, such as a mirror or picture frame, a shelf or bathroom decoration, or a cutting board. You can use them together, as I did, or separately. The wood for the carvings must be easy to carve, such as basswood, mahogany, or tightgrained pine.
I carved the letters with traditional carving tools, but you could paint or burn them into the banner or incise them with a knife or V-tool.
CARVING THE ROPE MOLDING
Cut tne morning blank. The blank is a length of 1/4"" (6mm) half-round or bead molding. Buy the molding or make your own using a router and suitable bit, or even a molding plane. Cut 45° miters on the ends of the pieces to fit around your project, but do not nail it in place yet. Stop each length of carved rope a little short of the corners; rope never looks natural wrapped around a sharp right angle.
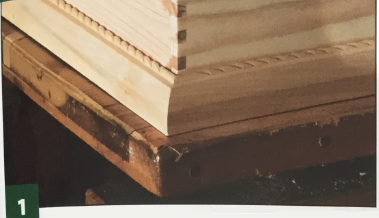
Mark the blank. Set dividers to twice the width of the molding and step out units that represent the twists of the rope. For long lengths use a template marked with a dozen divisions. Work from the center of each strip of molding toward the corners, stopping short of the miters. Use a pencil to make the marks easily visible
.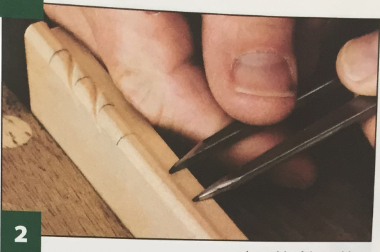
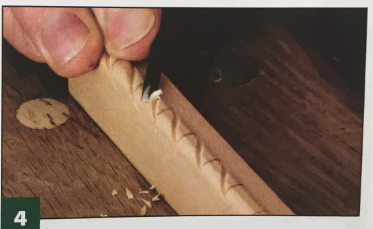
Rough out the rope twists. Carve diagonally between each twist with а 1/4" (6mm) 60° V-tool. This groove should be a smooth S shape. Start cutting lightly a little before the first division, and then cut up and over the molding. Cut down to the finish a little beyond the division on the far side. The start and end of the V groove is shallow, but the middle part is about 1/8" (3mm) deep. Repeat along the molding—make each cut exactly and with the same fluid movement.
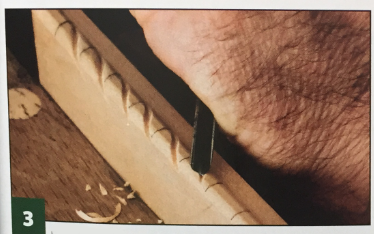
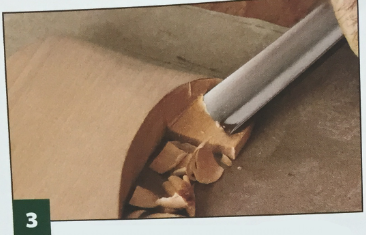
Round the corners of the V groove. Use a 3/16™ (5mm) #5 gouge upside down. Cut with the grain. Shape one side of the groove and then turn the molding around to carve the other side. There is no need to sand; the rope looks more natural with a few light facets, but make sure all of the cuts are clean and finished. Erase the pencil marks.
CARVING A BANNER
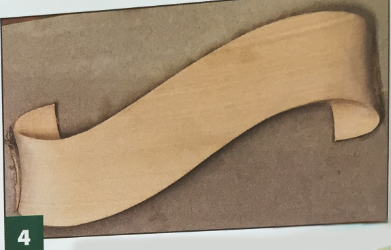
Transfer the pattern to the blank. Use adhesive to attach a photocopy of the banner pattern to the blank. Use a band saw or scroll saw to cut the banner outline. Glue the blank to a backing board with thick paper between the two pieces of wood (the paper sandwich method of holding the blank). The banner is level except for the ends. Round the ends with a 3/4" (19mm) #3 gouge, cutting around the ends and into the backing board. Sand the curved ends smooth.
Rough out the turnovers. Redraw the shape of the turnover at each end of the banner. Use the #3 gouge to remove the wood between the line and the rear corner of the banner down to about 1/8" (3mm). Set in the edges of the turnover at a 90° angle; there is no need to undercut.
Finish the visible back sides of the turnovers. Use a sharp gouge to dean up any rough cuts, or sand the back side. Make sure the joints are clean and set in at a 90° angle.
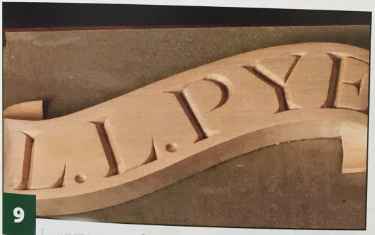
Refine the upper and lower edges. Match the curve of the gouge to the curve of the banner. I use a 5/8" (16mm) #5 gouge, a 1/2" (13mm) #6 gouge, and a 5/16" (8mm) #9 gouge. These edges curve) smoothly into the corners to give the banner a strong 3-D look. Hollow the ends of the banner slightly as they curve toward the back.
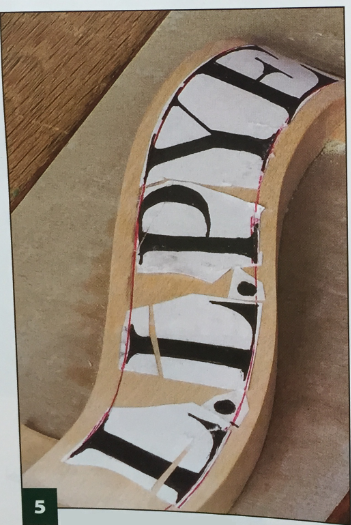
Make a lettering pattern. Print the name or message using your choice of font; I used Engravers MT. Cut the letters apart and position them on the banner. The header and footer lines (red in the picture) shouid follow the curves of the scroll and lead the letters around. Glue the paper letters directly onto the wood with a light tack adhesive so you can adjust them as needed. Start carving when you are sure the layout looks good.
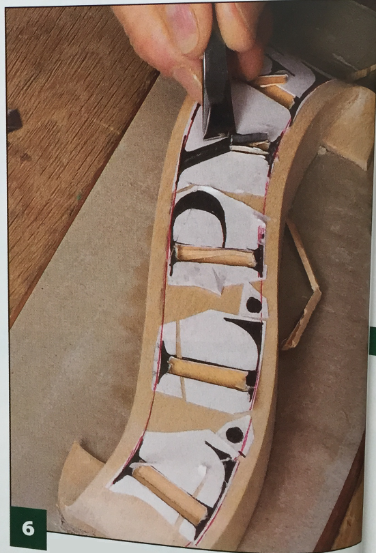
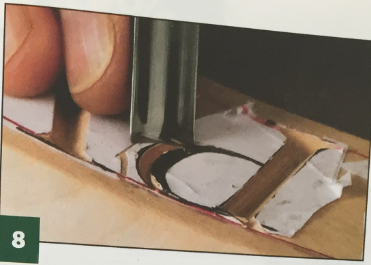
Carve the straight elements of the letters. Use an appropriately sized #1 straight chisel to make a stop cut in the centefi of each straight element (see the Tools list for the chisels I used). Do not carve the serifs yet. Use a #1 chisel to cut from the sides toward I the center of each letter at a 60° angle. Both cuts should meet in thE center at the bottom of the stop cut. Use this technique to carve the vertical, horizontal, and angled components, and then dean # the intersections between these components.
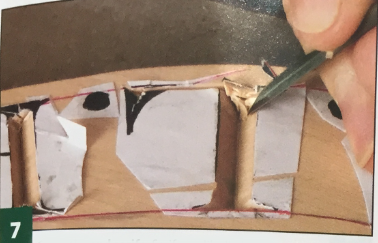
Cut the end serifs. Serifs are like little inverted triangles. Use a 3/8"" (10mm) #6 fishtail gouge for the serif sides and a 1/4" (6mm) #1 fishtail chisel for the ends. All walls slope at a 60° angle. Begin with stop cuts from the V trenches into the serif corners to prevent splitting the grain. Curve the trench walls around into the serif with the fishtail gouge. Finish the ends with a fishtail chisel, following the header and footer lines.
Carve the curved areas. The walls slope at a 60° angle. Pick gouges that match the inner and outer curves (the gouges I used are in the Tools list). Remove the excess wood first and then finish the walls with smooth slicing cuts. Keep the bottoms of the trenches clean.
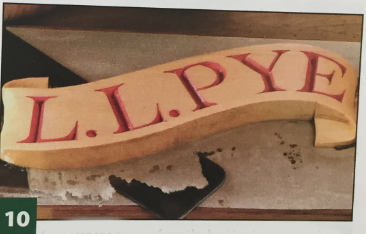
Finish the banner. Paint the letters with acrylic artist's paint. Finish the banner with matte acrylic varnish. You can see how laying out the letters to follow the curves gives the banner convincing movement. It's worth the time it took to place the pattern correctly.
Separate the banner from the backing board. Split the paper with a thin spatula. Rub the banner on sandpaper attached to a flat surface to remove the paper, or scrub ofFthe paper with mineral spirits.
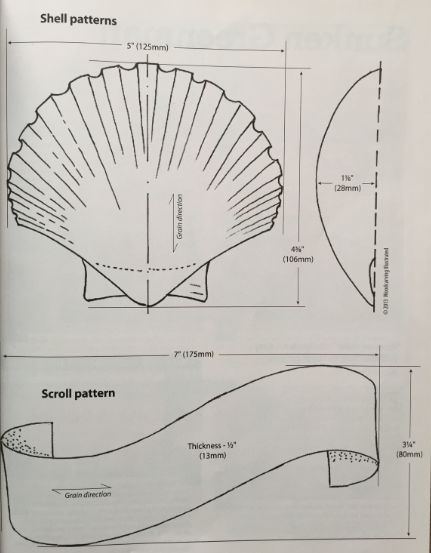
CARVING A SCALLOPED SHELL
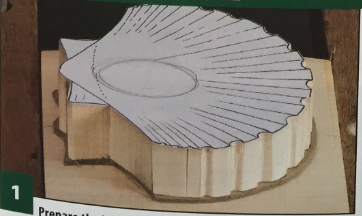
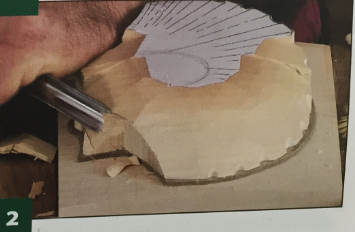
Prepare the blank. If you plan to place the shell on a curved surface, shape the back of the blank to the curve first. Then, attach a photocopy of the pattern to the front. Cut the blank and smooth all of the scalloped edges of the shell. Screw the shell to a curved piece of scrap with cardboard padding to fill any gaps between the back of the blank and the scrap. Grip the scrap block in a bench vise.
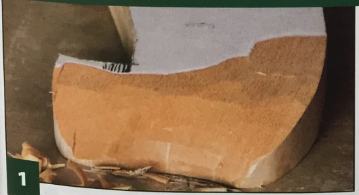
Shape the shell. Mark the high spot in the middle of the shell. Use a 3/4" (19mm) #3 gouge and a 1" (25mm) #1 chisel to round the shell down from this point to get the overall shape. Reduce the side ears, or auricles—which are part of the shell's bivalve hinge—with a 3/16" (5mm) #9 gouge.
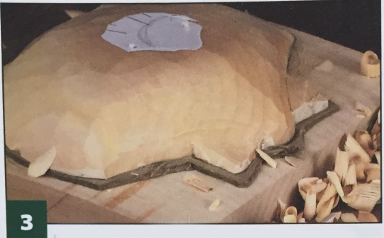
Refine the shell. Try to get a good overall shape before adding the splaying grooves (or flutes). Hold the #3 gouge upside down to smooth the surface and remove all of the paper pattern. Clean up the outer edges all round, cutting down into the backing wood. Sand the shell if desired. I left mine with a smoothly faceted surface because I think it looks a little softer.
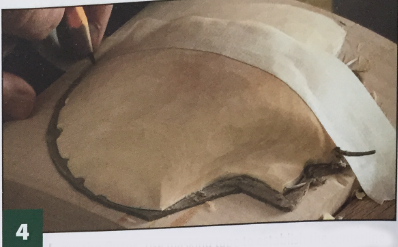
Draw the flutes. Use masking tape to establish the centerline. Carefully draw the flutes using a pencil or use paper templates. Take your time to make each flute look correct. Draw matching lines on both sides of the centerline to represent the flutes that splay out of the recesses in the corrugated outer edge.
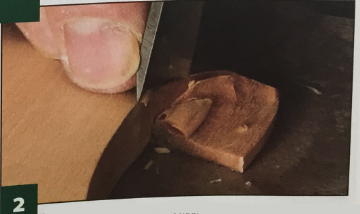
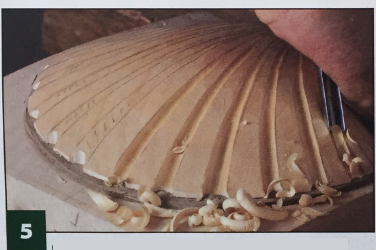
Carve the flutes. Carve downhill with a sharp 1/4 (6mm) #10 or #11 gouge. Start with the flutes close to the centerline. Make a light trial cut first before taking a final deeper pass down to the edge. The flutes aren't parallel; they splay slowly as they approach the edge. Aim for smooth, consistent curves. Carve all of the grooves on one side and then match the opposite side, or carve one pair of grooves at a time (carve a groove on the left side of the centerline and then carve the matching groove on the right side of the centerline). Smooth and finish the grooves with a tightly rolled cylinder of fine sandpaper. Apply a thin beeswax polish to the shell.
MATERIALS
- Semi-circular (astragal) molding, 1/4” (6mm): enough to go around the base of your box
- Basswood, mahogany, or tightgrained pine, 1/2 (13mm) thick: scroll, 3 1/4 x 7" (83mm x 178mm)
- Basswood, mahogany, or tightgrained pine, 1 1/8" (29mm) thick: shell, 4 3/8" x 5" (111mm x 127mm)
- Acrylic paint
- Varnish: matte acrylic
- Wood glue
- Cardboard: thin and thick
- Scrap wood (to support shell)
- Wood screws (to attach shell to scrap wood)
- Masking tape
TOOLS
Rope molding- 60° V-tool: 1/4" (6mm)
- #5 gouge: 3/16" (5mm)
Scroll and Letters
- #1 chisels: 1/4 (6mm) fishtail, 1/4 (13mm), 3/4" (19mm), 1" (25mm)
- #3 gouges: 3/8" (10mm), 3/4" (19mm)
- #5 gouges: 3/8" (10mm), 5/8" (16mm)
- #6 gouges: 3/8" (10mm) fishtail, 1/2" (13mm)
- #7 gouge: 3/8 (10mm)
- #8 gouge: 1/8" (3mm)
- #9 gouge: 3/16" (5mm)
- Paintbrushes
Shell
- #1 chisel: 1" (25mm)
- #3 gouge: 3/4” (19mm)
- #9 gouge: 3/16” (5mm)
- #10 or #11 gouge: 1/4" (6mm)
The author used these products for the project. Substitute your choice of brands, tools, and materials as desired.
By Chris Pye
Chris Pye is a master woodcarver, instructor, and author.
