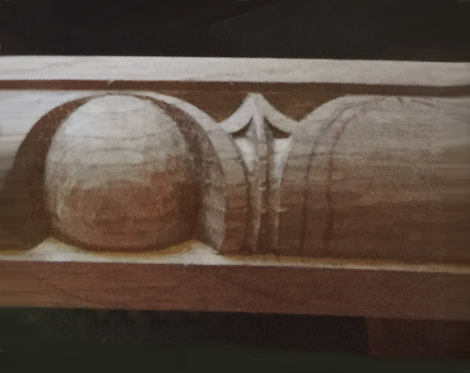
The egg and dart design originated in ancient Greek and Roman architecture, and can be seen in a variety of woodcarvings, stone carvings, and plaster castings. It contains an alternating design of an egg shape and a dart or arrow. This classical motif can be seen in many historical architectural designs.
This particular example was carved in quarter-sawn white oak. This is a very hard, dense wood, so you will need to use a mallet when carving with the gouges. Note: Use a softer wood, such as basswood, to practice carving the Egg and Dart Molding.
Use the following techniques to create this design:
- Shape a quarter-round ovolo molding with a stepped edge (Fig. 1).
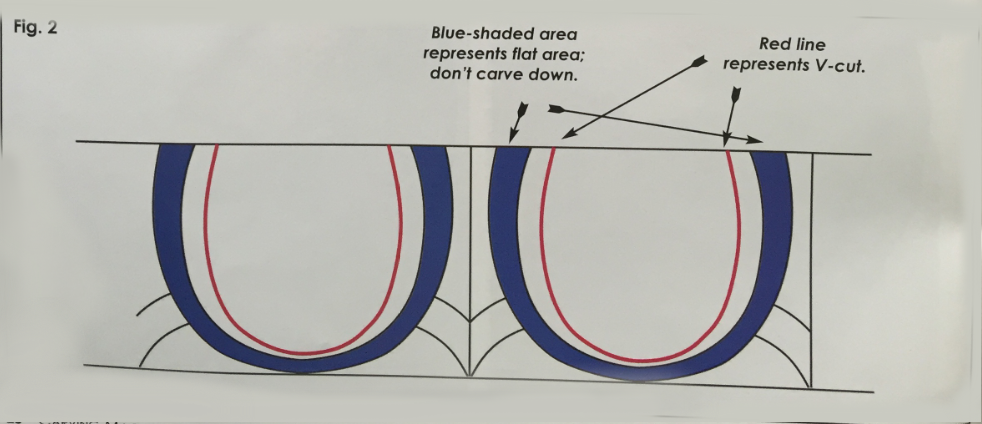
- Lay out the design accurately using a cutout template (Fig. 2).
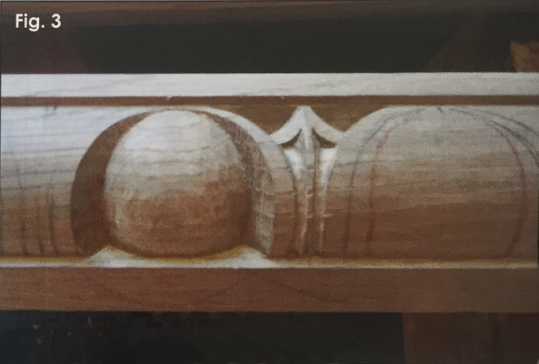
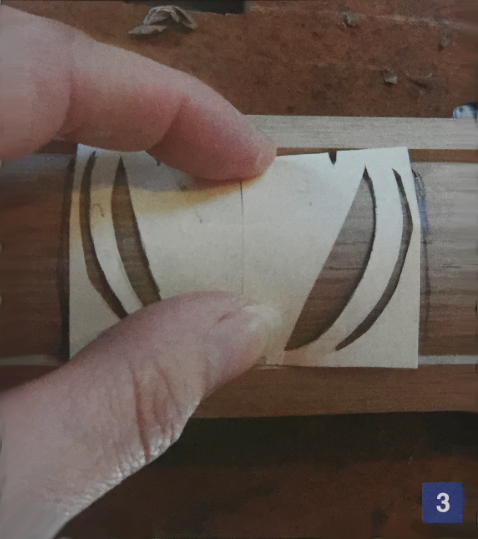
- Carve the molding (Fig. 3).

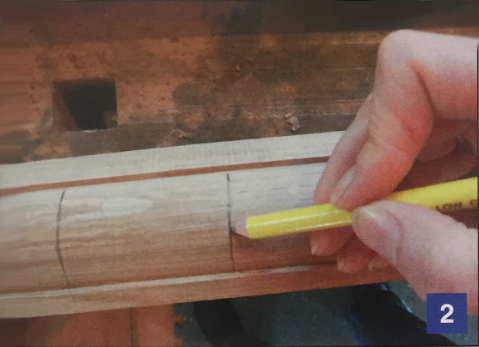
- Using calipers, measure out equal spaces to place the egg and dart template along the length of the molding.
- At each of the points marked in Step 1, extend a line straight down the molding—this will be the centerline of each “dart."
- Make a template out of thin cardboard (I used a manila folder) to draw the main lines of design centered between the lines drawn in Step 2. Make a mark on the wood at the small notch in the top of the template. This will be explained in Step 5.
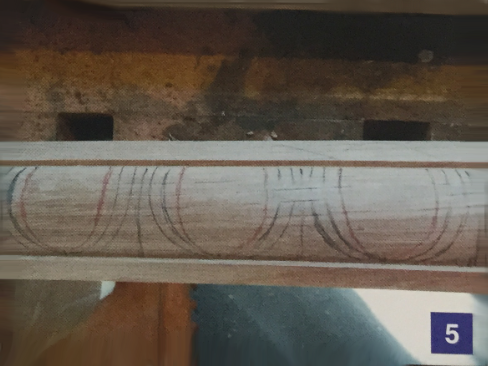
- This is how the pattern should look after tracing the template. The template gives you only guidelines; you will have to complete the rest of the pattern lines freehand.
- Complete these lines freehand to finish locating the guidelines. Use a red-colored pencil to draw a line from the small notch line (made in Step 3) and a curved line to represent the edge of the egg. Note: This line can also be cut into the cardboard template so that you do not have to draw it freehand.
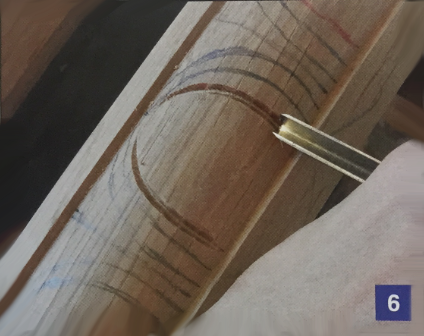
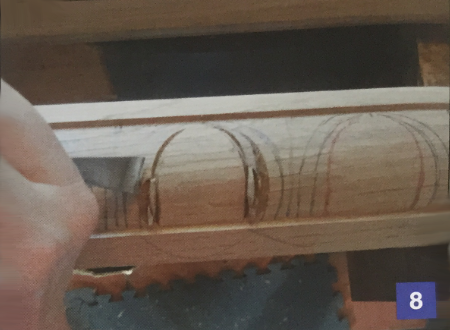
- Using the 6mm V-tool, cut directly on the red line approximately 3/8" deep at the straighter section and gradually bring the depth shallower to 1/8 deep as it reaches the curved section.
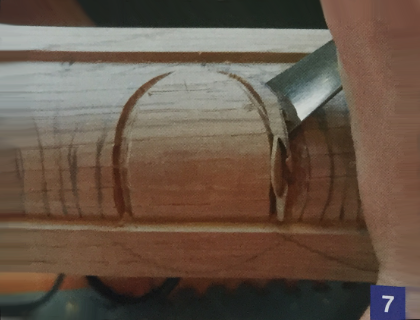
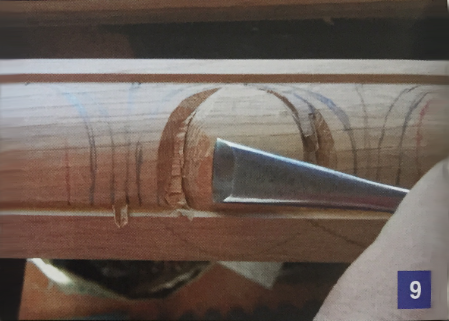
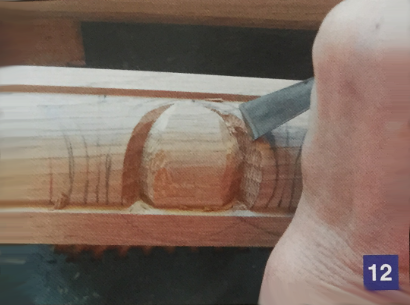
- With the #4-14mm gouge, make a 45-degree angle cut from the line shown down to the V-cut that was made in Step 6.
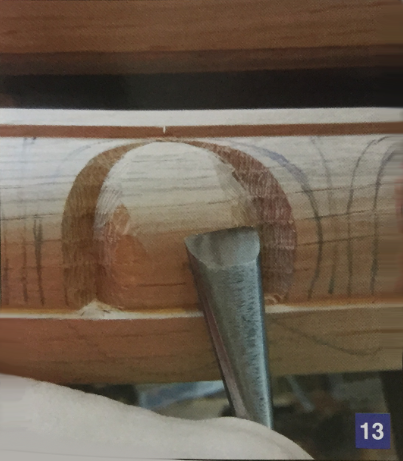
- Using the same gouge, continue this same cut on the other side of the egg down to the depth of the V-cut.
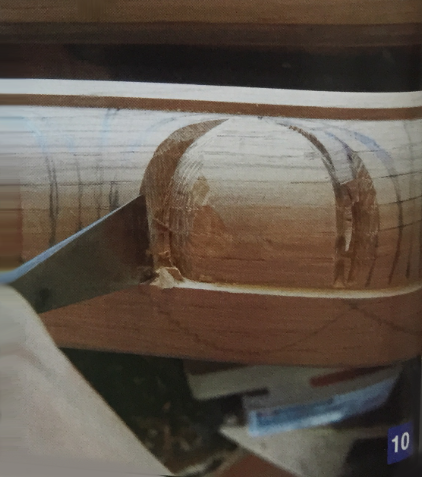
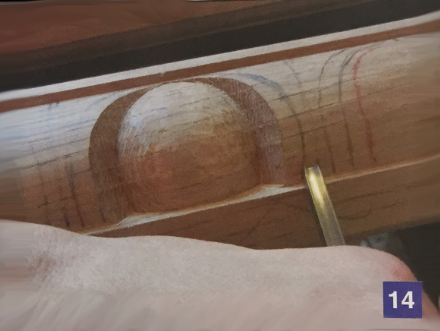
- Start to round over the egg to the depth of the V-cut that was made in Step 6 with the #3-18mm (or you can continue to use the #4-14mm, as long as the edges don't dig in).
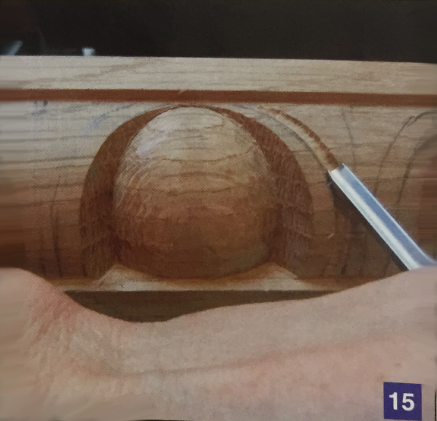
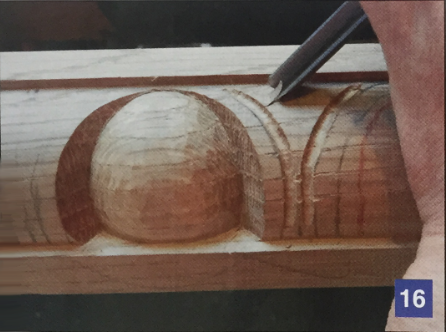
- Clean up this outside edge with the #4-14mm. Using the #4-14mm and #3-18mm gouges, clean up the edge of the egg so that this corner comes down to a sharp angle.
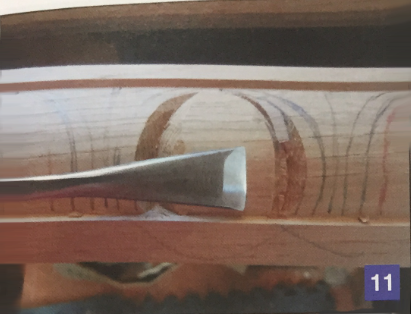
- Round over the other side of the egg with the #3-18mm.
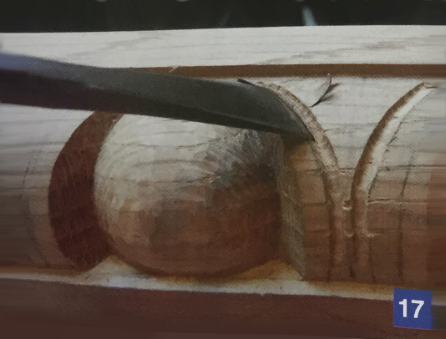
- Clean up this outside edge with the #4-14mm.
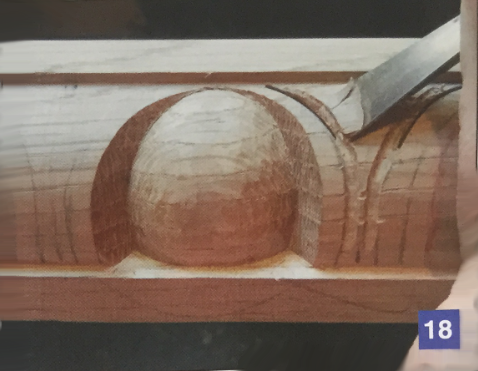
- Using the #3-18mm, continue to round and smooth over the egg to its final curvature—make sure that it is does not have a flat spot in the center.
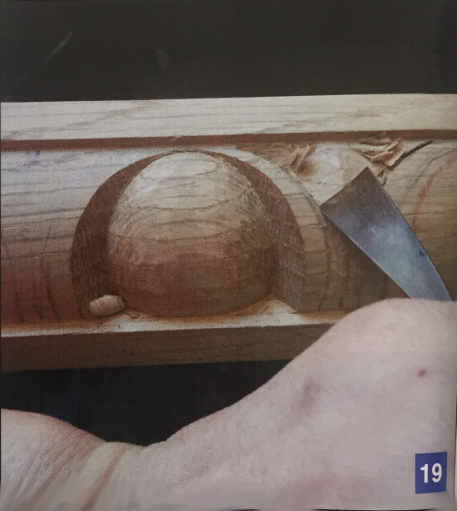
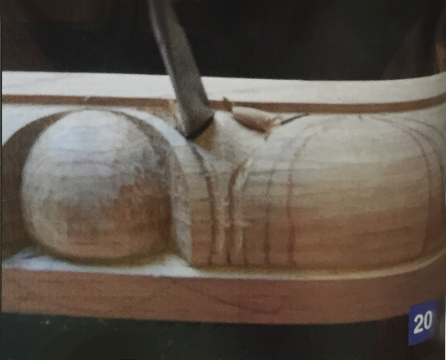
- Place the #1 l-3mm on one side of the centerline and begin carving the “dart." Quite often, I use a V-tool in place of the #11-3mm to give this a sharper edge.
- Continue the cut that was made in Step 14 all the way along the edge as shown—leave the line visible.
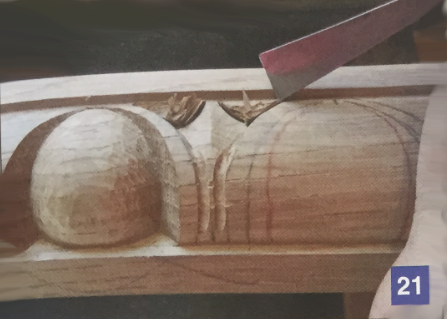
- Use the V-tool to make a 45-degree angie cut from the tip of the dart down to the cut that was made in Step 15. This takes the bulk of the wood away in order to shape the tip ot the dart.
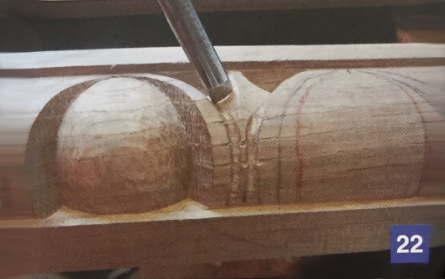
- Make a solid cut altong this line with the #4-14mm. Tip the gouge so that the upper part of the gouge cuts deeper than the lower part ot the gouge.
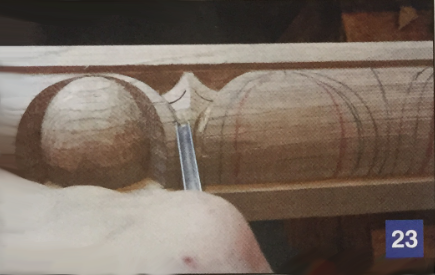
- With the same gouge, make a 45-degree angle cut trom the centerline ot the dart down to the cut that was made in Step 17.
- Using the #4-14mm, clean up this angle cut. At this point, there should be a small triangular-shaped piece of wood that has been removed on each side of the dart (similar to a chip-carving cut).
- To form the tip of the dart, make a deep cut with the #7-6mm. Make sure that the cut is deep enough so that you can clean out this triangular-shaped area in the next step.
- Use the #4-14mm to clean out the triangular-shaped section below the dart (this is where fishtail-shaped gouges work great).
- Cut out this area up to the tip of the dart with the #11-3mm.
- Clean up and define the dart with the #7-6mm.


Tool List
#3-18mm, #4-14mm, #5-5mm, #7-6mm, and #11-3mm gouges; mallet; 6mm V-tool (60-degree angle)
(Note: Full-length fishtail-shaped gouges are recommended, as they can fit into tight corners much easier.)
By Mary May
Mary May is a professional woodcarver In Charleston, South Carolina. She has studied with a variety of master European carvers to learn the classical techniques of woodcarving. Mary’s work focuses on traditional architectural carving and furniture carving. She has been a guest on the PBS show The Woodwright’s Shop with Roy Underhill and has been published In a variety of woodworking maga-zlnes. She teaches at a variety of woodworking schools throughout the United States, sells instructional DVDs, and has recently started an online video woodcarving school, which focuses on traditional techniques and styles.
