Of the attention getters in my home, I'd have to put my critters in glass houses near the top of the list. These cute little fellows spend all their time perched on the inside of a glass or cup watching all that goes on around them, well, at least in front of them anyway.
ABOUT THE AUTHOR
Award winning artist and carver, Ol' Don has been following his creative urges since carving neckerchief slides as a Boy Scout in the 1940s.
SUPPLIES
- 3" x 3" x 5" basswood block Foredom power tool (optional)
- Kutzall 3/8" dia. x 2" tapered bit (optional)
- Typhoon 1 /2" dia. x 3/4" coarse bit (optional)
- RotoZip 1 /8" Sabrecut Zip bit (optional)
- Detail knife with a 1 -5/8" blade
- #1 8mm (5/16") gouge
- #2 14mm (9/16") gouge
- #3 10mm (3/8") gouge
- #3 18mm (5/8") gouge
- #7 6mm (1/4") gouge
- #7 12mm (1/2") gouge
- #11 6mm veiner
- #39 (75 degree) 8mm (5/16") V-tool
- Acrylic paints of preferred colors
- Assorted sizes of brushed
- Spray satin polyurethane or clear finish of choice.
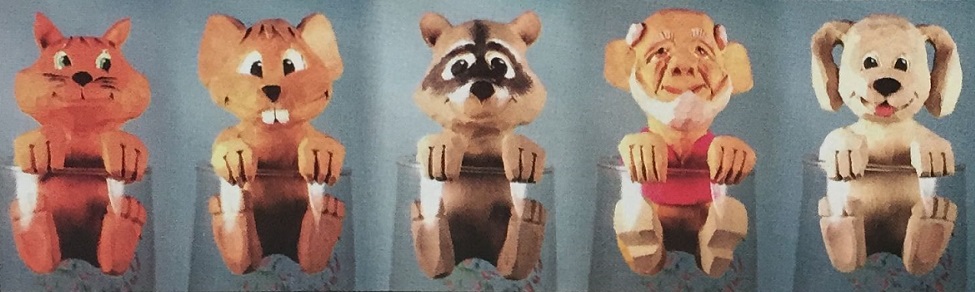
Their bodies are pretty much all the same shape and form it’s the head that defines the subject. We’ll carve the mouse as our project, but you’ll find reference views for the other subjects in the “From My Drawing Table to Your Carving Bench” feature found after this article. The pattern on the pullout section shows a dotted line option which will provide you with a generic cutout suitable for carving any of the subjects pictured; if you prefer, generic roughouts are available - see our pattern's category for more information. To familiarize yourself with this project, I would suggest you look at all the photographs and notes before actually starting on your subject.
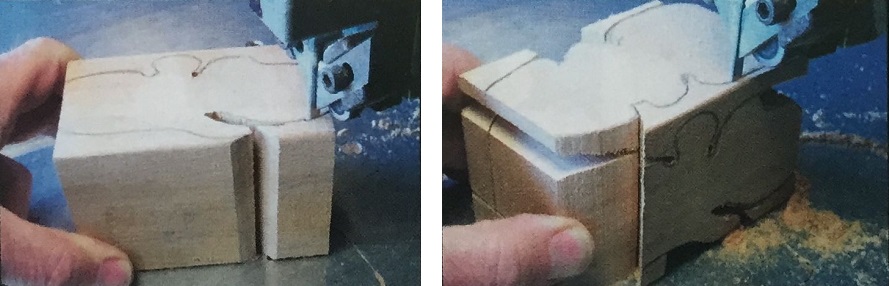
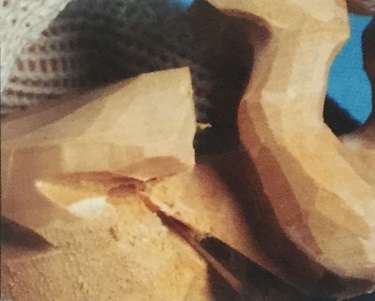
Once the pattern has been transferred to the wood, we’ll create a cutout. As you can see in the photo, I use a bandsaw with a 1/4", 6 teeth per inch blade. In order to cut out both the front and profile views, I leave a 1/4" to 3/8" section of material in place so that the block lays flat against the saw table as I work from one view to the other. These sections will be carefully removed after both views have been contoured.
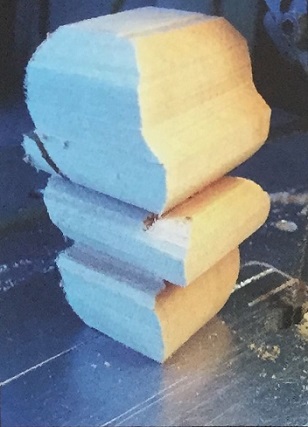
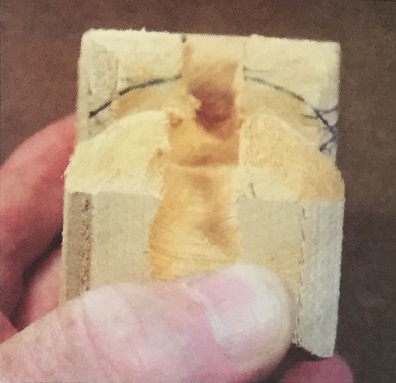
This is a view of our finished cutout. The generic shape is shown for illustrative purposes, though I could have saved some carving time by using the mouse pattern as it is pictured in the pull out section.
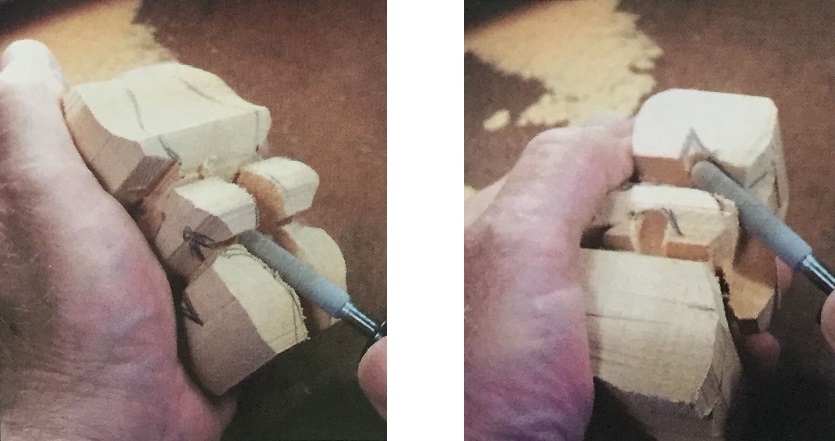
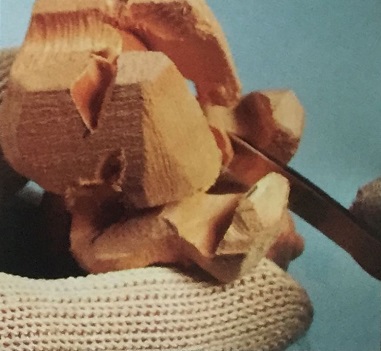
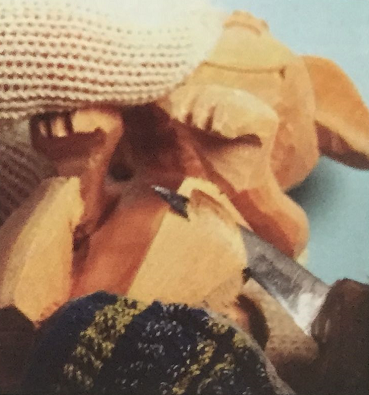
For general shaping of the rough out I personally prefer using power tools. Shaping can be done with hand tools as well if that is your preference. I start by using a Kutzall 3/8" dia. x 2" tapered bit to cut away the material from between his arms and legs. I will also use this bit for removing mate- rial where the arms and legs bend.
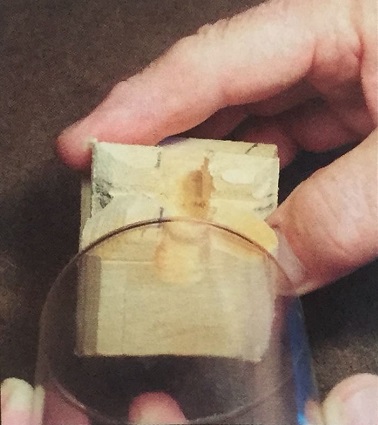
Use a glass to determine the angle the feet should be shaped to. You'll want the angle of the feet to follow the inside radius of the glass.

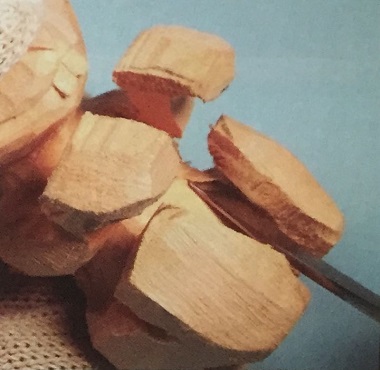
Roughing out restricted areas such as between the arms and legs is accomplished by using a 1/8" diameter RotoZip Sabrecut Zip bit. This bit is extremely aggressive, so use caution when carving with it.
With the space between the arms and legs now defined, set your subject back in the glass and draw a reference line on the hands using the outside diameter of the glass.

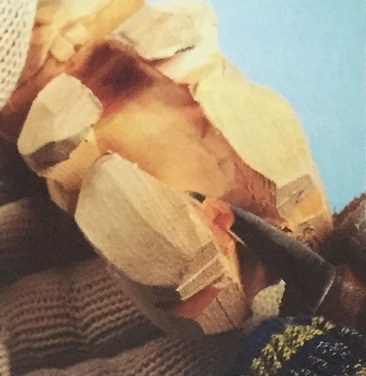
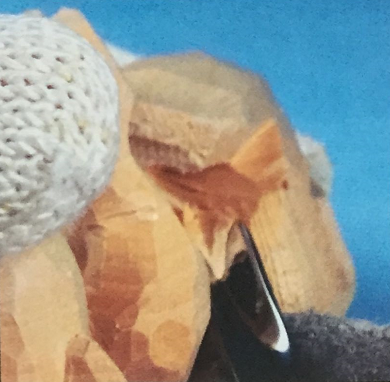
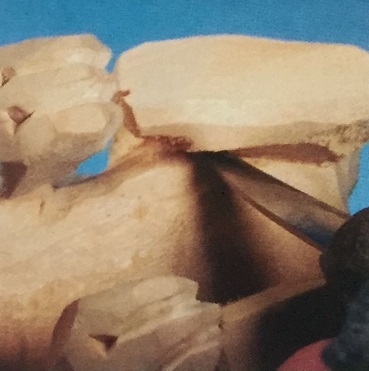
With the Sabrecut bit or any suitable tool, cut a groove in the bottom of each hand using the reference lines as a guide. Let these grooves taper back toward his elbows. This will create the forearm, the palm of his hand, and the finger area which will hang over the outside of the rim of the glass.
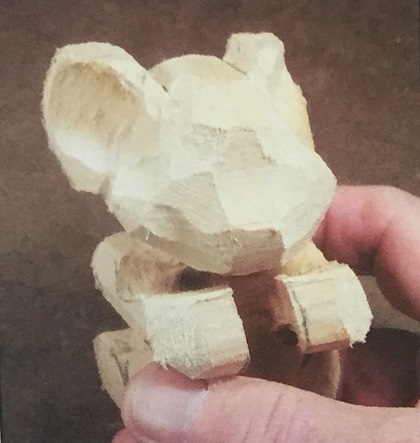
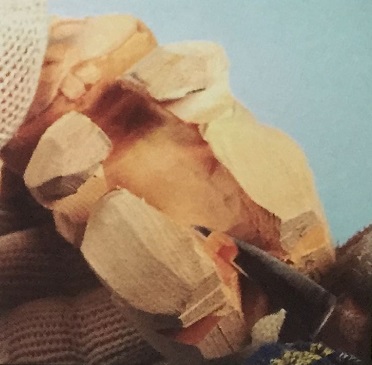
Though not shown, I roughed out the rest of my subject with a 1/2" dia. x 3/4" long Typhoon bit. Here you see the basic shape of the mouse’s head.
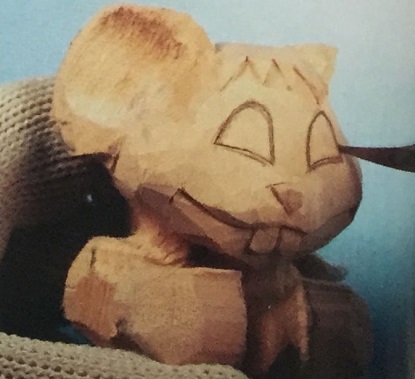
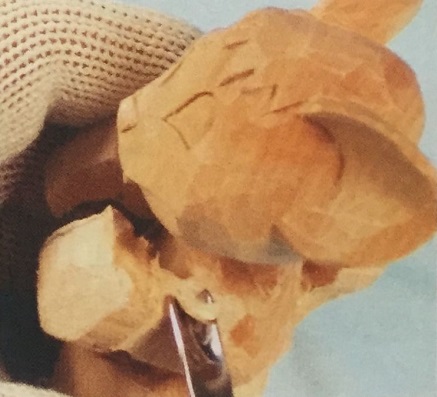
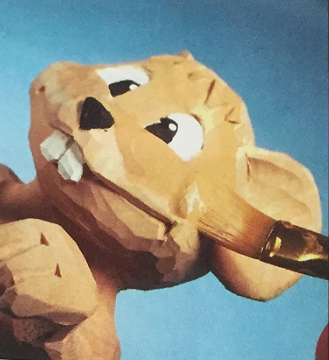
Once you have the overall general shape of your subject defined, it’s time to start the blade work. Use a detail knife to begin shaping his head. I’ve added a few tufts of hair to his forehead. They may be ignored if you wish to blend his forehead into the crown of his head. After shaping his head, draw in his mouth, teeth, and nose. Use your detail knife to create a stop cut defining the shape of his mouth.
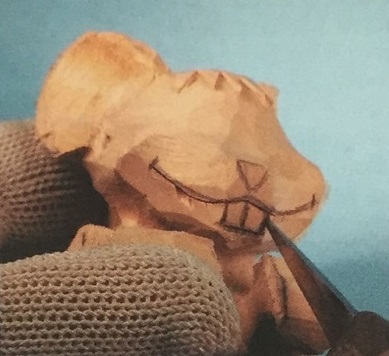
You’ll also want to make a stop cut around the shape of his two teeth before shaping his upper and lower lips. Notice that his upper lip protrudes farther forward than his teeth and his lower lip is behind the teeth. Be sure you layer them that way when you carve them. A shallow V-cut is used to give him two teeth; add a triangle chip to each end of his mouth for an accent.
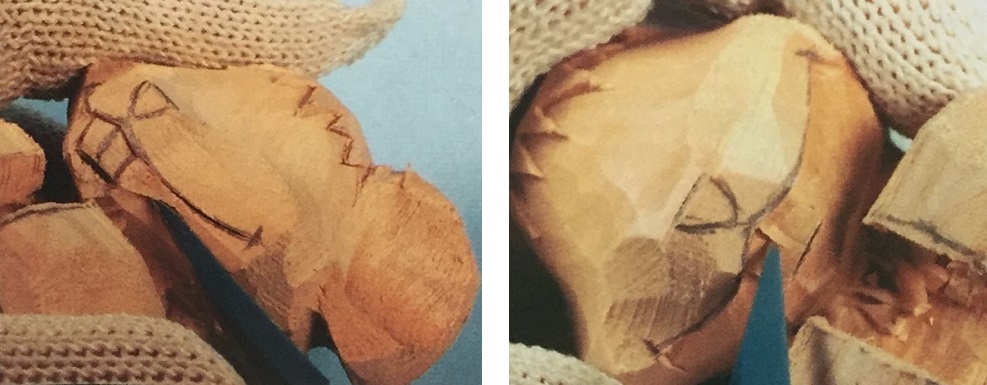
Use your detail knife to create the triangle shape of his nose, and then remove a small amount of material to make his nose stand out from his face. Eliminate the flat look by rounding the edges slightly.
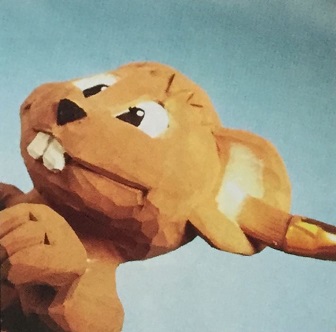
Here is a top view reference photo. Notice the convex and concave outline of the cheek to nose to cheek area as seen from this perspective.
Draw his eyes and define their shape with detail knife stop cuts. Create the roundness of his eyes by cutting into the stop cuts from the inside area of the eyes.
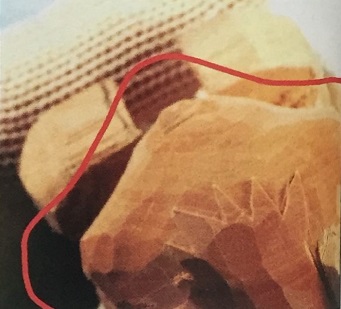
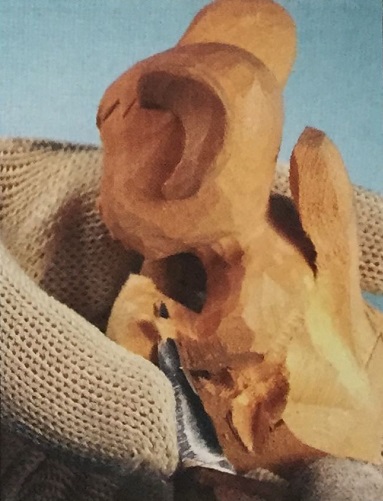
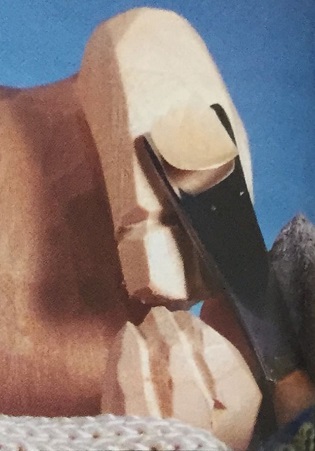
To give roundness to the back of his head, I use a #2 14mm gouge. The slight inside radius of this blade works well for shaping the curve of his head.

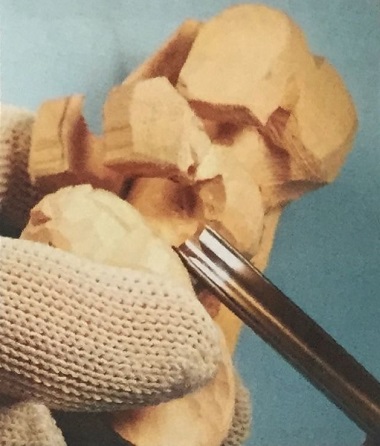
Continue using the #2 14mm gouge to shape the slightly curved back of his ears. To hollow out the concave inside of his ears, I use a #7 12mm gouge along with my detail knife for shaping the top of his head up to the ear.
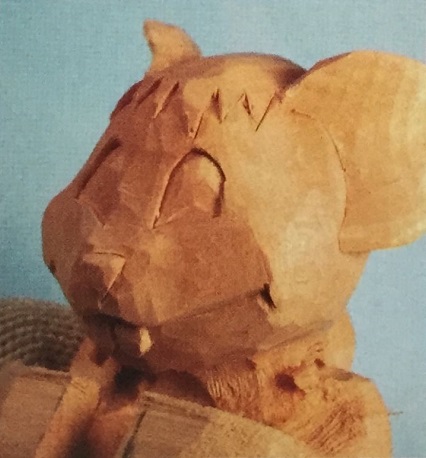
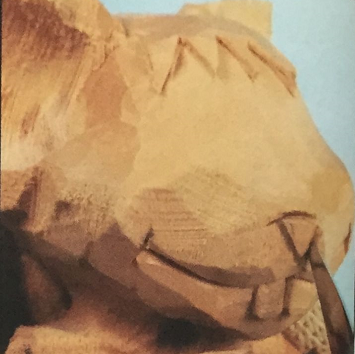
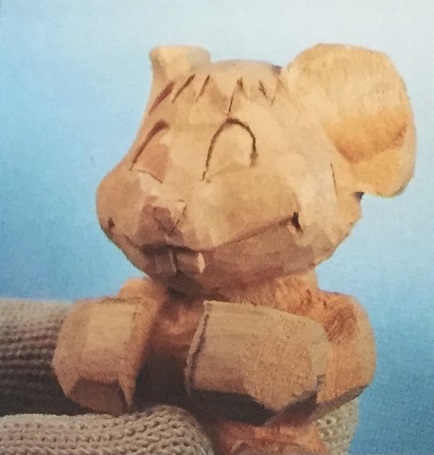
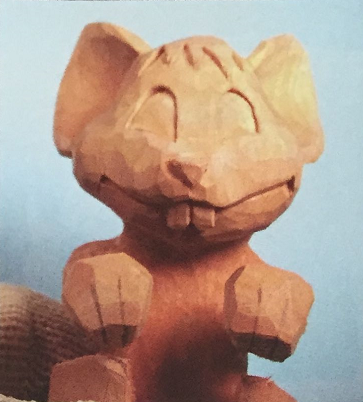
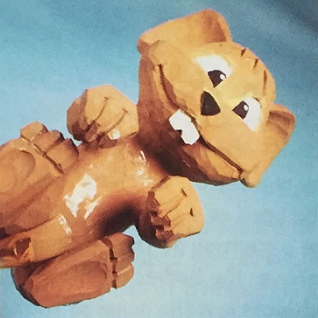
Here is how your mouse should look at this stage of development. Notice the raised tufts of hair, recessed, rounded eyes, the slightly protruding rounded nose, and the layered look of the upper lip to the teeth to the lower lip.
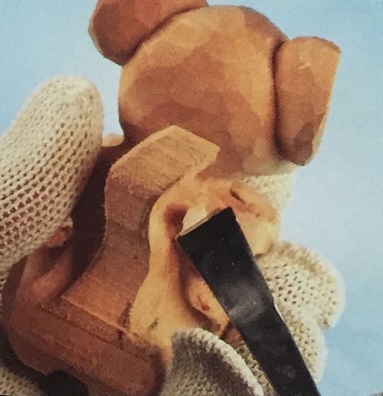
As we proceed to the body area, a #11 6mm veiner is used to create the transition from the head to the neck to the upper torso.
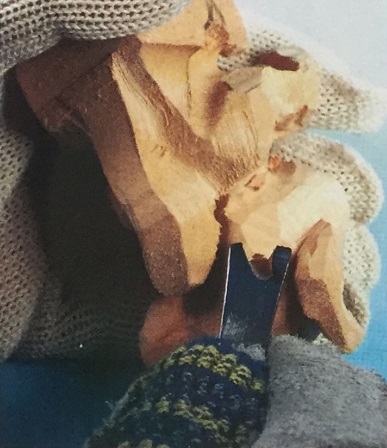
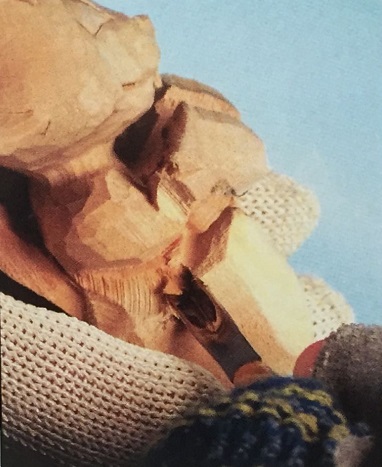
Create the sharp inside bend of his arm with a #39 (75 degree) 8mm V-tool before using a detail knife to begin shaping his arms. Use caution in these areas since the arms are a cross grain part of the project.

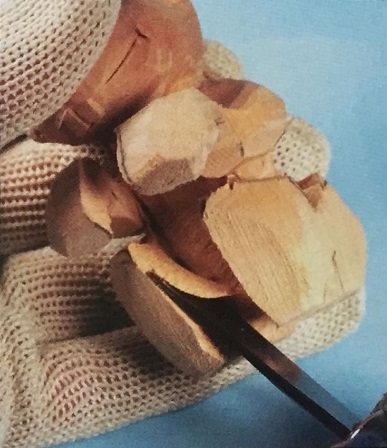
For shaping the chest area between his arms and the lower torso area between his legs, a flat #1 8mm blade is used along with a #3 10mm gouge. You may find you’ll be working in opposing grain directions on the upper and lower sections because of the curve of his torso. Be careful not to cut deep into the grain, causing it to split.
With these same blades, start giving some shape to his shoulders and back, working over the entire body configuration. Avoid overworking one area while ignoring another. Develop the entire project as you progress.
Using the #39 8mm V-tool and/or your detail knife, define the sharp bend areas of his legs and feet in the same way you created the inside bend of his arms.
The #3 10mm gouge is used to begin shaping the inside of his legs and feet. Using the #39 8mm V-tool, create the sharp break between his arms and body and blend in these areas with your detail knife. Again, use caution since you’re working in a weak cross grain area.
Using the #3 10mm gouge, begin shaping the inside area of the arms.
The detail knife is used to blend in the areas between the inside of his legs and the lower torso.

Because this is a cross grain part of the piece, when shaping the inside and outside of his hands, it is a good idea to use your thumb to support the project's hand from the side opposite where blade pressure is being applied.
Once the hands are shaped to their finished configuration, draw in the location of his fingers. Since this is a caricature type subject, I chose to give him the traditional comic strip critter 3-finger look.
To define his fingers, I use the #39 8mm V-tool, though a detail knife will work just as well for creating the recesses between the fingers. To add an accent and create the impression of a knuckle, use the detail knife to make a small triangle chip at the base of his fingers.
Using the detail knife, start giving more definition to the hip, leg, and foot areas.
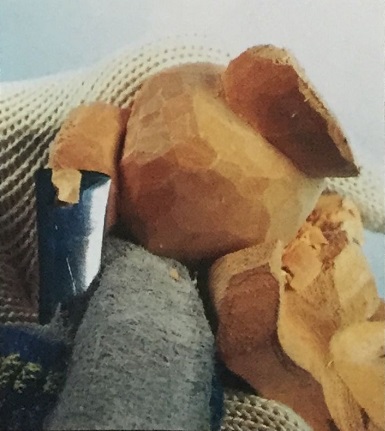
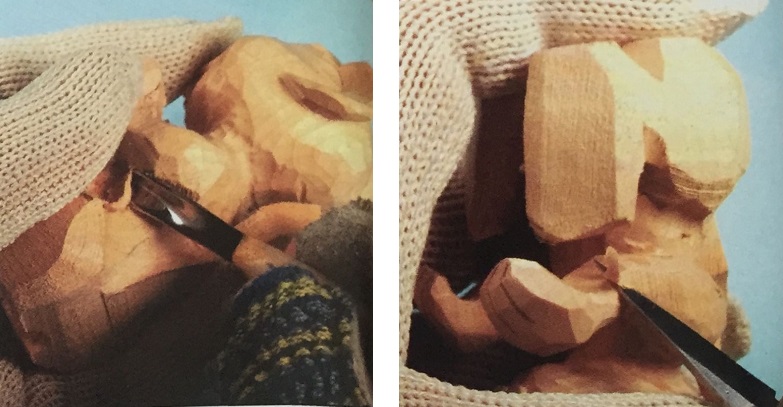
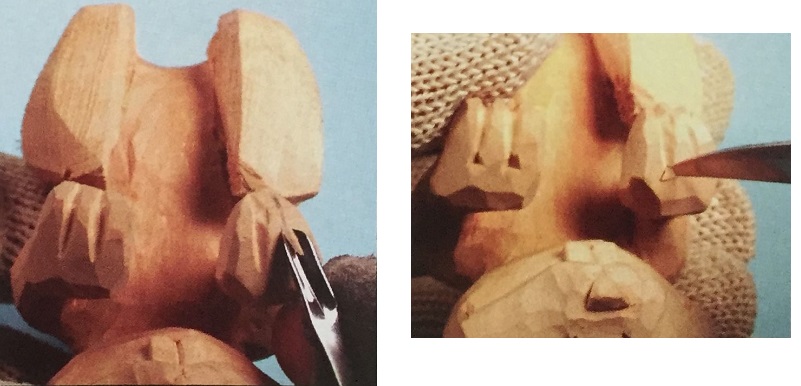
As the figure begins to take its final shape you'll find that there are a lot of tight areas to contend with. The #3 10mm and #1 8mm blades in both the concave and convex positions will work better for you fhan a detail knife.
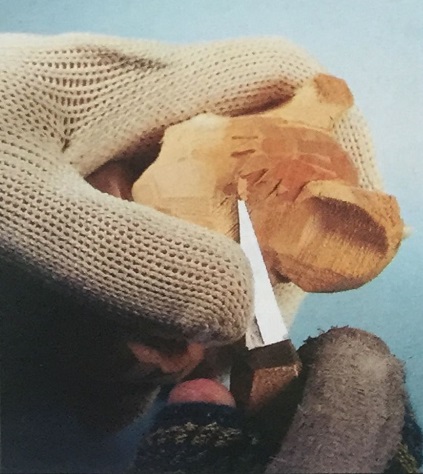
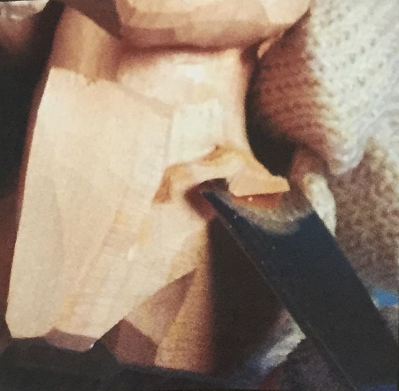
As you can see in the top photo, I also use the V-tool where it will do the job better than another blade. In this case it was used for cleaning out the inside area of his leg. Learn to use whatever works best for you in achieving your goal.
Work your way down his bent leg to his foot. The detail knife is being used here to shape the top of his foot.
With the wider shallow sweep gouge used earlier, final shaping is done to the rest of his leg from his hip to his foot.

The same procedure as was used earlier to define his fingers helps define his toes. The #39 8mm V- tool creates the separation between his toes as well as between his toes and foot. Then a small triangular chip accent is created using the detail knife. A slight curve establishes the top of his toes.
To finish the carving of his feet and eliminate a flat foot look, cut a slight recess into the bottom of each foot using a #7 12mm gouge.

To complete the carving part of this project, give his tail some shape by curving it from side to side. That will make it more interesting to look at than a straight, stiff tail. Finally, give your project a quick inspection to see if there are any areas that use a little more work. If you’re satisfied with its appearance, let’s add some color.

I always start by painting the whites of the eyes since that is a recessed area of the carving. Since the whites of the eyes are not a stark white, use an off-white or cream color. The teeth are also not a pure white so I use the same off-white for them. Once the white is dry, add the black pupils. I usually have my subjects looking to the right or left rather than straight ahead, but this fellow seems to look pretty good staring at me. As long as I had the black on my brush, I went ahead and painted his nose as well. When painting eyes, don’t forget that little white dot of reflected light that gives life to the eyes of your carved subject.
Choose whatever color suits you for the body of your mouse. A beige mouse was what I decided on.
As a final accent, add a blended pinkish tint to the inside of his ear. This will help break up the monotonous look of the overall body color. After the colors are thoroughly dry, sign your piece and protect it with a couple coats of clear spray polyurethane.
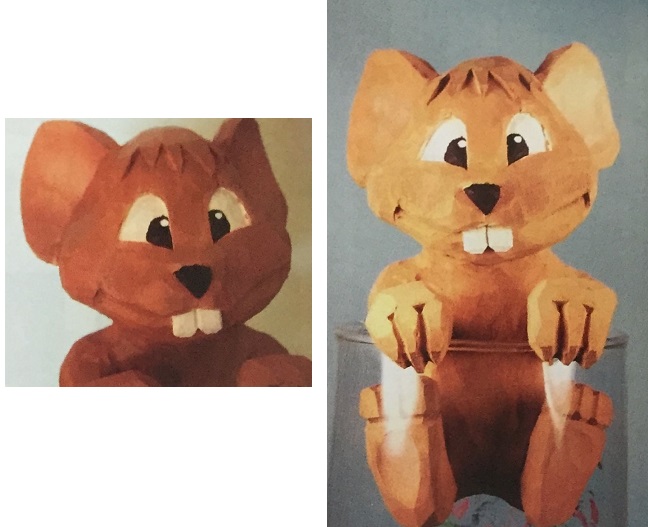
And here he is, content at home in his glass house and ready to keep an eye on all who pass his way. If you have any questions or suggestions for future projects, we would enjoy hearing from you. Our contact form is in the main menu along. Until next time, may your blades stay sharp and all your cuts be true.
