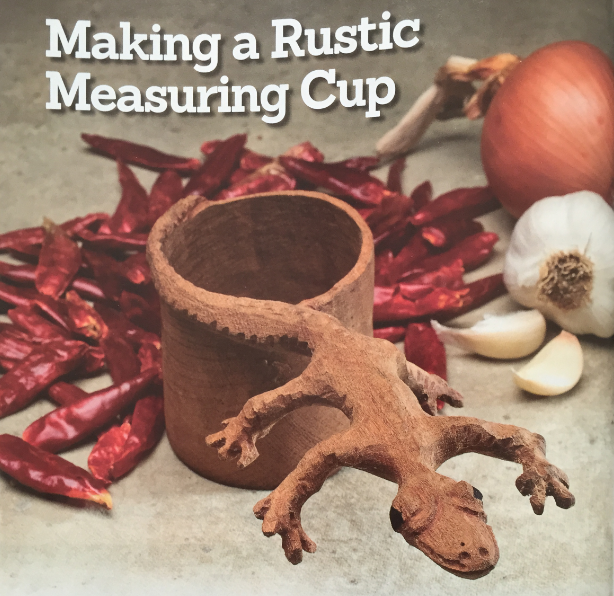
Power carve a cup from salvaged wood
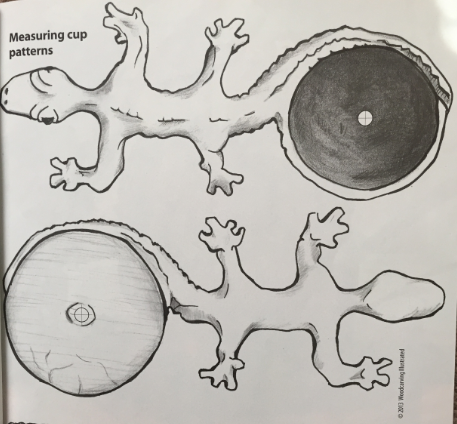
At a rib and brisket competition in Texas, our group of chefs decide to use coded measuring cups so we could share information in our recipes without giving away secrets. Using a reptile theme, we decided a 1/4 cup would have a tadpole handle, 3/4 cup would have a lizard handle, etc. Now we can make our recipes in public and only those who know the сой* recognize the measurements. The coded cups also make fun serving ladle* and water dippers.
Wood selection is important for this project; choose a large piece of natural, untreated wood. I used a piece of black oak salvaged from an old bar. Cut down the large piece, watching for knots, soft spots, and fissure* that can be used in or hinder your project.
SHAPING THE CUP
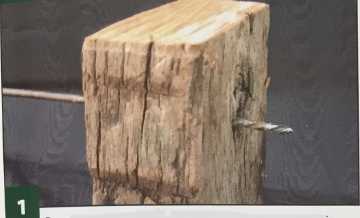
Prepare the blank. Use a band saw or table saw with a rip fence to smooth and square one face for drilling. Note the knot and fissures; we will use the knot and carve away the fissures. Lay the pattern on the blank, mark the center of the cup, and drill a 1/4" (6mm)-diameter hole through the blank at the mark.
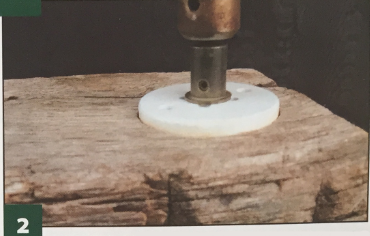
Define the inside perimeter of the cup. Use a 2 1/2" (64mm)-diameter hole saw on a drill press to define the inside of the cup. You will need to remove about 3/4" (19mm) of wood for every 3/4 cup you want the cup to hold, or about 1" (25mm) for every 3/4 cup. To make a 3/4-cup measure, drill down about 2 1/4" (57mm).
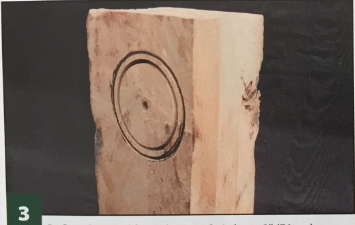
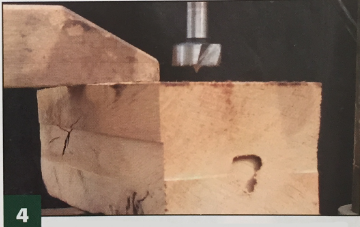
Define the outside perimeter. Switch to a 3" (76mm)-diameter hole saw and etch the top side to show where the outside of the cup will be. Flip the blank over and secure it to the drill press. Use the center hole to line up the 3" (76mm)-diameter hole saw and cut the outside of the cup about 1 1/2" (38mm) deep. This leaves 1 1/2" (38mm) for the handle.
Rough out the inside of the cup. Clamp the blank to the drill press and use a 1" (25mm)-diameter Forstner bit to remove most of the excess wood from the inside of the cup. Drill down 2 1/4" (57mm).
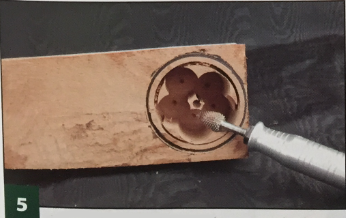
Clean out the inside of the cup. Use a rotary tool with a carbide-point bit. Be careful around the thin sides. Refine the inside of the cup with a chisel. Cover the center hole with tape, fill the cup with water, and pour the water into a measuring cup. To accommodate more water, cut the inside deeper. To accommodate less water, trim away wood from the rim to make the cup shorter.
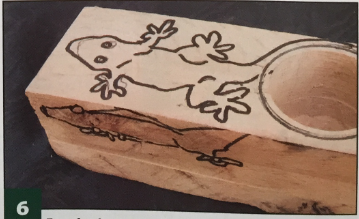
Transfer the patterns to the handle. Size the patterns to fit the stock, cut them, and trace them onto the blank.
SHAPING THE HANDLE
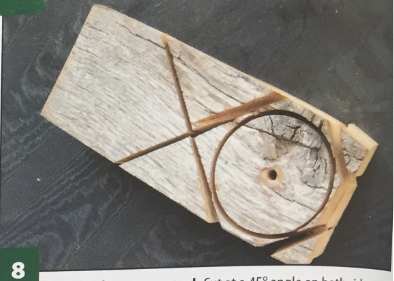
Prepare to remove the excess wood from under the handle. Set the blade of a table saw to cut a little more than half the thickness of the blank. Set a stop to keep from cutting into the body of the cup, and set the rip fence to remove the wood from under the handle.
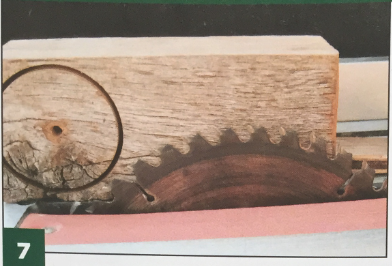
Remove the excess wood. Cut at a 45° angle on both sides of the cup. Then, make a series of relief cuts with the table saw to remove the excess wood, but stay Vs" (3mm) away from the handle and cup at all times.
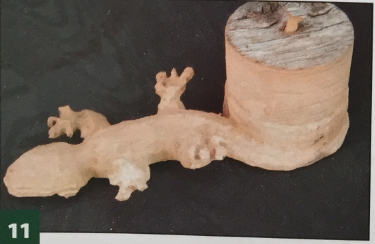
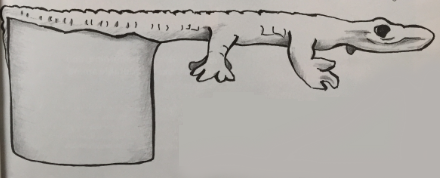
Rough out the lizard. Use a band saw to cut the rough shape of the cup and handle. Use a variety of bits in a rotary tool to rough out the lizard's shape. To make the best use of the long grain, adjust the head or legs as needed.
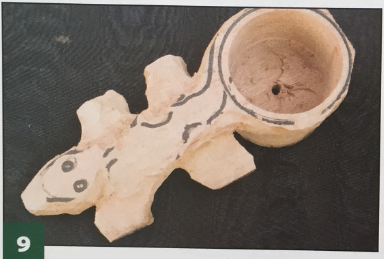
Refine the lizard. Use finer-grit bits to wrap the tail around the cup. Remember to watch the grain; it will guide the flow of the piece.
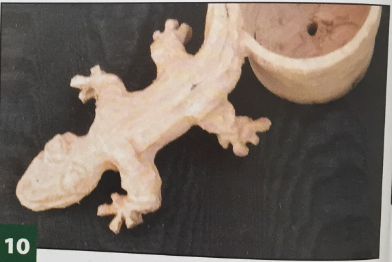
Finish the cup. Fill the center hole with a piece of scrap cut off the handle. I try to match the grain of the plug with the grain of the cup. Finish the cup with beeswax and orange oil, and use it for drinking, dipping, or measuring.
MATERIALS
- Natural, untreated wood, 3" (76mm) thick: 6" x 9" (152mm x 229mm)
- Wood glue
- Food-safe finish, such as beeswax and orange oil
TOOLS
- Band saw
- Table saw
- Drill with bits: 14" (6mm)-diameter twist, 1" (25mm)-diameter Forstner
- Hole saws: 216" (64mm) diameter, 3" (76mm) diameter
- Rotary tool with assorted bits» including a carbide-point bit
- Measuring cup
The author used these products for the project. Substitute your choice of brands, took, and materials as desired.
By David Drake
David D. Drake of Spencerville, Ind., has been carving since 1997, when he was snowed in during a blizzard and carved a piece of firewood into a sculpture. He now carves live and storm-killed trees, specializing in monumental sculptures. David is also learning how to compost his wood debris.
