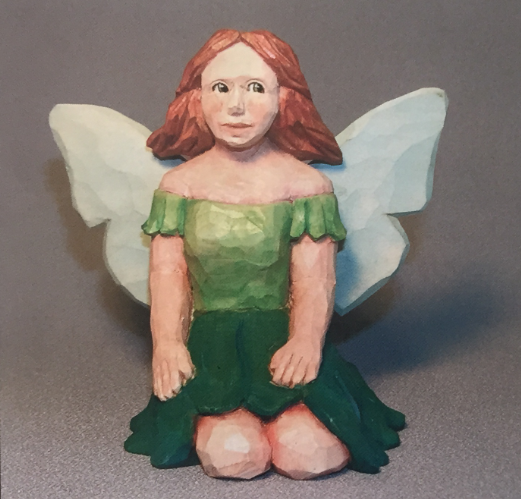
This fairy project is challenging because female features are quite often more difficult to carve than male features.
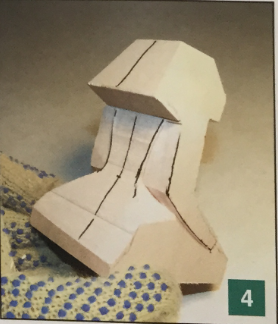
1-4. Transfer the pattern onto a block of basswood. Cut out the pattern, and draw a centerline down both the front and the back of the cutout. Then sketch in and rough in the arm blocks. Begin to rough out the figure. Rough in the arms and hand
s.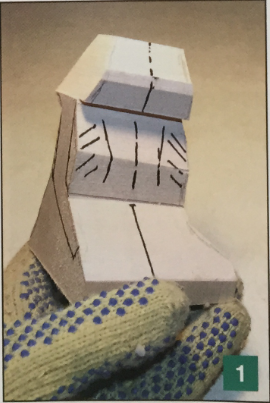
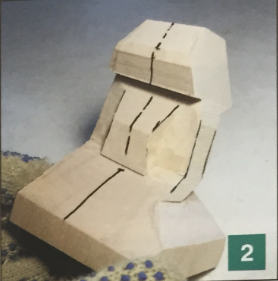
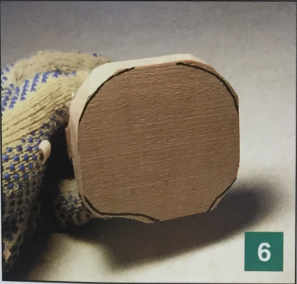
5 & 6. Sketch in and then begin roughing the base.

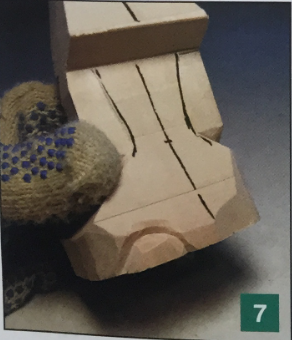
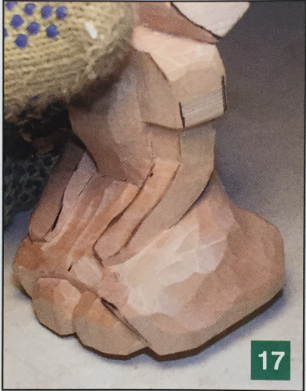
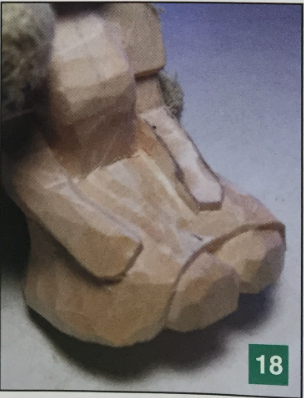
7 & 8. Next, use a V-tool to rough in the back foot and begin to carve in the knees.
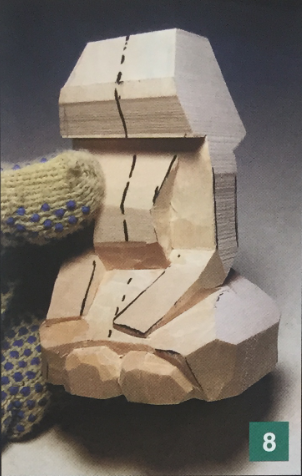
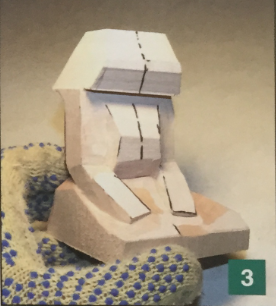
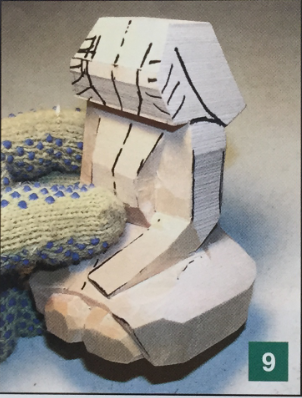
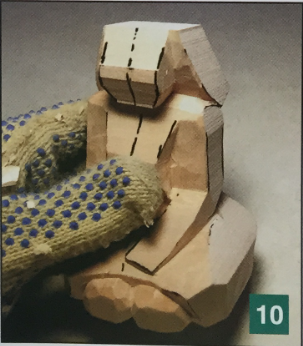
9 & 10. Begin to block fn the head, hair, and face.
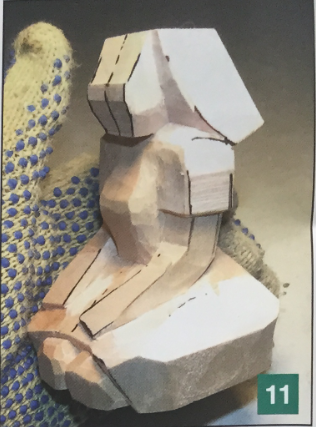
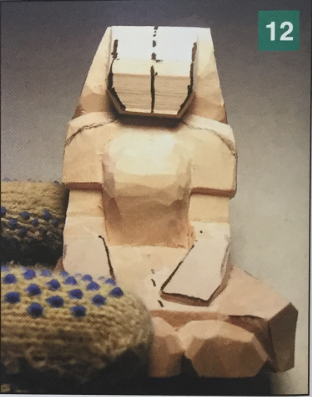
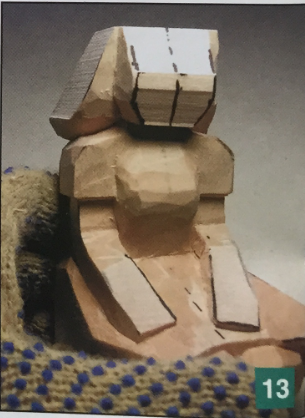
11-13. Begin to shape the chest, arms, sleeves, and shoulders.
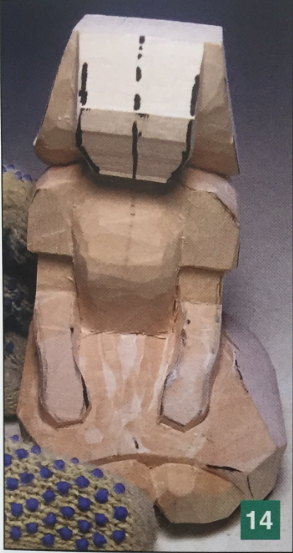
14. Shape the wrists and hands.
15-21. Begin to rough in the dress. Shape the upper and lower legs, the area of the dress that covers the legs and the back of the dress. Round the arms, rough in the sleeves, and then flare out the bottoms of the sleeves.
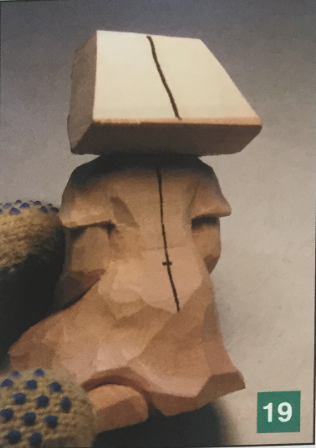
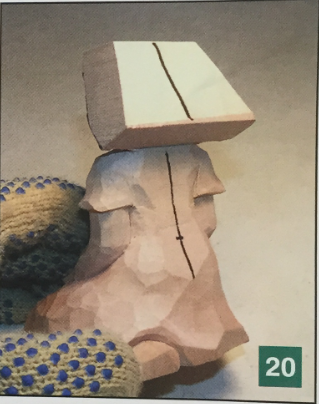
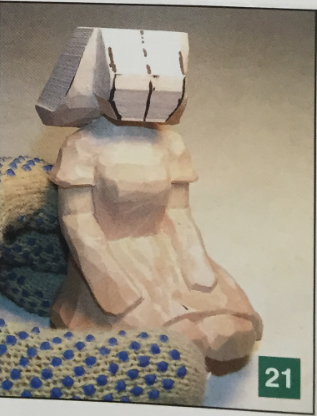
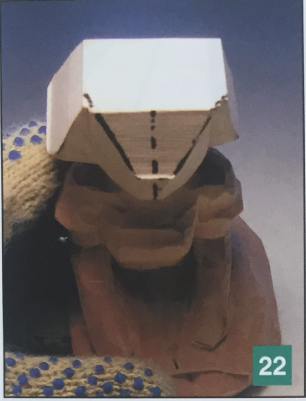
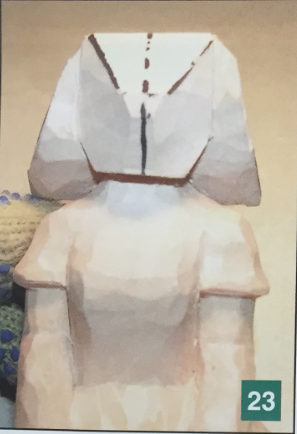
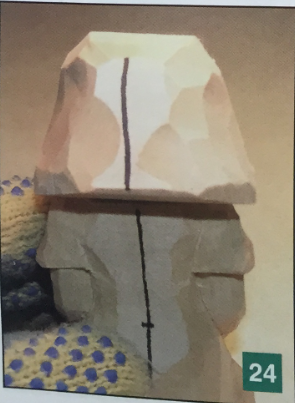
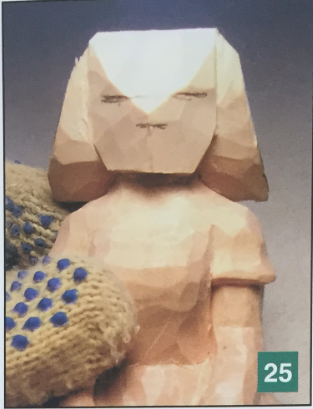
22-25. Slant the face area to a 90-degree point and then round the back of the head. Draw a horizontal line in the center of the face area; this is the eye line. Draw a shorter horizontal line one-third the distance between the eye line and the chin; this is the bottom of the nose.
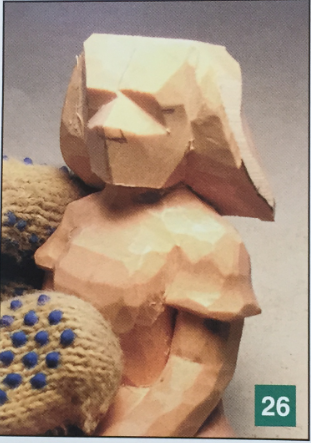
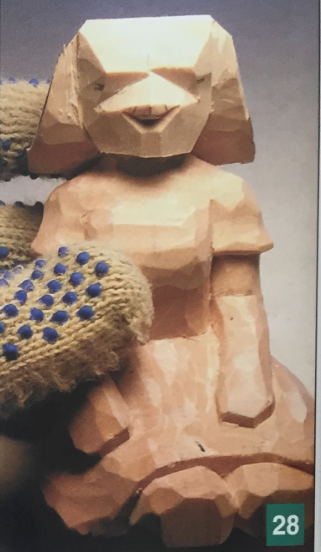
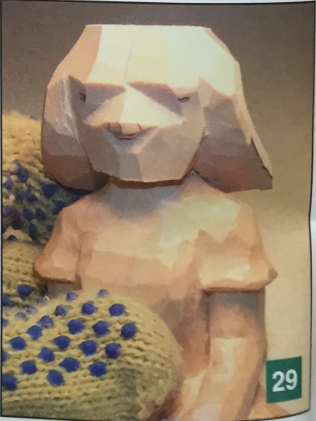
26-29. Use large V-cuts to create the area for the eyes. Carve stop cuts on and below the nose lines, and make small stop cuts to form the nostrils.
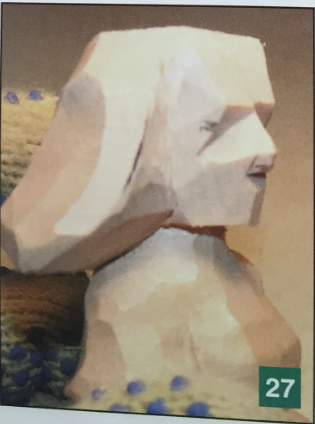
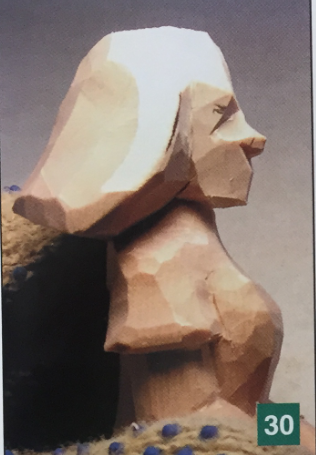
30. Beginning at the center of the nose, make a scoop cut up to the top 0f the head to create the forehead area.
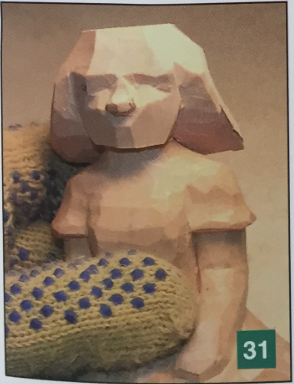
31. Draw and carve in the shape of the nose; make small V-cuts on the sides of the nose.
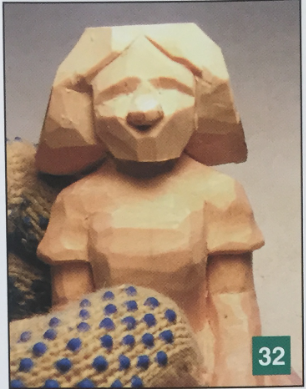
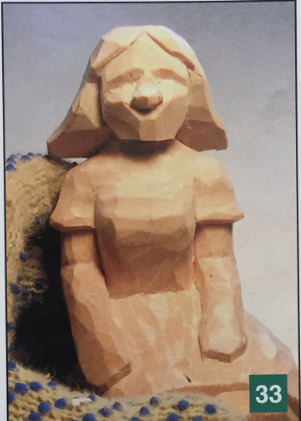
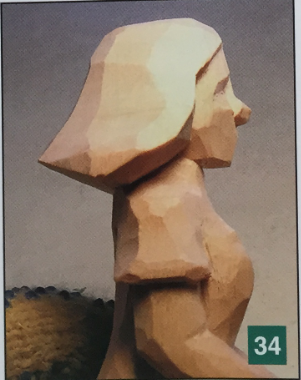
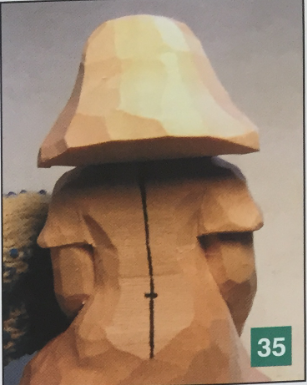
32-35. Shape the head, carve in the masses for the hair, and create the hairline.
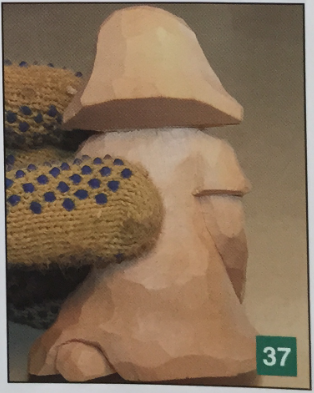
36 & 37. In these steps, begin to shape the knees. The left knee points toward the right knee. Shape the foot in the back; notice the tilt. Shape the dress around the knees.
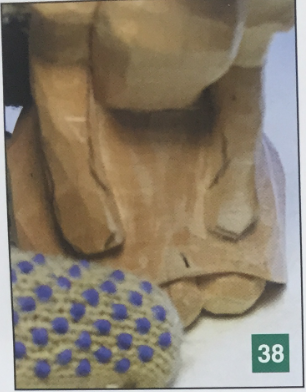
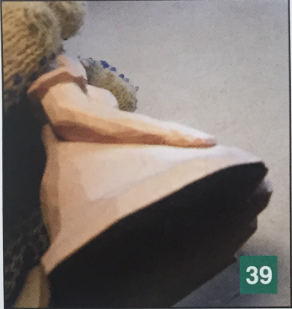
38 & 39. Block out the hands and wrists Flatten the hands.
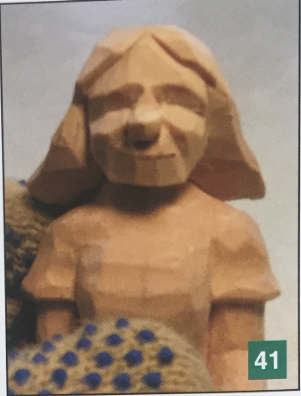
40 - 43. Use stop cuts to form the cheeks and the barrel of the mouth. Pencil in and carve the mouth line (the mouth-line is 1/3 the distance between the bottom of the nose and the bottom of he chin). Use a small V-cut on the mouth-line. Begin to thin the face.
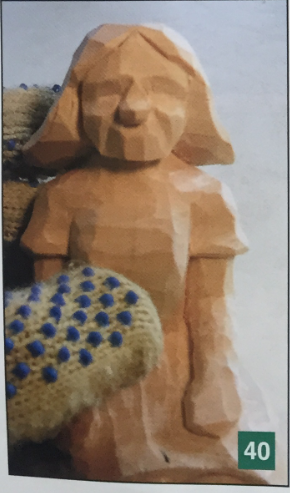
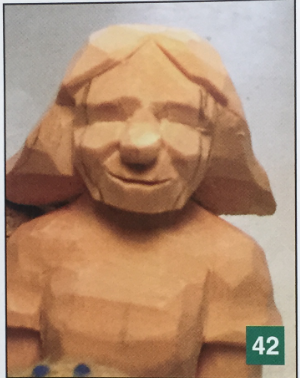
44 & 45. Carve the chin to a rounded point. Shape the lower half of the face. Cut the lips. Make a stop cut between the mouth and the chin. Shape the lips.
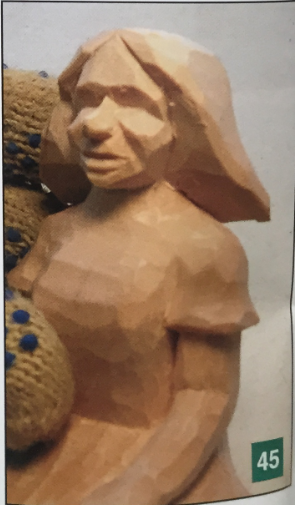
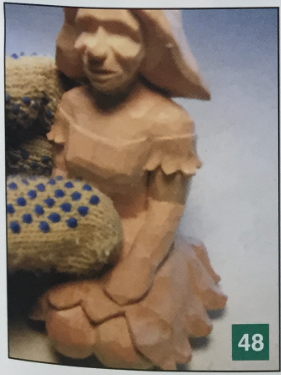
44-48. Begin to shape the neck area, and rough and shape the dress. Use gouge cuts to create flow and form.
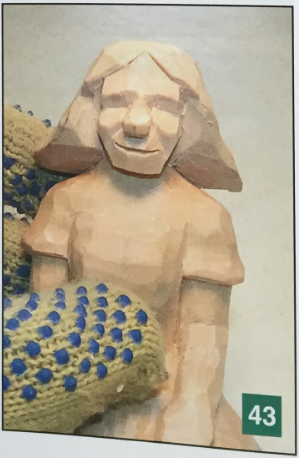
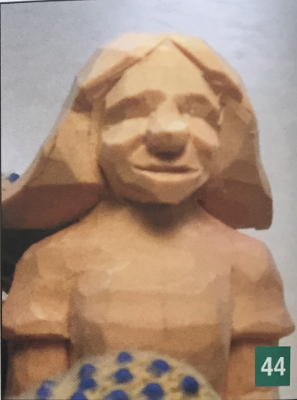
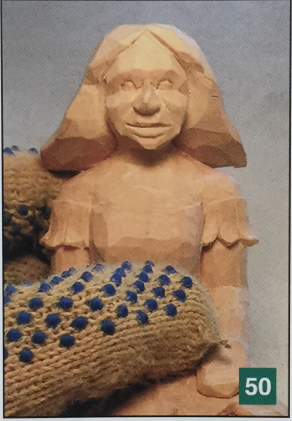
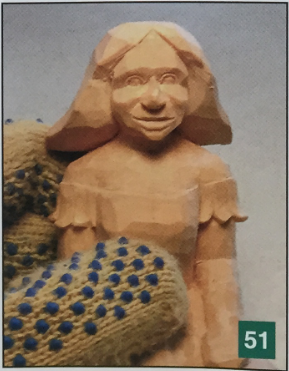
49-51. Sketch in and then carve in the eyes. Create half circles above the eye line; use a small V-tool to create the lids.

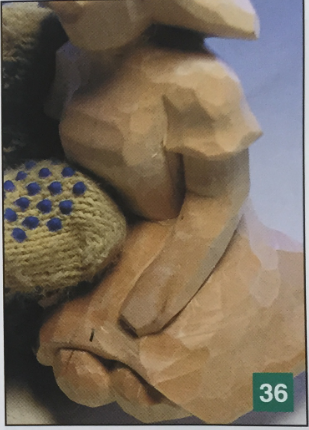
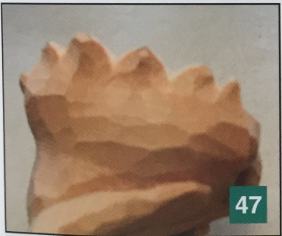
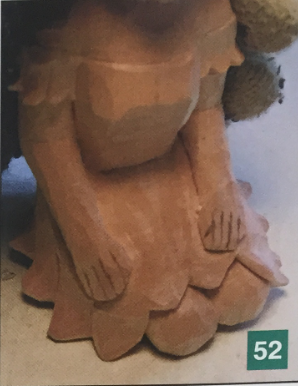
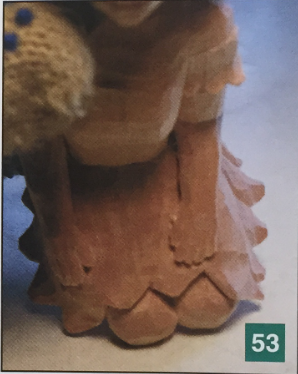
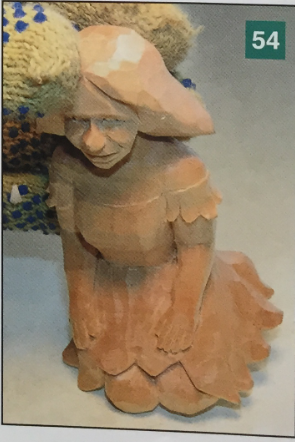
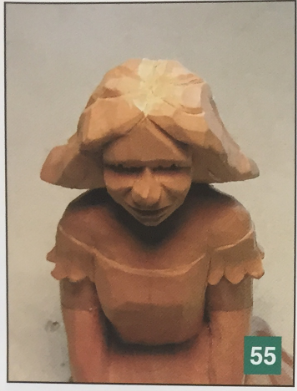
52-54. Refer to these photos when carving in the fingers and thumbs.
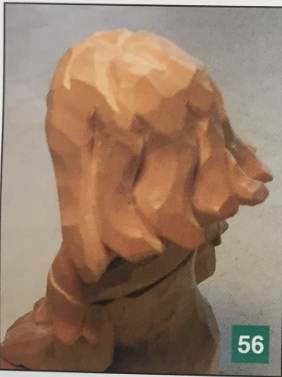
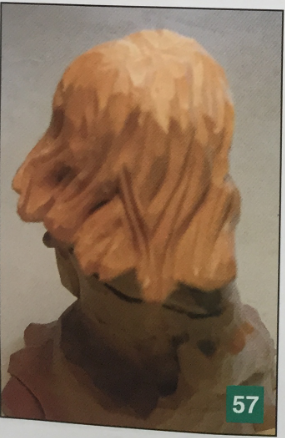
55-57. Create swirly hair using the tip of a knife fo cut large and curved V-cuts. Create the hair clumps. Use a V-tool to create realistic-looking hair by adding more hair detail, such as waves and curls.
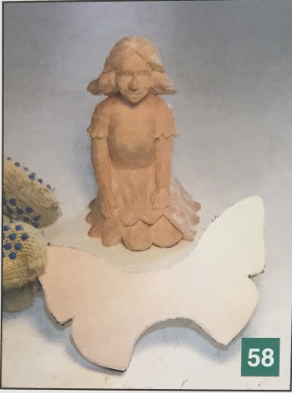
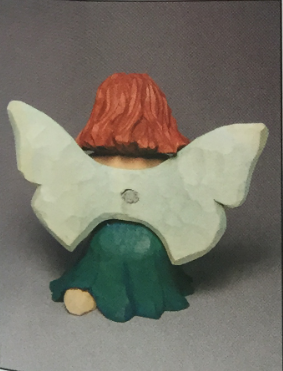
58. Use a bandsaw to cut out the wings from a 1 /4" thick piece of basswood. Create a concave shape for ebch wing. [Note: You can create a larger bend if you use a thicker piece of wood.)
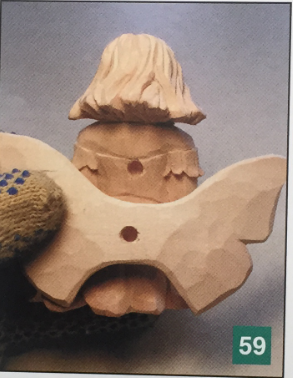
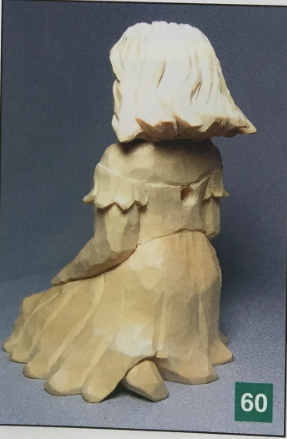
59-61. Round the edges of the wings. Drill a 1 /4" hole in the wings and in the back of the figure. Then attach the wings to the figure using a dowel and wood glue.
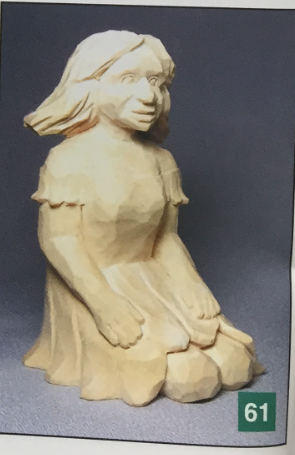
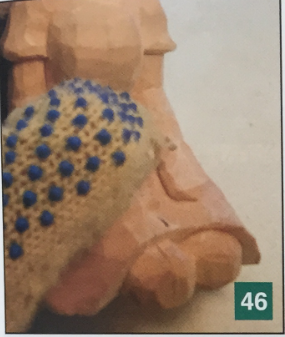
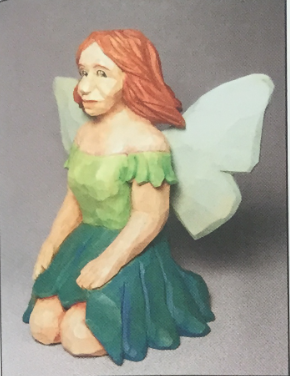
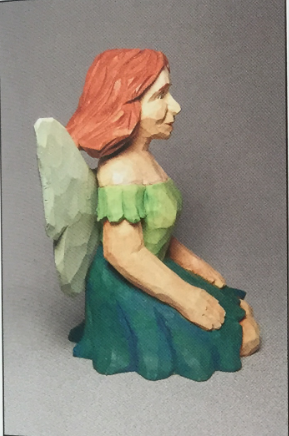
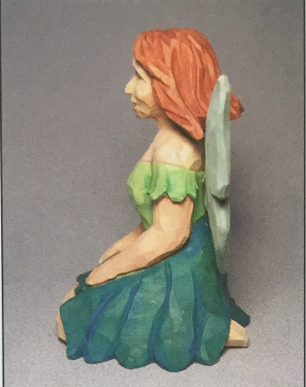
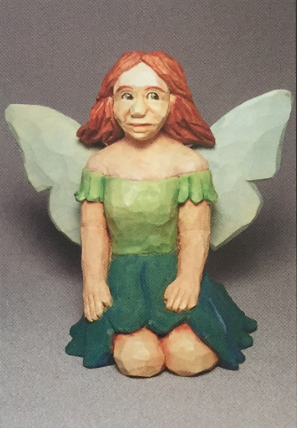
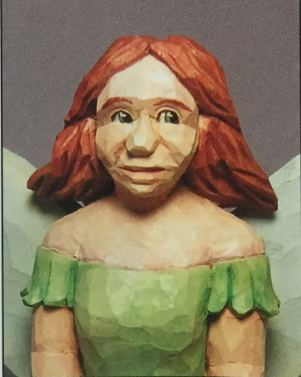
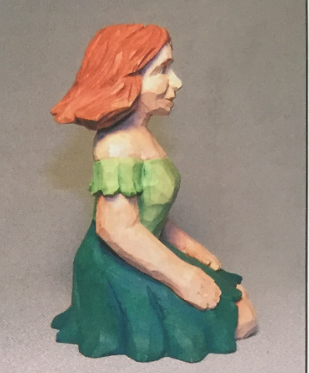
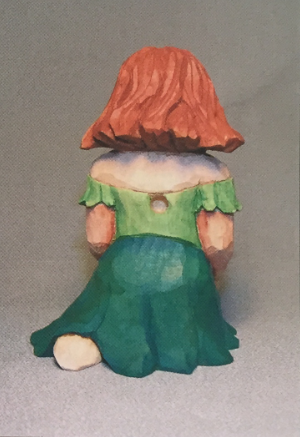
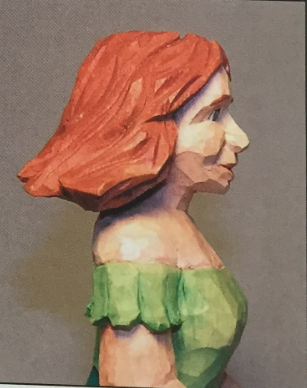
Paint and finish your project as desired. Refer to the photos while painting.
Russell Scott is from Saint Paul, Minnesota, and has been carving for over 10 years. He has a passion for carving and a desire to bring out the beauty that lies within each piece of wood. He carves mainly human figures, such as Santas, cowboys, and females. Russell has won numerous awards at local, regional, and national carving events, and teaches many classes and workshops.
