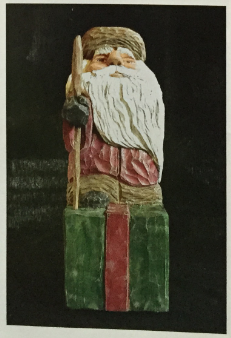
Like many of you, I have always loved Santa and the spirit of good cheer that he represents. That, perhaps, is why I love to carve Santas so much. I share this Santa with you in the hope that this project rekindles the spirit of Christmas and holiday goodwill in each of you. The Santa in this project is a posed Santa. He is about to deliver the large present on which he is standing. I wonder who caught him on camera. I wonder what is in the present.
For this project, I used a 4" x 5-1/2" x 12" block of basswood .
For the most part, I carved this project using large two-handed tools for the roughing work and palm tools for the details. You can use tools that you have available, but most of the time I will indicate the tools that I used for the given step. I held this Santa in a vise, which allowed me to use both hands to control the tools.
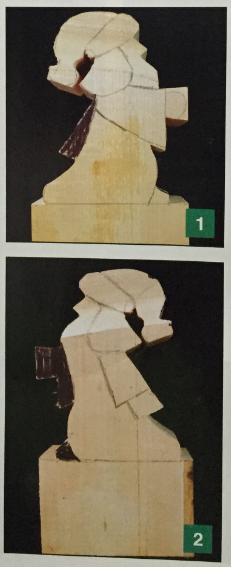
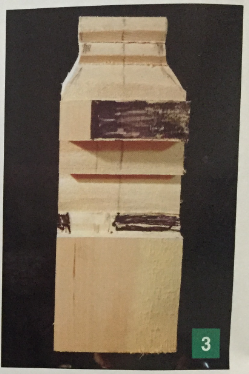
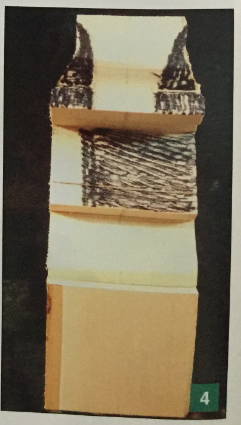
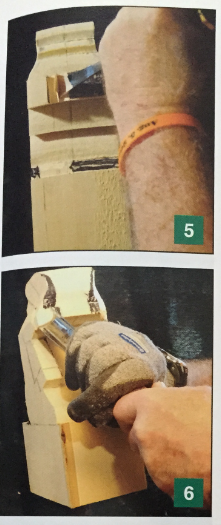
1-4. Using carbon or transfer paper underneath the pattern, trace the profile of Santa onto the basswood, and then carefully cut out the pattern on a bandsaw.
Begin roughing out the basic form. The darkened areas on the project indicate excess wood that needs to be carved away.
5.Use a bench knife to create a stop cut along the right arm and sleeve. Use a #3-20mm gouge to remove the wood up to the stop cut.
6.Using a #8-25mm gouge, remove excess wood from the hat and pompom area to taper the back of the hat.
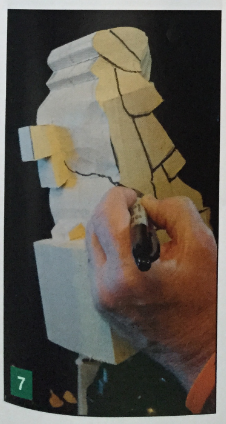
7.After removing the wood from the darkened areas to expose the arms and foot, use a marking pen to draw in the beard. The beard is very long and sweeps down and around the left side of Santa.
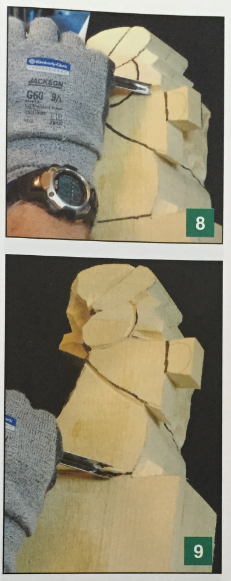
8-9. Use an 8mm V-tool (or something comparable) to outline the upper right arm and the lower right arm/ sleeve area. Repeat this step a few times with the V-tool to establish a good stop cut and further define the arm and sleeve. Repeat this step on his left arm and sleeve. Continue to use this V-tool to begin to separate Santa from the present that he is standing on. Use the V-tool to establish an outline separating the hat from the trim and the pom-pom on the back of the hat. Also outline Santa's beard, and the hairline on the sides of his face as well as over his shoulders.
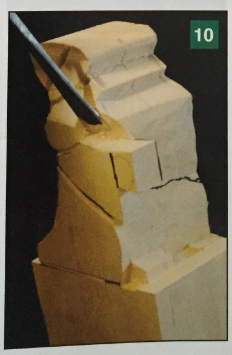
10.Use a #3-20mm gouge to remove excess wood from the beard and to expose his right arm.
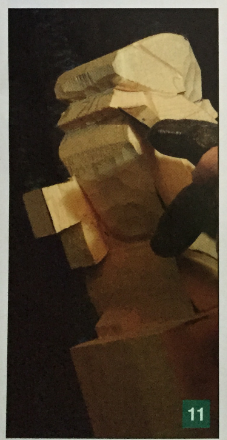
11.Put a stop cut with your bench knife at the temple area of the face (both sides), and then use a large #3-35mm gouge to establish the facial planes of Santa.
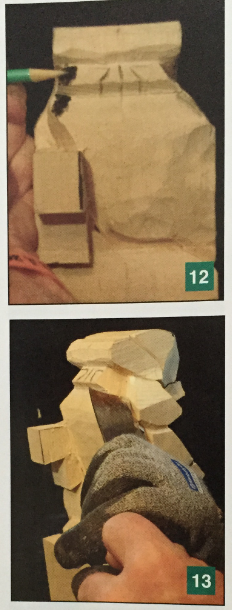
12.The darkened area shows the amount of wood that we want to remove to narrow Santa's head.
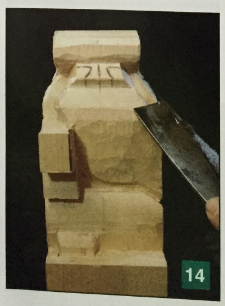
13-14. Continue using the #3-35mm gouge to narrow Santa's face. Use the V-tool alongside Santa’s face where the hair flows down the sides of his head. Narrow the face so that when looking directly at Santa from a front view, you can see the hair standing out on both sides of the head framing his face.
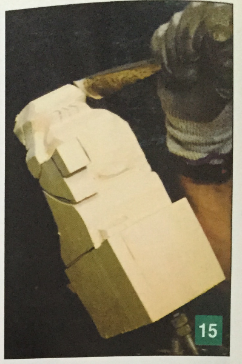
15.Knock off the corners of the hat and begin to round the hat.
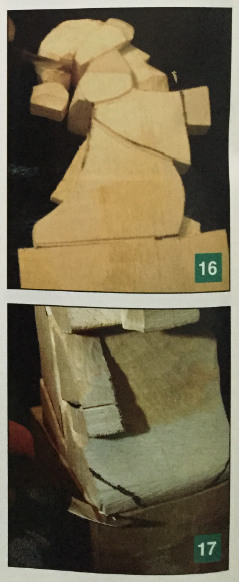
16.Create a stop cut at the top of the pom-pom and carve down to the pom-pom from all sides of the hat.
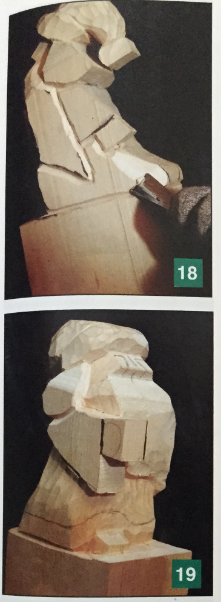
17.Use a bench knife to create a stop cut at the corners where the back of Santa's robe comes in contact with the present on which he is standing.
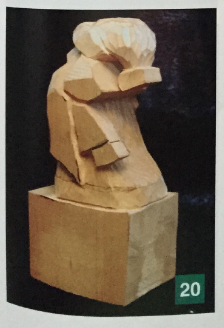
18-20. After creating a stop cut at the bottom of Santa's left mitten, at the bottom edge of his flowing beard, at the bottom of Santa’s robe all around the figure, and below the right sleeve, use the #3-20mm gouge to begin to round and shape the figure. Where possible, carve from the bottom of the robe up the figure to the beard. Be sure that you remove enough wood from below the beard to have a thickness of mass to shape later.
21.Carefully place a stop cut alongside the inside of Santa’s right sleeve and alongside the beard where it intersects with the sleeve. Slide the tip of your bench knife into the tight corner at a shallow angle to remove the excess wood between the sleeve and beard.
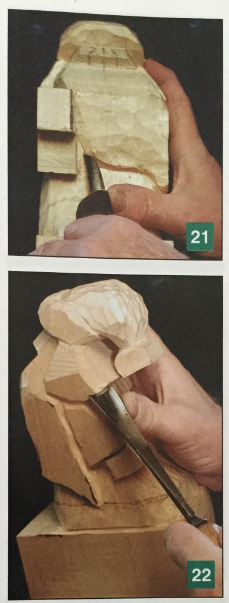
22.Carve off the corners of Santa's hair, and begin to shape the hair to the general contour of the body and hat with the #3-20mm gouge.
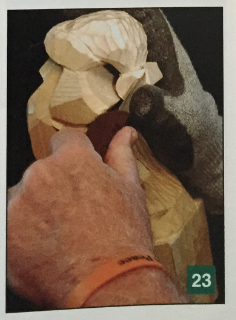
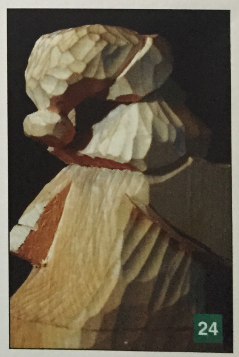
23-24. Because I tend to like a carving that shows the tool marks/ facets, especially after it has been painted and drybrushed, I use a #5 palm gouge to shape the hat and body. Continue to use a bench knife to shape the pom-pom as you shape Santa’s hat. (Note: Don't make the taper to the pom-pom too narrow prior to shaping the pom-pom, as it could break off.)
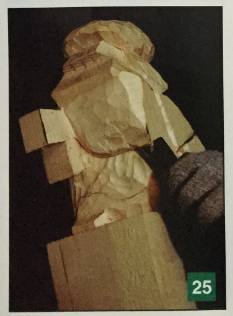
25.Use a wide #3-35mm gouge to begin to shape the beard. You can also use the #3-20mm or a shallow sweep #3 palm gouge if you prefer.
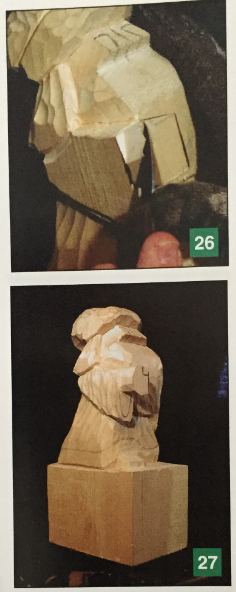
26.Use a 7/32" drill bit and drill a hole straight down through the top of the right mitten to accommodate the walking stick to be carved later. Use your bench knife to put a stop cut on each arm where Santa's mitten meets the sleeve; then use your bench knife to remove wood from the mitten/wrist area to distinguish the mitten from the sleeve.
27.Use your #5 palm gouge to shape the sleeves.
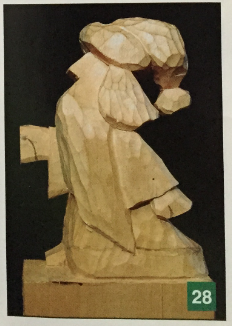
28.Sketch in thumb and hand lines on both mittens. Draw the thumb on the top inside of the mitten to just come up next to the hole that has been drilled down through the mitten.
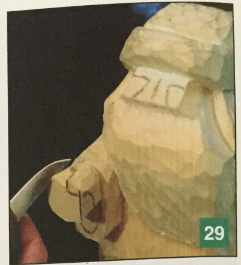
29.Use your bench knife to establish a stop cut alongside the thumb; then use a medium 5mm V-tool to outline the thumb and the folded hand area. Shape the hand using your bench knife.
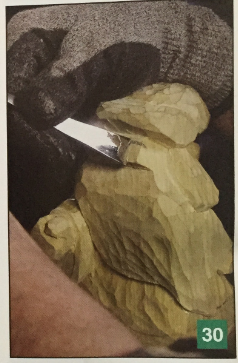
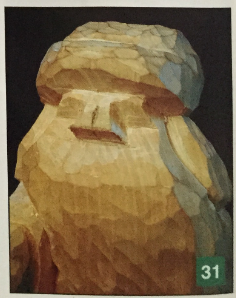
30-31. Use the #3-20mm gouge to establish stop cuts alongside the nose as well as the brow ridge. (Note: Be sure to angle the stop cuts on each side of the nose so that the planes of the nose flow out onto each cheek. Also be sure to have the stop cuts establishing the brow ridge flow down at an angle onto the face.)
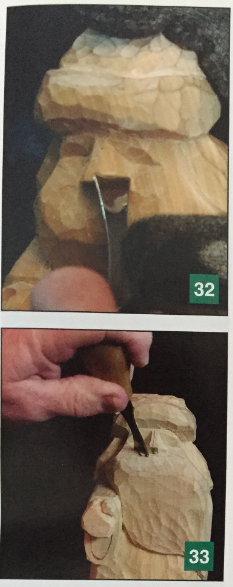
32.Use a #3 palm gouge to further define the nose.
33.Use a #5 palm gouge to establish the nasal wings.
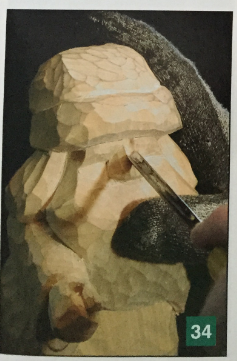
34.Using a #9-5mm gouge, start at about a third of the way from the top of the nose to carve a trough to just beyond the brow ridge line up onto the forehead. This will help to establish and define the brow area over each eye. Use a bent knife to smooth out the nose where the trough area was created.
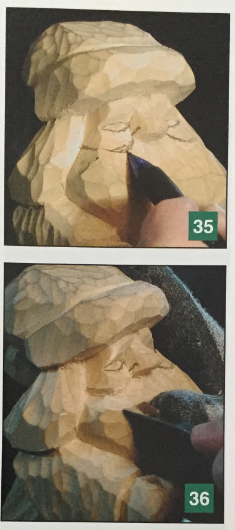
35.Draw in cheek lines. (Note: I find it helpful to turn the piece upside down to make sure that these arcs are symmetrical.)
36.Using the tip of your bench knife, place a stop cut alongside the top of the nasal wing where the cheek arc line comes in contact with the nose. Also place a stop cut where each arc line meets the hairline. Then, using a 5mm palm gouge, establish a stop cut along the arc line. Use a #3-20mm gouge to remove wood below the cheek lines to create cheek mass.
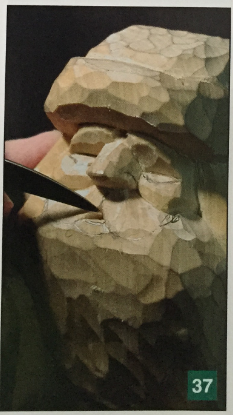
37.With a pencil, draw the mustache and lower lip. Then, using your bench knife, plunge-cut at an angle inward from both inside edges of the mustache and at the top of the lower lip to create a chip cut and establish his mouth.
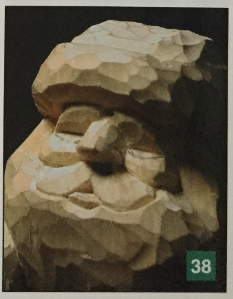
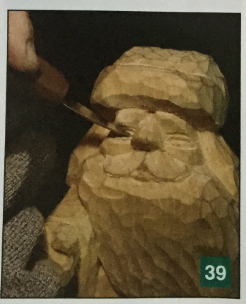
38.Draw in Santa's eyes, using the bottom of each brow ridge to form the top of each eye.
39-40. With the tip of your detail knife, establish a stop cut at the corner of each side of both eyes. Lay your knife fairly flat and slide the point into each corner of the eye to begin to create curvature to the eye. Using the tip of your detail knife, place a stop cut along the entire curvature of the eye. (Note: Be sure to make your stop cuts as vertical as possible to the eye surface to avoid the risk of undercutting the eye and causing it to pop out.) Again, laying your knife at a very shallow angle to the eye, remove a thin amount of material from the top and the bottom of each eye.
41.Draw in upper and lower lid lines, and using a 1 /8" palm V-tool, carefully establish the upper and lower lids and crow’s-feet.

42.Add eyebrows using a 1 /8" V-tool.

43-44. Use a larger 8mm V-tool to create flow in the beard and hair. Using a larger V-tool to create separations in hair and beard mass makes the carving more interesting. Also carve hair texture lines that flow with the direction of the beard or hair. Try to create open "$" texture cuts with the V-tool, which makes the carving more dynamic.

45.Using the tip of your bench knife, place a stop cut at the bottom of the mitten where it meets the sleeve. Make the stop cut parallel to the mitten into the sleeve. Then, using a #9-12mm gouge at the bottom of the sleeve, carve up to the mitten, hollowing out the sleeve.

46.Using a pencil, draw in the fur trim line at the bottom of Santa's robe, and then use a 5mm 60-degree V-tool to carve the trim line.
47.Using the #11-4mm veiner, texture the trim on the hat, the pom-pom, and the trim along the bottom of Santa's robe.

48.Carefully slide the tip of your bench knife along the face into the front base of each nasal wing to establish a stop cut; then use a #8-4mm to establish both nostrils.

49.Use a 3mm V-tool to create a sole on Santa’s exposed boot.
50.Create the part in Santa’s robe with a 5mm V-tool.

51-52. Draw ribbon lines on the present, and then use your 5mm V-tool to carve along the ribbon lines and to define them. Carefully use a very shallow sweep gouge, like a #3 gouge, to remove wood along the present up to the ribbon. With your bench knife, whittle the staff to be placed in Santa's hand.


Painting Tips: Use good-quality acrylics to paint Santa (I usually thin the paints with a few drops of water), and be careful and take your time. Remember: A good painting job can enhance a carving, but if the painting is rushed or doesn't look good, it can detract from a good carving.
Drybrushing: After the paint has dried, I dip the tip of a dry, soft, wide brush into undiluted paint (Soldier Gray) and then wipe it off on a paper towel. I lightly brush it back and forth over the entire carving to enhance the tool marks and to add depth to the piece. Repeat as many times as desired.