If you were a teenager in the 1950s as I was, this project may bring back some fond memories. The 50s was a great era in which to grow up. It was a time of relative peace and prosperity and rock-a-billy was our music. Remember Gene Vincent and the Blue Caps?
How about Buddy Holly and the Crickets or Bill Haley's Comets? And that fantastic harmony of the Everly Brothers? Did you sing along to “Be-Bop-a-Lulu,” “Peggy Sue,” “Rock Around the Clock?” Great songs and singers. And, oh yes. There was that other fellow who had just one name. Came from Tupelo, Mississippi, as I recall and got his start in Memphis on Sam Phillip's Sun record label along with Johnny Cash, Jerry Lee Lewis, Roy Orbison, and a few others. Who could ever forget Elvis? Relive those wonderful years by adding this rock-a-billy project to your collection.
I hope you won't let the complexity of this project’s pose frighten you. He is carvable if you just take it one step at a time. In addition to the basic pattern drawings, I have included several reference views to show you the pose from various angles. Read through the entire article to familiarize yourself with the project before starting.
Supplies
- 4-1/2" X 4-1 /2" X 8-1/2" Basswood
- Foredom power tool (optional)
- Typhoon 1 /2"-diameter x 3/4"- long coarse bit (optional)
- RotoZip 1 /8" Sabrecut Zip bit (optional)
- Detail knife with 1-5/8" blade
- #2 20mm (3/4") gouge
- #3 18mm (23/32") gouge
- #7 6mm (7/32") gouge
- #7 12mm (7/16") gouge
- #9 10mm (3/8") gouge
- #11 8mm (5/16") veiner
- #39 (75) 6mm (7/32") V-tool
- #39 (75) 8mm (5/16") V-tool
- 1/8"-diameter punch
- 2-part epoxy glue
- Acrylic paints of preferred colors
- Assorted-size brushes
- Spray satin polyurethane or clear finish of choice
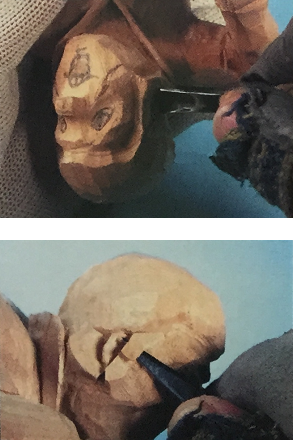
1. If you resize the figure's patterns, be sure to resize the guitar pattern the same percentage because it is proportioned to the figure. I recommend a vertical grain direction for this project. After cutting out the front and profile contours on the band saw, I use power to shape the figure into its pose. For a figure of this size, I mostly use a 1/2"-diameter x 3/4"-long coarse Typhoon bit. If you prefer hand tools, they work just as well. Because of the twists and bends of the figure, take your time and use the reference drawings as a guide to how the figure should look from the various angles. Drawing and redrawing reference lines on the wood as you proceed can be helpful in identifying the areas where wood is to be removed. Study the reference drawings often as you rough out your figure.
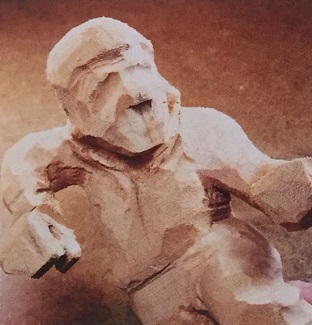
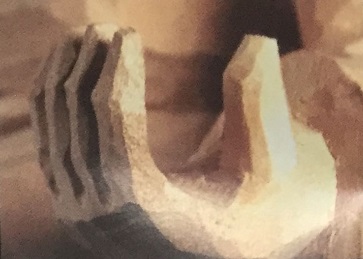
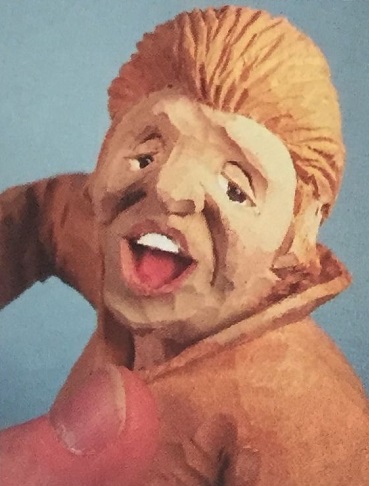
2. This close-up shows how your figure should look when it's time to start the final shaping.
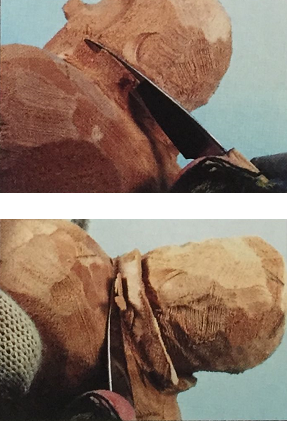
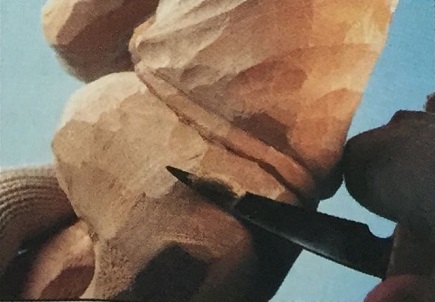
3. As a starting point, I define the front of the collar with my detail knife. The collar is high and turned up and wraps around the back of his head. Because of the fullness of hair behind his ears, the collar will not be as deep in that area as it is toward his chest and neck or at the back of his head.
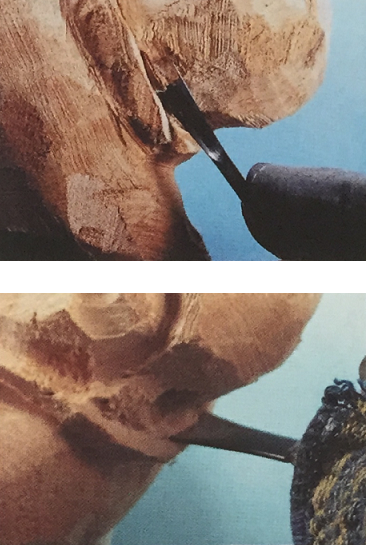
4. Shape the inside of fhe back of the collar and the hair mass behind it by creating a stop cut to the base of the collar with the #7 6mm gouge and cutting down to it.
5. Use the detail knife to shape the outside of the collar with a stop cut and then cut into it while shaping the shoulder area. Though not shown, I also made use of a #3 18mm gouge while defining the area of the shoulders and upper back. The shallow sweep of this gouge works well for removing wide areas of wood from across the upper back of his shirt.
6. To define the sharp break between the collar and the front of his shirt, use a #39 (75-degree) 8mm V-tool. The detail knife and/or a shallow sweep gouge is used to blend the base of his collar into the front of his shirt.
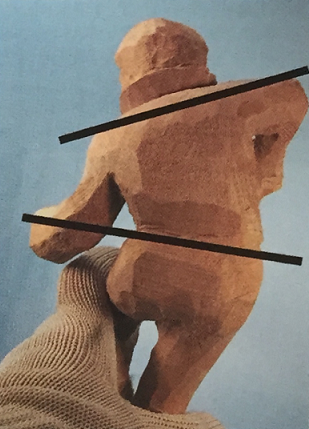
7. As you begin shaping the upper torso, keep in mind the sideways bend of his body. His shoulders will not be parallel to his waist.
8. Use a detail knife on the large open convex areas that shape his shirt. I also used a #2 20mm gouge at times depending upon the grain direction with which I was working. To avoid the chance of splitting the wood, carve off the grain as much as possible and not into it. Use a #7 12mm gouge for the curved area under his arm.
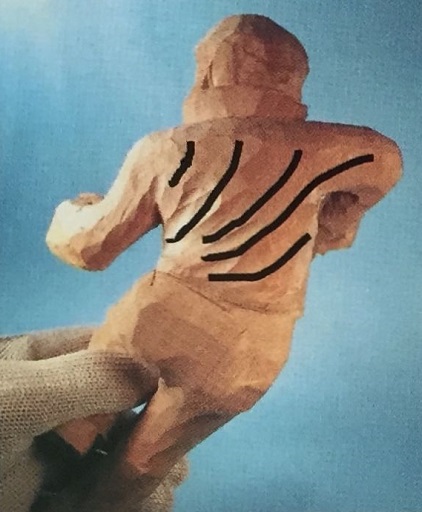
9. Because of the bend in his torso, his shirt will be stretched on one side and compressed on the other. Several different gouges are used to create a variety of folds and wrinkles across his back.

10. When arms bend, the shirt material will be compressed tightly at the inside of the elbow with looser folds at the sides of the arm. Be sure to show these folds when you carve his arms. A detail knife shapes the sharp creases and a #7 12mm gouge can be used to create the folds which blend into them.
11. Use a #39 (75-degree) 8mm V-tool to create the stop cut defining the top of the shirt hem.
12. Using the same V-tool, create a stop cut for the bottom of the shirt hem. The width of the hem should, be narrower on the left side of his body because the material is being compressed due to the twist in his body. Use a detail knife to shape the upper area of his pants by cutting into the V-tool stop cut so that hi: pants appear to go under the hem ol his shirt.
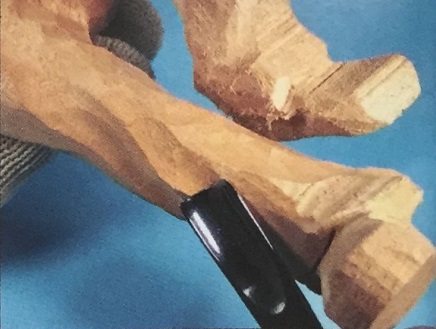
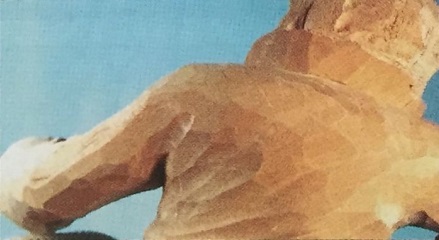
13. To add to the feeling of movement, use a #7 12mm gouge to create long folds in his pants. For hb left leg, keep in mind how materid will compress at the back of the knee and stretch at the front, creating folds that pull away from the knee.
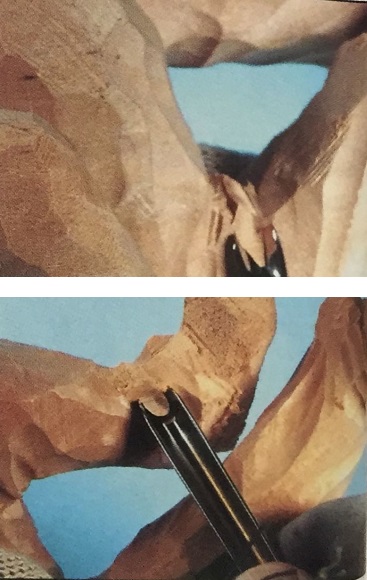
14. To create the sharper and rnore defined creases and folds where his pants overlap his shoes and the bend of his left leg, I used a #7 12mm gouge and a #11 8mm veiner.
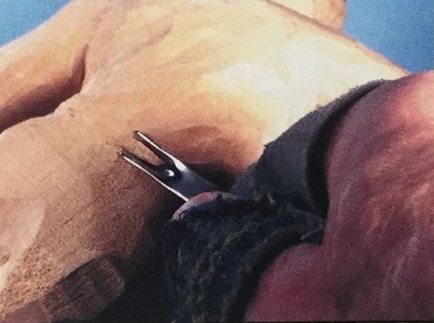
15. The break between the sole of his shoe and the upper shoe is made using a #39 (75-degree) 6mm V-tool after drawing a guide line around the base of the shoe so that the thickness of the sole is uniform. Use the detail knife to finish shaping his shoes.

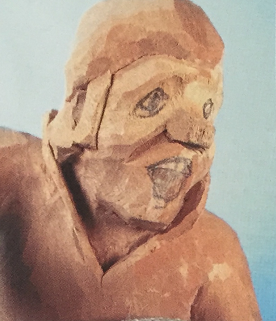
16. Now that his body is fairly well defined, it’s time to work on his head. Much of the general shaping of his head was done with power initially, but at this point I’ll use the detail knife and various gouges to give better definition.
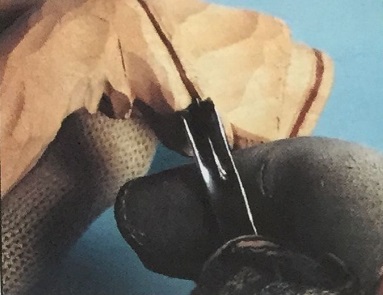
17. To define the curved back of his ear with a stop cut, I used a #9 10mm gouge. When defining the hair, the main mass of hair overlaps the top of his ear as well as his sideburns. You’ll want him to have a full head of hair for the characteristic “DA" of that era.
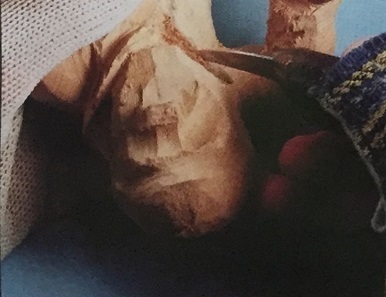
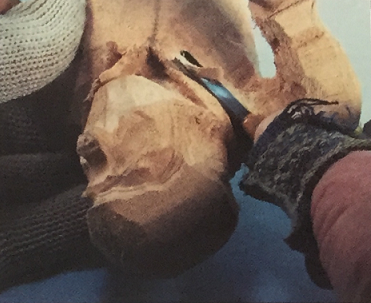
18. Before carving the features, draw them in to get a visual reference for the facial expression.
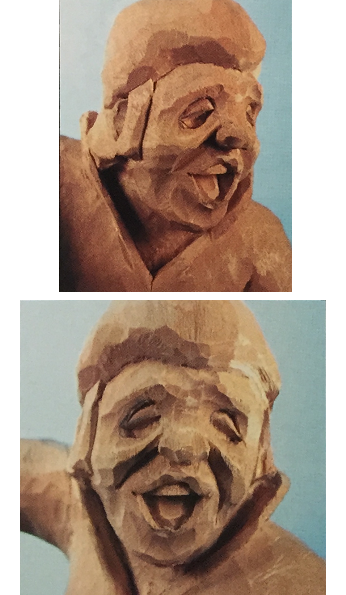
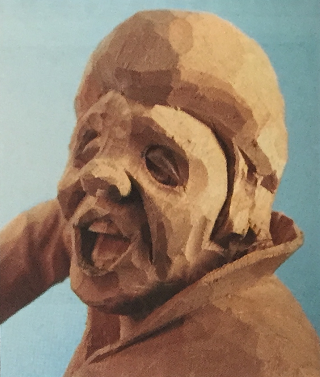
19. Once I decide on the expression I want, I detail the features, giving the eyes and mouth the shape I need to express that emotion. For this figure I wanted the expression to match the mood of the pose, so his eyes are partially closed and the mouth is wide open with his teeth showing. The angle of the eyebrows will also add to the overall expression and will be defined when the piece is painted.
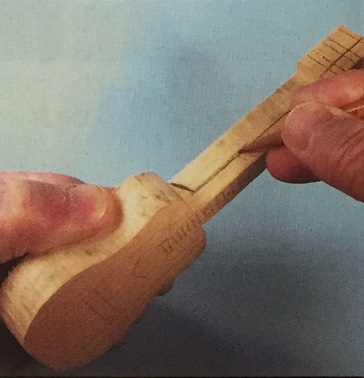
20. For the time being, set the figure aside, and let's get started on his guitar. I used a piece of pine I had in the shop. Position the grain in the direction of the guitar neck. After cutting out the pattern shape, I use my middle finger as a guide to draw a line for the thickness of the neck, which is then trimmed to shape on the band saw.
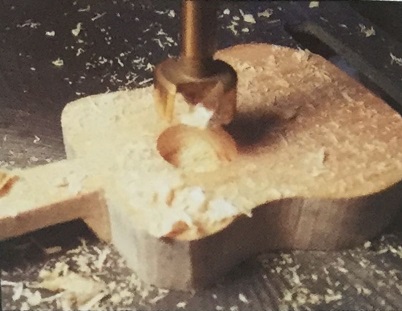
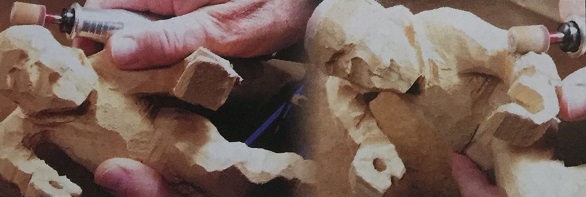
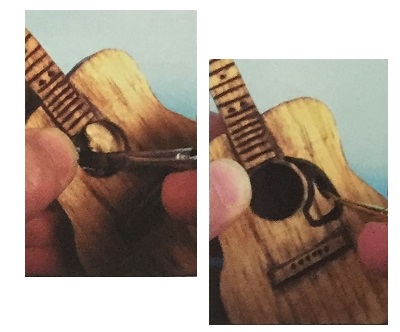
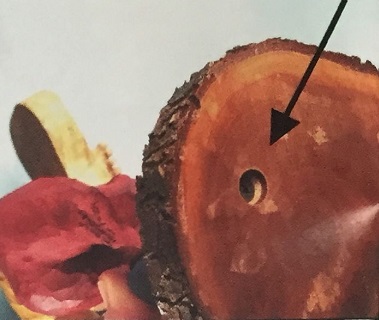
21. Mark the center point for the sound hole and use a 7/16"-diameter Forstner bit to drill a blind hole about 3/8" deep (about halfway through the wood).
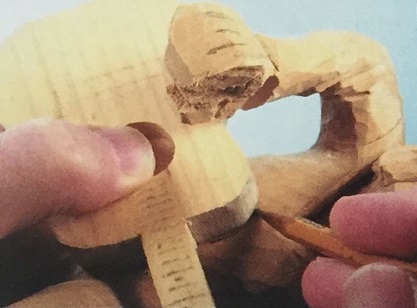
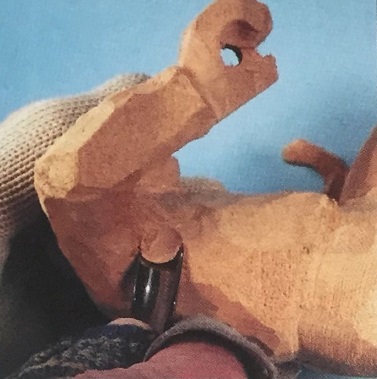
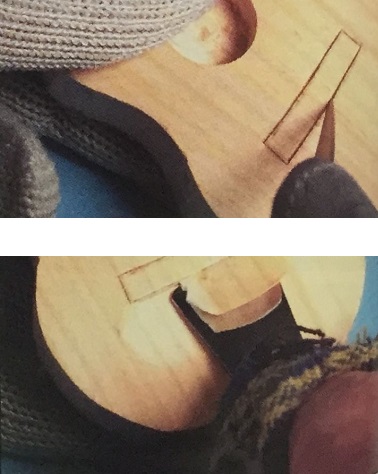
22. This next step is important because it will locate the guitar on the figure. Position the guitar where you would like it to be against his chest, but make sure the neck of the guitar rests in his left hand as if he was playing a chord. If you need to adjust the open- ing between his thumb and fingers so that the guitar neck will fit there, do it now. When you are satisfied with the guitar's location, draw a line on his chest where the guitar makes contact with it.
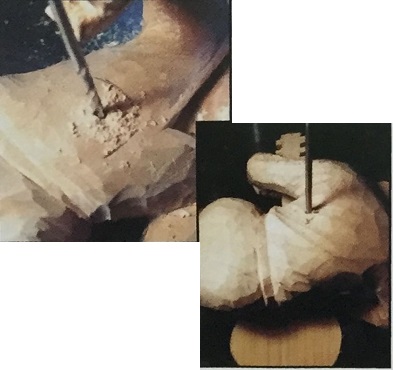
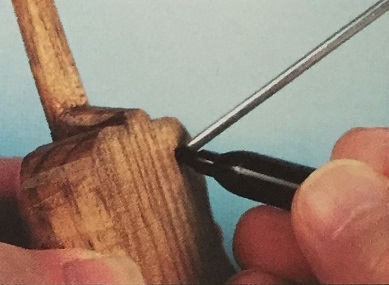
23. Using a 1 /8"-diameter (“aircraft") bit, drill a hole through his body about 1/4" below and in from your guitar shape reference line. It doesn’t matter where it comes through on his back. Next, carefully reposition the guitar where you had it when you drew the reference line. Hold the guitar in that position and, from the back of the figure, using the existing hole as a guide, drill a hole no more than 1 /2" into the back of the guitar. Be very careful that you don't drill the hole all the way through the guitar.
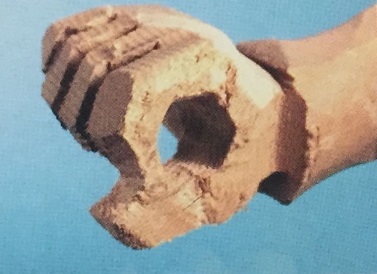

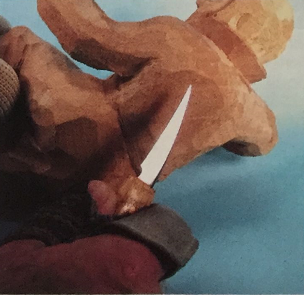
24. With the means of attaching the guitar to the body established, we can now continue with the figure. To strengthen the right hand as you carve it, leave the thumb attached to the index finger until all the fingers are carved. Then separate them.
25. Carve the left hand carefully because the palm runs cross grain. Though they are thin, the fingers and thumbs are in the direction of the grain, so they shouldn't be too fragile.
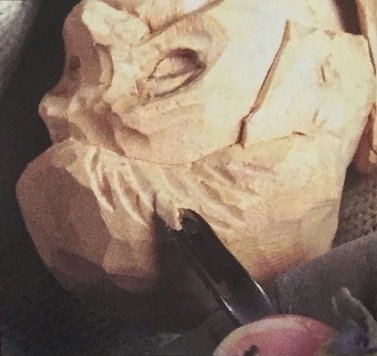
26. To complete the carving of the figure, use the #39 (75-degree) 6mm V-tool to create hair texture. Texture it so that it looks like a ‘50s haircut by using horizontal cuts which meet on the back of his head.
27. To finish carving the guitar, use the detail knife to make a stop cut around the bridge and around the neck where it is over the guitar body in front of the sound hole. The shallow sweep of the #2 20mm gouge works well for shaving the guitar body down about 1/16". This gives definition to the bridge and neck.
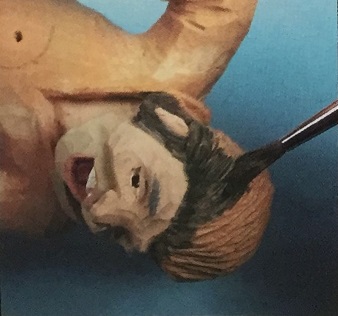
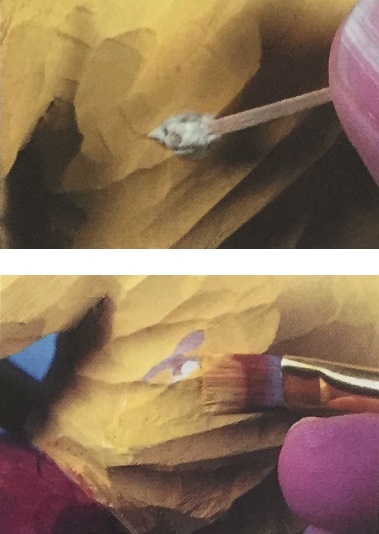
28. The eyes are a recessed area, so they should be painted first. I paint the eyes with an off white. As long as I have the white out, I paint the teeth with the same color. The irises of the eyes are painted next, then the pupil. Remember that the iris covers about one-third of the eye area. If they're painted too small, your figure will have a beady-eyed look. Once the eyes are done, apply the flesh color to the face and hands. I also add a slight amount of green blended wet- in-wet to give the hint of a 5 o'clock shadow around his jaw. Finish the face by painting the lips and tongue a slight rose color.
29. To make black hair, I always add a bit of dark blue to the thinned black. This prevents the black from looking flat and lifeless.
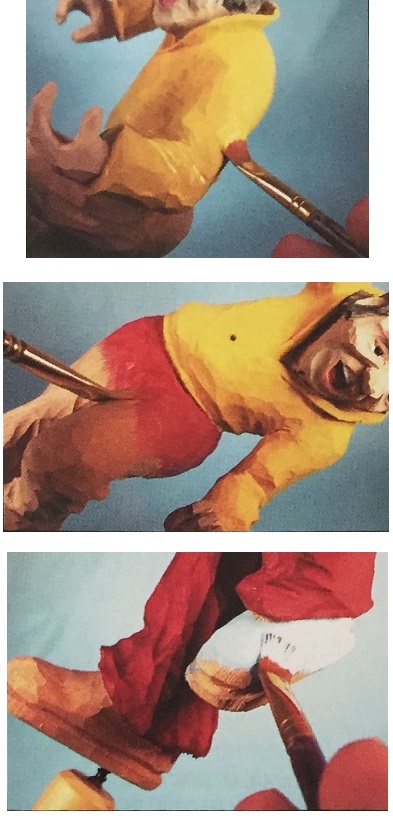
30. Select colors for his shirt and pants, but to give him that ‘50s rock-a-billy look, be sure to give him blue suede shoes. This will complete the painting of your figure. The polyurethane finish won't be applied until after the guitar is finished and attached to the body.
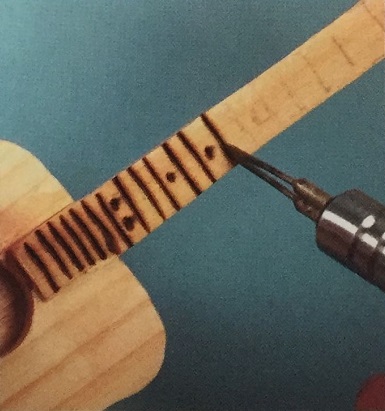
31. Rather than paint the frets on the neck of the guitar, I used my woodburner to indicate them. Then I dipped the guitar into a can of stain. You can either stain yours or paint it.
32. After the stain or paint has dried, use black paint to give depth and a hollow look to the sound hole. Black or your color of choice can be used for creating the scratch guard as well.
33. To attach the guitar to the body, I use a piece of l/8"-diameter alu- minum rod about 6" long, though any 1 /8"-diameter material could be used. Insert the material into the hole in the back of the guitar and mark its depth as a reference to show how far the rod goes into the guitar.
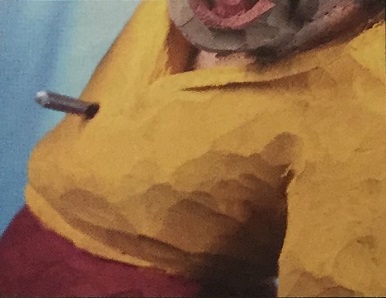
34. Insert the rod through the body and allow it to protrude the length that was in the guitar body as indicated by the reference mark. Make a note of where the rod is flush with the back of the figure's body, and then remove it and cut it to a length about 1/4" shorter than where it was flush with the back.
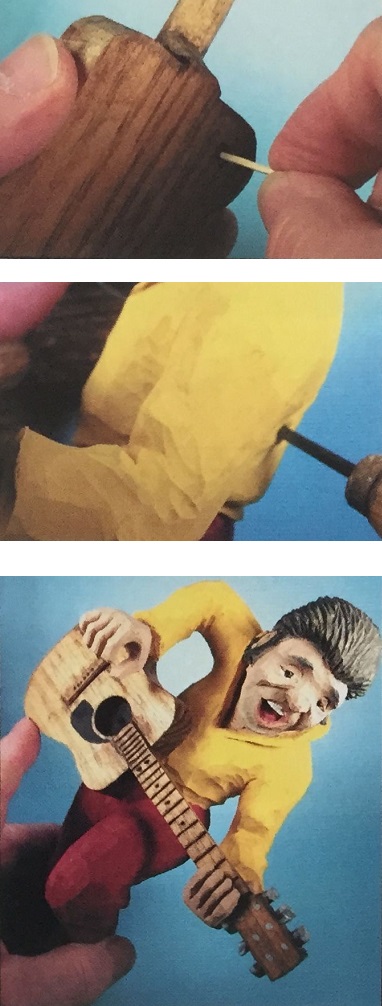
35. To attach the guitar to the body, I use 2-part extended-time epoxy to allow myself plenty of time for assembly and adjustments. After mixing the epoxy, use a toothpick to put a small amount in the hole in the back of the guitar and in the hole in the body. I also add some epoxy on the 1/8"- diameter rod. Push the rod through the back of the body and into the hole in the back of the guitar. Because the rod is short, you'll need something to push it through the body into the guitar. I used an old ice pick. Once the rod is seated in the hole in the guitar, push the guitar back against the body and pivot it so that the neck rests in his left hand. Prop it in this position until the epoxy cures. I usually leave it overnight.
36. To complete this project, fill the hole in the figure's back with wood filler and, when dry, shape it flush to the surface. A little touch-up with the shirt color is the final touch before spraying your project with a protective coat or two of satin polyurethane.
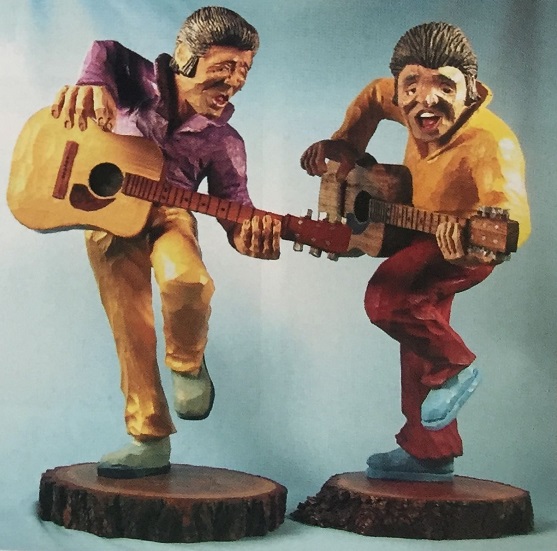
37. To mount the figure on a base, I drill a clearance hole and then countersink it so that the head of the mounting screw is recessed. A little protective felt on the bottom of the base will complete your figure.
38. And here you see not only one, but two music makers. Hey... I live in Nashville. Maybe I should try to get these guys a record deal. They could be the next Brooks and Dunn or Montgomery Gentry. Hmm...not likely. Oh well, enjoy letting your rock-a-billy carry you back to the ‘50s, and I'll “see you later, alligator.” In the meantime, may your blades stay sharp and your cuts be true!
About the author
Award-winning artist and carver, Ol' Don has been following his creative urges since carving neckerchief as a Boy Scout in the 1940s.
